Table of Contents

Build A Giocoso Pro Server
1.0 Introduction
A Giocoso Pro Server is simply a PC (or virtual PC) that runs a copy of the MySQL database (or MariaDB). Such a computer does not need to be particularly powerful or well-resourced: a single CPU, 1GB RAM and (say) 40GB of hard disk space should be more than adequate, though of course more of any of these things is always welcome!
Since it is a server, there is no need for a fancy graphical desktop to make things look 'nice': a Linux distro that provides the bare minimum of computing capabilities whilst managing to run the database is all that is really required: so Arch, or Ubuntu Server or Fedora Server are ideal candidates, because they ship 'out-of-the-box' without GUI bells and whistles. Personally, my Giocoso Pro Server runs in a FreeBSD jail, so not even Linux is a necessity!
A fixed IP address for networking purposes is a good idea (servers need to be contacted by client machines, so it's a good idea for the server to stay fixed at a known address, rather than to dynamically wander around the place!) but it is not a requirement that the server has to be able to see your music collection, either directly or via a storage sharing technology (such as NFS or SMB). The Giocoso clients will inform the server about what music exists: the server itself doesn't need to be able to confirm the details.
I've written a separate article on how to build a Giocoso Pro server using Arch, because the Arch installation process itself is so unusual, compared to any other distros you might want to use. In this article, I'll be using Fedora Server 41 specifically -but the principles demonstrated work on any non-Arch distro you're likely to want to use. The basic story is:
- Install your operating system using defaults
- Download a preparation script from this website
- Run the preparation script
- Confirm things are working
- Check your clients can access the new server
2.0 Install your Operating System
I'm building a virtual machine in which to install Fedora Server: I've deliberately configured it with fairly minimal resource settings:
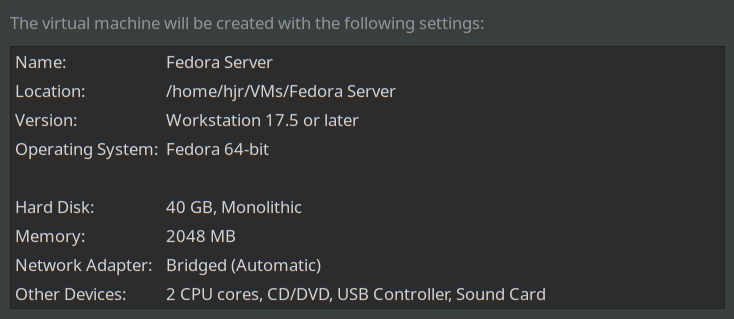
Anything vaguely similar in physical hardware capabilities would suffice just as well: before I built my FreeBSD Jail, I was using a 2011-vintage Dell desktop PC with an Intel i3 CPU, 4GB of total RAM and a 60GB solid state hard drive as a test platform, and it worked fine.
As far as the operating system installation went, I ran with all the defaults proposed:
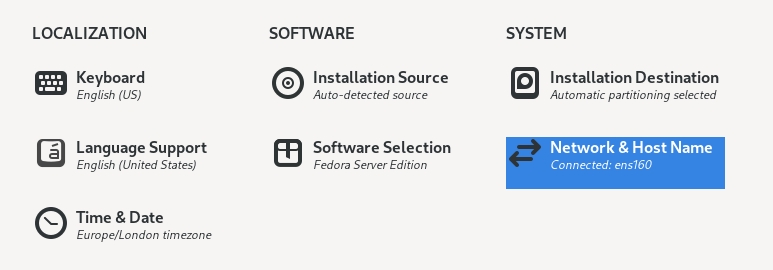
Specifically, I chose automatic disk partitioning and the default Fedora Server software selection. The one thing I <em>did</em> manually intervene on was the networking: by default, it's configured with DHCP, which makes life convenient but means your server is assigned an IP address dynamically and in a way that means the address could change every time the server is rebooted. Changing IP addresses makes life hard for clients wanting to <em>find</em> the server! Therefore, I assigned a <strong>static IP address</strong>, as follows:
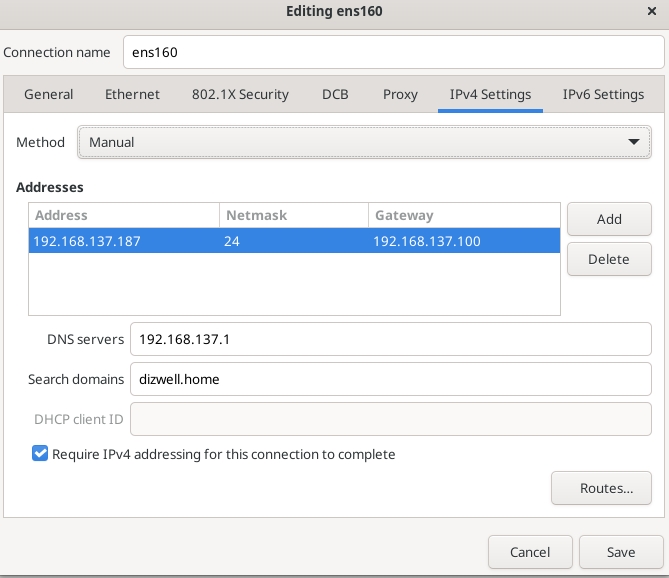
Now, the specific addresses you see here are <em>mine</em>, appropriate to my home network setup. They are unlikely to apply to your environment. Here is not the place to explain the basics of home networking, but if you aren't sure what entries to make for your own Giocoso Pro Server, please read <a href=“http://absolutelybaching.com:81/music-articles/how-to-rip-an-sacd/”>Section 2.3 (“The Home Network”) of my article on doing SACD ripping, where I explain network addresses in some detail.</a>
I also clicked the IPv6 Settings tab in the above screenshot and set the 'Method' to 'Disabled': your Giocoso Pro Server is not going to need to know how to handle IPv6 connections!
Fedora's installation prompts for the creation of a non-root user account: you should take the opportunity to do that:
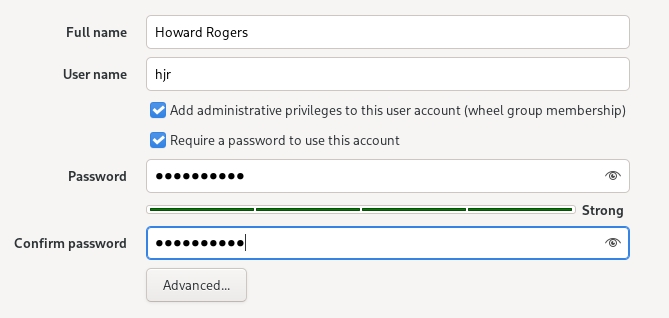
You also get the opportunity to enable or disable the root account:
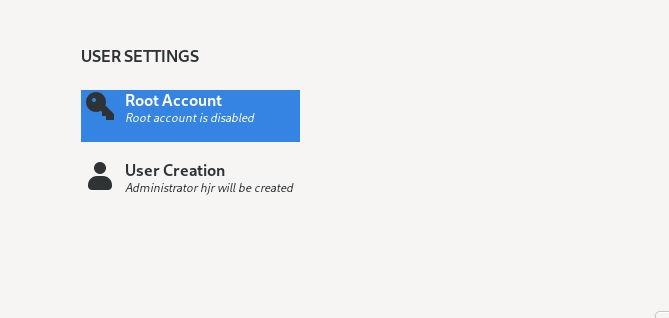
I chose to leave the root account disabled. It would be like that in Ubuntu Server, for example, without even asking you about it …and isn't a bad thing to do in any distro. Provided there is a non-root administrator account created (as you can see my 'hjr' account will be), you can always exercise root powers via the magic of the sudo command, so there's no need to ever actually be root directly.
They're really all the things you need to consider at operating system installation time: non-root user account, fixed IP address, standard/default disk partitioning and software selections. After that, you just click the 'Begin installation' button and sit back and wait. It took about 10 minutes for the O/S installation to complete for me.
When the installation completes, reboot the machine and log in as the non-root administrator user you created earlier:
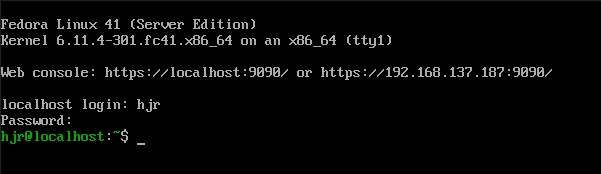
As you see, you end up at no-frills command line prompt… just what servers are supposed to look like!
The only other order of business at this point is to stop the machine being called “localhost”, which is what Linux calls things that don't have 'proper' host names. Some operating system installers allow you to specify a proper hostname as part of their installation wizard, but Fedora doesn't. So lLet's fix that the manual way, like so:
sudo hostnamectl set-hostname giocosopro
I'm assigning the name 'giocosopro' here, but you can pick any single-word name of your fancy. You'll need to log out and then log back in to have the change picked up and applied:
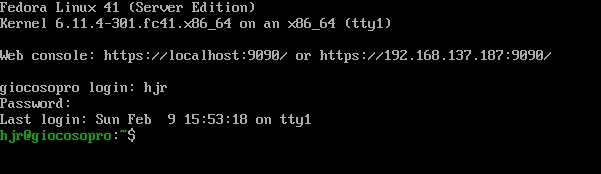
Apart from that, though, you're now running a server that can become a Giocoso Pro server… we just need to make that bit happen next!
3.0 Update the O/S & run the Giocoso Pro Installation Script
Before we do the Giocoso Pro bit, it's a good idea to make sure all the software on your new server is as up-to-date as it can be. If you don't do this manually now, the Giocoso Pro installer will do it for you anyway, but it's nice if that script doesn't have to take hours to complete! Getting the updates done now means the Giocoso installer will have to do much less of the heavy lifting later. At the command prompt, therefore, type the command:
sudo dnf update
On Ubuntu or Debian, you'd type 'sudo apt update && sudo apt upgrade'; on Arch it would be 'sudo pacman -Syu'; on OpenSuse, 'sudo zypper update' and on FreeBSD, 'pkg update'. All do the same thing: inspect the software on the system, fetch updates to all of it from across the Internet, then apply it. On Fedora, my update was not terribly big:
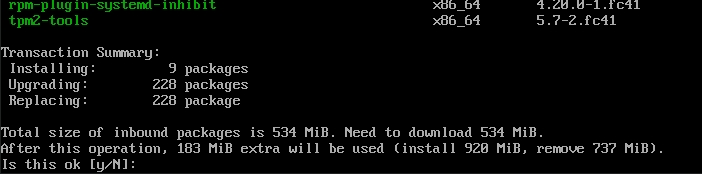
…but it depends on how recently a particular version of your server's operating system was released or refreshed as to precisely how much software will need to be downloaded and applied.
Once your operating system has been updated, type this command:
wget software.bbritten.com/pro
If you get told 'command not found', you'll first need to install the wget program itself (this happens commonly on Debian-based distros, for example): sudo dnf install wget would be the command on Fedora; sudo apt install wget on Debian and Ubuntu; sudo zypper install wget on OpenSuse and pkg install wget on FreeBSD.
You can confirm the script has downloaded correctly, like so:

The exact size of the script will vary over time, so don't place too much reliance on specific numbers: the point is simply that you can see the downloaded file. It's a shell script, which means it's fundamentally merely a text file. You're welcome (indeed, encouraged) to open the file in a text editor to check its contents and make sure it doesn't do nefarious things. A suitable command might therefore be less pro. Just tap the letter 'q' to quit the less program when you're satisfied with the script's contents.
When you're ready to launch the pro script, just type:
bash pro
You will immediately be prompted for your sudo password (i.e., the password of the non-root account you're operating under). Depending on how long the script runs for, you may be prompted for the sudo password more than once: just type it in whenever prompted.
The script does the following things to your server:
- Updates all its software (which shouldn't do much, if you've just done the job manually anyway!)
- Installs MariaDB database software (equivalent to installing MySQL)
- Enables MariaDB to restart automatically whenever the server reboots
- Configures MariaDB to accept network connections
- Opens the MariaDB default port (3306) in any running firewall
- Runs the mysql_secure_installation script to tighten up the default security within MariaDB
- Creates a new MariaDB database, called “giocoso3” and a user to own and administer it, also called “giocoso3”, with a password of “giocoso3”
It should all generally whizz by at a rate of knots without too much drama. Debian doesn't install sudo by default, so there are some root passwords required to get it to the point of using sudo, I'm afraid: this means that Debian-based distros will generally prompt for the root password multiple times before it finally prompts for the sudo password. Stay aware of which one it's asking for at any given time.
Please note that on FreeBSD, you will probably get an error about 'bash not found', so you'll have to do a pkg install bash before you can run the bash pro command.
4.0 Post-Installation Checks
Once the pro script has run its course, it's probably wise to run a few checks, just to make sure everything worked as intended.
4.1. Is the MySQL Configuration File correctly set to accept network connections?
The MySQL database needs to be configured to 'bind' to a network address, and not just to localhost connections. The pro script should have done that for you, but it's best to be sure. The relevant configuration file is either /etc/mysql/my.cnf or /etc/my.cnf, depending on distro (Fedora and OpenSuse use the /etc/my.cnf location; most other platforms use /etc/mysql/my.cnf. Just cat the file and check the results:
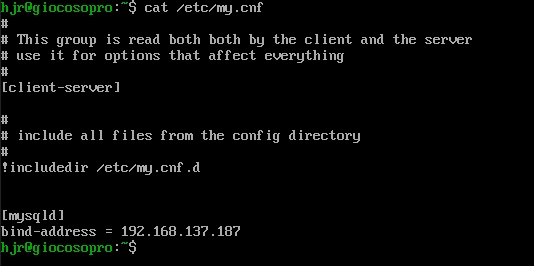
You need to see a 'mysqld' section at the end of the file, together with a bind address that reads your server's actual IP address, not a '127.0.0.1' placeholder. If you see something similar to the above, your MySQL server is configured to accept connections from across the network, which is what we want to see.
4.2. Is the Firewall port 3306 open?
This can be tricky to do in a bit of distro-agnostic documentation, because different distros use different firewalls, if they use a firewall at all by default. Thus, the specific commands to check the status of the firewall on any given distro might well vary. On Fedora Server, the firewall software is called firewalld and 'firewall-cmd' commands are used to query and control it.
To check if a firewall is running at all, issue the command:
sudo firewall-cmd --state
If it returns with a reply of running, then you know that there is< a firewall in use and that therefore it needs to permit MySQL traffic through. To check that the MySQL port is open for network traffic, therefore, then issue this command:
sudo firewall-cmd --query-port=3306/tcp
That will either return 'yes' or 'no'. If it returns yes, you're in business and need do no more. If it returns no, however, then you need to manually force the port open with the commands:
sudo firewall-cmd --permanent --add-port=3306/tcp
sudo firewall-cmd --reload
A re-run of the 'query port' command should then return a 'yes' reply.
On Ubuntu Server, the firewall software is called ufw so the command to check if port 3306 is open is:
sudo ufw status
If you get a little table of results when issuing that command, you should be good to go. OpenSuse apparently uses the firewalld firewall, just as Fedora does …so the above commands should work on that distro, too. Debian is a law unto itself, so on that distro you'd issue the command
sudo nft list ruleset
If a bunch of code comes back that lists 'dport 3306' within curly braces, you're probably good to go!
4.3. Is there a Giocoso3 Database?
The last thing to check on the server is whether the script correctly created a giocoso3 database for you. Issue the command:
sudo mysql
At the new prompt that then appears, type:
show databases;
Be sure to include that trailing semi-colon, which is the delimiter that tells the database engine your command 'ends here'. You should see something like this:
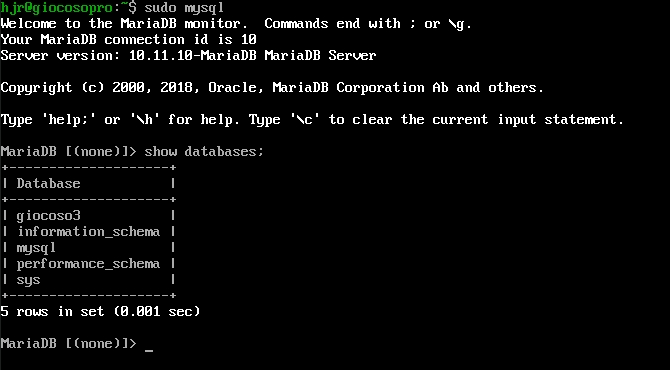
You can see the name 'giocoso3' shown in the little list of databases there: that means the script has done its job correctly. Type the word quit to get back to the normal command prompt.
4.4 Final Checks from Clients
One final check is probably worth performing: can your client devices actually see and connect to the new Giocoso Pro server? To check that, you'll need a client device onto which the MySQL server client software has been installed. Explaining how to do that in detail is outside the scope of this article, but in brief:
- Arch: sudo pacman -S mariadb
- Debian: sudo apt install mariadb-client
- Ubuntu: sudo apt install mariadb-client
- OpenSuse: sudo zypper install mariadb-client
- Fedora: sudo dnf install mariadb
Assuming the client software has been installed, switch to using one of those client devices and in a new terminal session type the command:
mariadb -u giocoso3 -pgiocoso3 -h 192.168.137.187 -D giocoso3 --skip-ssl
…which means “connect to a database called 'giocoso3', as a user called 'giocoso3' and with a password of 'giocoso3' (notice there's no space between the -p and the password!)”. The specific IP address you use should be whatever your new Giocoso Pro Server is using, of course. The username and password are, however, hard-coded and fixed.
The response should be something like this:
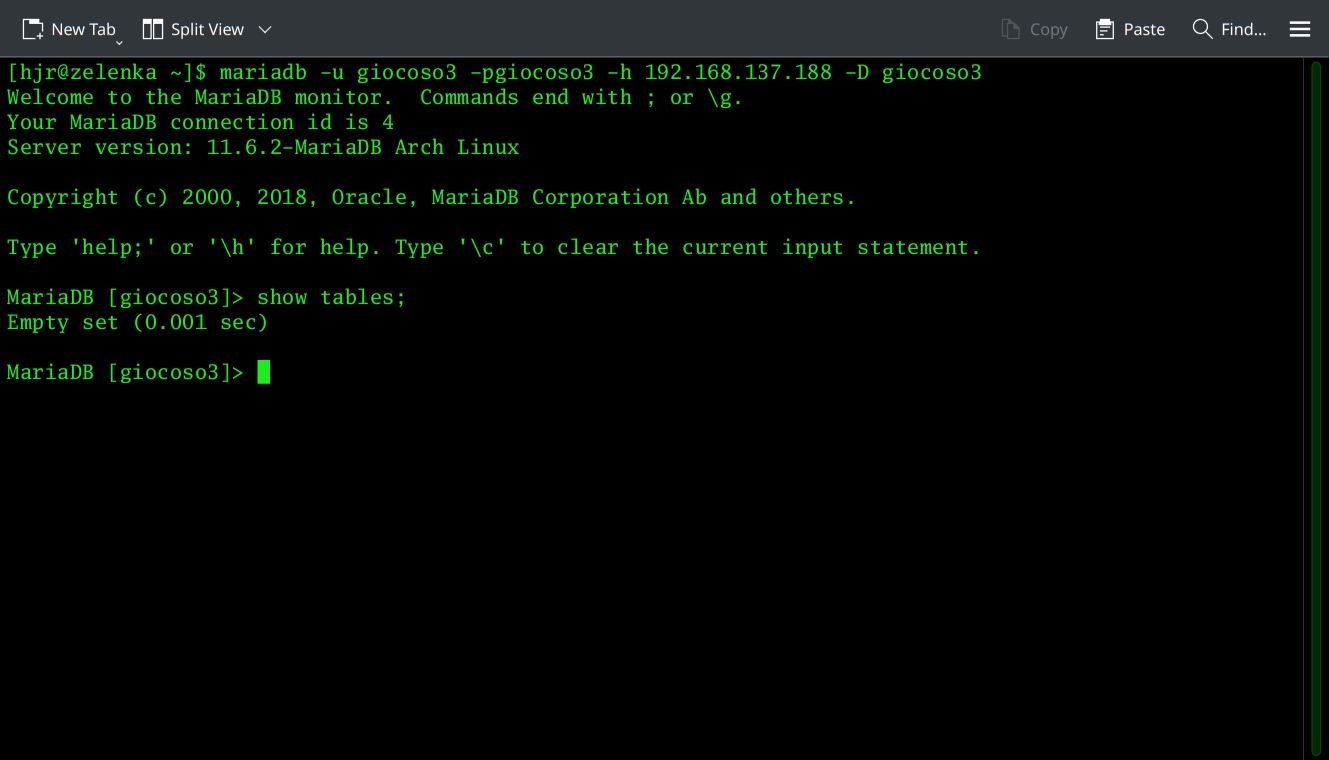
You'll notice that I threw in a 'show tables;' command there -the result was 'empty set', because no tables actually exist within this database as yet, but the fact that the command produce a response of any sort at all indicates that remote connections to the server are working as intended. To create appropriate tables is the job of the Giocoso Pro initialisation process, which is launched from within Giocoso itself… and which is resolutely outside the scope of this particular article! For now, it's sufficient to know that you've got a working Pro server that is able to be used by Giocoso clients successfully.
5.0 Final Notes on Security and the Pro Script
The Pro script aims to automate the setup of a MySQL server on Arch, Debian, Devuan, Fedora, OpenSuse, Ubuntu and FreeBSD. It may work on distros derived from those 'parent distros', but I haven't tested them and I can't vouch that anything will work in such environments. Generally speaking, you don't want to be setting up dedicated database servers on 'niche' distros anyway: I've never seen Oracle installed on Peppermint Linux or Garuda Linux, for example! Stick to the mainstream 'parent' distros, though, and you should be OK.
That said, I'm disclaiming all responsibility at this point! You run the Pro script at your own risk. I haven't wrapped it in layers of error detection and robustness, for example. I've tested it on virtual machines running fresh installs of the latest versions of the various distros mentioned (latest at the time of writing that is, being mid-February 2025) and it does what I expect it to do on all of them. If you run it on a server you're already using for other things, who knows what the results might be. If a pre-loved server is your intended platform, therefore, I would recommend you reading the Pro script and working out what it does… and then doing those same things yourself, manually… and carefully!
Finally, please note that the MySQL database the Pro script creates (and which Giocoso Pro expects) is not secure and isn't intended to be secure. It's administrative user is giocoso3, password giocoso3, and he has complete authority to create or destroy everything in the giocoso3 database. There's no subtlety about that and it's entirely by deliberate design: a Giocoso Pro database is not meant to be as secure as Fort Knox. It's intended for internal use in a home network environment, without access to the wider world via the Internet, so any potential threat to it is entirely inside your own home. Knowing the credentials involved potentially gives your miscreant children the ability to screw with the Giocoso global database …but it's expected that this is a problem you'll resolve in whatever way seems appropriate to you! Just be warned that you should not attempt to change the giocoso3 username or password. That combo of credentials is hard-coded throughout Giocoso's code, so changing it on the database will definitely break things, badly.
In conclusion:
- Start with a vanilla, fresh server installation
- Fully update your server's operating system
- wget software.bbritten.com/pro
- bash pro
- Check your firewall allows traffic on port 3306
…and then go configure your client devices to point to and make use of the new Giocoso Pro Server's database.
| Back to Software Home | Back to Giocoso Documentation Home | Back to Pro Menu |