Table of Contents

Build A Giocoso Pro Server With Arch Linux
1.0 Introduction
Giocoso Pro is the name given to a MySQL (or MariaDB) database that provides details of what music files exist and what plays of them have taken place, shared amongst all your computing devices that might be involved in playing classical music. It is a very lightweight implementation of a relational database, with just two tables and not a lot of relations between them! Running such a database therefore requires very little in the way of hardware resources: it's recommended to have a dual core CPU, 2GB of RAM and 20GB of hard disk space, though more of any of these resources is always handy 
Since it is a server, there is no need for a fancy graphical desktop to make things look 'nice': a Linux distro that provides the bare minimum of computing capabilities whilst managing to run the database is all that is really required -and that makes Arch an ideal distro for implementing Giocoso Pro, because it starts out about as barebones an operating system as it's possible to get. You choose what to add to it (not much, as it turns out!) and the end result remains extremely minimalist, yet fully functional. As such, this article sort-of reproduces my earlier article on how to build an Arch desktop, but simplifies things dramatically, as no desktop environment is involved.
2.0 The Basics
I built what follows in VMware Workstation as a virtual machine, with:
- 4096 MB of virtual RAM
- 2 virtual CPUs
- 20GB virtual hard disk
Those are above-minimum specs and I could certainly have halved the RAM allocation without too much drama. It's still fairly lightweight, however. If I were doing this on one of the spare physical machines I have sitting around in my loft, my 2011-vintage Dell desktop PC with an Intel i3 CPU, 4GB of total RAM and a 60GB solid state hard drive would work perfectly well.
It is configured to use bridged networking, as it will need to be able to connect to the Internet -and, of course, as a Giocoso Pro machine, client music-playing devices will want to be able to connect to it!
I obtained my Arch Linux installation medium from here, specifically the archlinux-2025.01.01-x86_64.iso file, via the torrent link provided on that page.
3.0 Getting Started
When you first boot your PC or virtual machine, you'll see this boot menu:
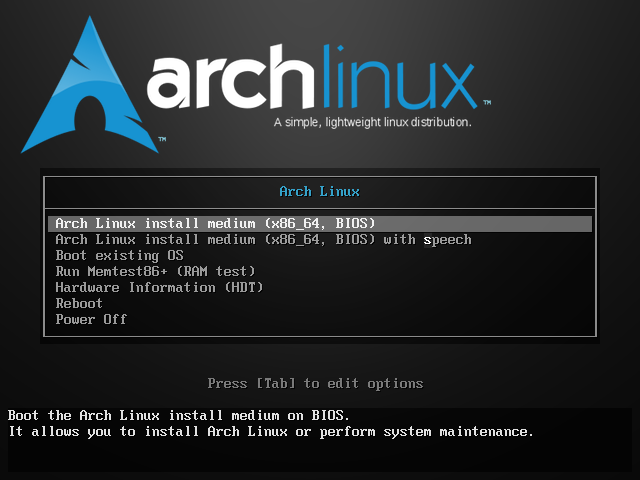
The top menu option is the correct option to take: either let the automatic boot countdown time itself out or press [Enter] to accept the top menu selection. This will trigger the display of a pile of unintelligible messages, at the end of which you are somewhat unceremoniously dumped at a command prompt, logged in as root:
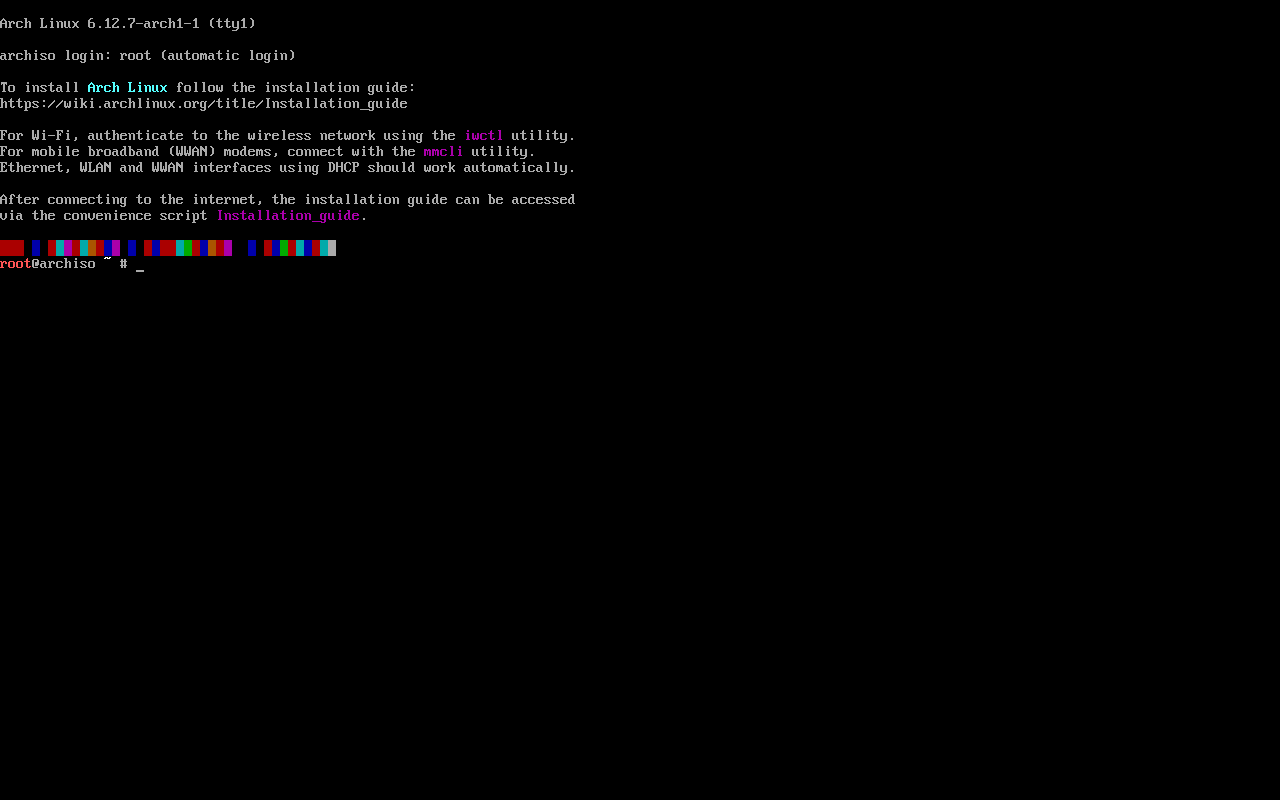
Everything from this point on consists of typing some textual commands in order to get the operating system installed on your computer -and ensuring you type them correctly!
4.0 Initial Steps
4.1 Keyboard Selection
Arch assumes you are using a standard US keyboard. If that's not true for you, you'll need to tell it what keyboard you're actually using. Type the following command:
ls /usr/share/kbd/keymaps/**/*.map.gz | less
…and a long list of available keyboard mappings will be displayed, one page at a time (tap 'q' to quit back to the command prompt at any time). Read the list carefully until you see the one you need. The bit you need to take note of is the last part of the file name, but ignoring the “.map.gz” extension. So, a Spanish keyboard would probably be listed under 'es' for 'España'; an Italian one under 'it' and so on. The standard UK Qwerty keymap is listed as 'uk.map.gz', so lopping off the extension, you arrive at plain 'uk'. Knowing that, issue the loadkeys command:
loadkeys uk
You can then tap some keys on your keyboard to validate that you've selected the correct keymap.
4.2 Prepare the Hard Disk
You next need to know what hard disk(s) you've got and onto which one you'll be installing the operating system. Type the command:
fdisk -l
…and you'll see output such as this one:
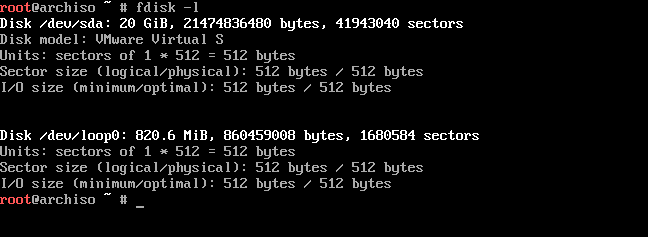
This tells me I have one real hard disk (ignore things called /dev/loop…) called /dev/sda: I can tell that's the 'right' device identifier because the display tells me it's 20GB big, which is the hard disk size I was expecting. You replace '/dev/sda' in everything that follows with the device identifier that is displayed for your hard disks.
Knowing the device identifier for your hard disk, we now need to parttition it and write a file system onto it. The command to do that is:
fdisk /dev/sda
That takes you into the fdisk utility where it unhelpfully sits there prompting you to type a 'command' of some sort. These are issued by typing individual letters. The key sequence you need to supply now is as follows:
- n
- p
- [Enter] [Enter] [Enter]
- w
That creates you a new primary partition, accepting the defaults for its size and location on the disk, and writing those configuration details to disk, so they actually take effect: congratulations, you now have a new partition on the hard drive, called /dev/sda1 (notice the '1' gets appended to the base device identifier, to indicate that it's the first partition (and the only one, as it happens) on this disk. Once the partitioning is complete, you could do another fdisk -l to confirm that a numbered partition is listed in the output.
Assuming it is, you now need to format it (and I'm only going to use the very unexotic ext4 file system to do so), using the command:
mkfs.ext4 /dev/sda1
That command should complete relatively quickly and at this point you now have a usable hard disk onto which we can install the Arch operating system and software itself.
We finish up this stage of proceedings by mounting the new hard drive partition into a folder, allowing us to write to it by directing things 'into' that folder. The command to do that is simply:
mount /dev/sda1 /mnt
…and this means that if we were to store or write anything into /mnt, we'll be writing onto the physical hard drive we've just formatted.
4.3 Installing the Operating System
The command to fetch the operating system files from the Internet and copy them into /mnt is:
pacstrap /mnt base linux linux-firmware nano sudo make wget gcc binutils bc networkmanager inetutils man coreutils
That triggers a lot of activity:
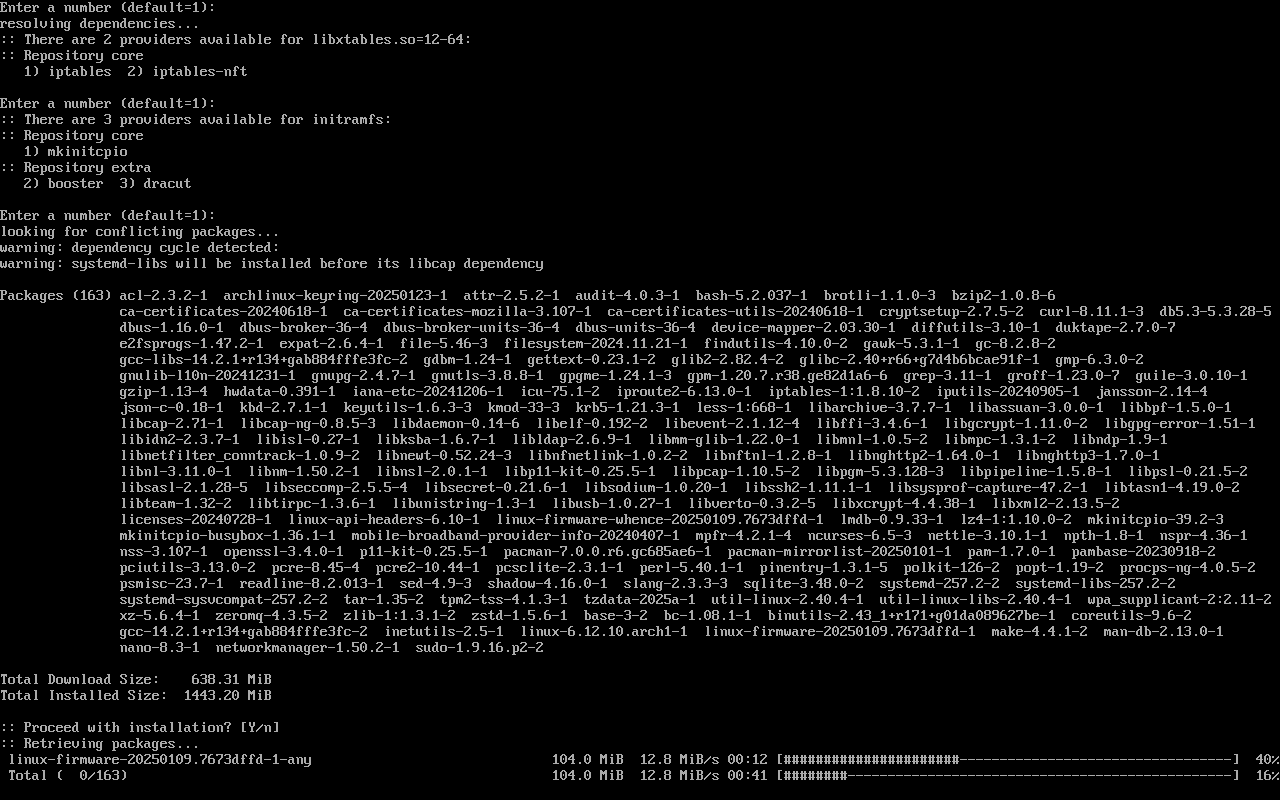
Around 600MB of files are now downloaded from the Internet and written into various sub-folders within the /mnt folder. The process should be entirely automatic, so be patient and just let the process complete in its own good time. Should your network connection fail for any reason, don't panic: just re-issue the same pacstrap command again once normal network service has been resumed. The process will pick up from where it last reached.
4.4 Post OS-Installation Configuration
At this point, your new operating system is downloaded and installed, but is fundamentally not usable and won't even boot correctly. We need to tweak some things before you can turn the raw install into a usable operating system.
The first thing we need to do is create an fstab so that the new OS knows what drive(s) it's got to mount in the first place. Issue this command:
genfstab -U /mnt >> /mnt/etc/fstab
That's the 'live' Arch system writing into the contents of the /mnt folder, so that what it sees as /mnt/etc/fstab will, eventually, become the new system's actual /etc/fstab.
Everything else we need to tweak cannot really be written 'into' the new operating system from 'outside' like this, however. Instead, we actually have to sort-of 'go into' /mnt and do everything from within that system. The command to do that is:
arch-chroot /mnt
You'll see the start of the command prompt changes to reflect the fact that you are now 'in' /mnt, as though it were your root folder. There are bunch of fairly low-level commands we must now issue to get things 'right'. First, we ought to set the new system's time zone correctly. To find out what time zones even exist, type the command:
timedatectl list-timezones | less
Once you've found one that seems suitable (I'm going for 'Europe/London'!), tap 'q' to quit the listing and then type the command:
timedatectl set-timezone Europe/London
Next, we need to say what 'locale' our system should use. In my case, I want to say I'm using UK currency, date and time conventions and also using the UTF-8 character set (I need the ability to type the occasional umlaut, or cedilla, given I listen to a lot of classical music by European composers!). So:
nano /etc/locale.gen
That document lists every possible locale: your job is to find the one you want and to remove the hash from the start of the line so that it is uncommented. In my case, I'm looking for en_GB.UTF-8 (English, Great Britain, UTF-8 characterset). Once uncommented, press Ctrl+X to quit and then tap 'y' to save when prompted, finishing with a final [Enter] to accept the proposed file name. With one locale un-commented in this way, type the command:
locale-gen
…and you should see confirmation that the correct locale has been generated.
If you had to change your keyboard settings right at the start of proceedings (see Section 4.1 above), then you should configure that keyboard change now, too:
nano /etc/vconsole.conf
…and type in:
KEYMAP=uk
(or whatever keymap you chose back in Section 4.1).
The new operating system now needs to know about its network identity. So, issue this command:
echo stravinsky > /etc/hostname
…to set your new device's hostname to 'stravinsky'. If you want a different name, be my guest and supply it instead -but make sure you replace all future mentions of 'stravinsky' in this article with whatever alternative name you decided upon!
Now, finish things off with:
nano /etc/hosts
Into this mostly-empty file, append the following information:
127.0.0.1 localhost
::1 localhost
127.0.1.1 stravinsky.dizwell.home stravinsky
Of course, replace 'stravinsky' with your actual choice of hostname. Also note that 'dizwell.home' is my home network's 'domain name': you'd have to change that to whatever you use in your home network, too. Save the edited file.
4.5 Configure Some Users
We're nearly done! We should now set a password for our root user, with the command:
passwd
Type something memorable and complicated twice, when prompted. Don't forget what you supply at this point! Now we move on to creating a non-root user, who I'm calling 'hjr', but substitute in whatever feels more appropriate for you! The commands to give are:
useradd -m -G wheel hjr
passwd hjr
The first command creates a user called 'hjr' and makes him a member of the 'wheel' group for reasons which will shortly become apparent! The second command sets a new password for the new user: follow the prompts and type in a suitable password, twice.
Lastly, type these commands:
export EDITOR=nano visudo
This will open up the sudoers file inside the nano text editor. Your job is to find the line which reads %wheel ALL=(ALL:ALL) ALL and remove the '#' character from the start of that line, so that the line becomes a real, operative one rather than just being commented-out. Press Ctrl+X to exit the editor when ready and then tap 'y' when asked whether you want to 'save the modified buffer': this exit+save is how the edited file will get saved back to disk safely. The new line in the sudoers file means that anyone who is a member of the 'wheel' group can now exercise sudo powers (and thus be the equivalent of root). From the way I created the 'hjr' user earlier, you can see this means that if I log in as hjr, I should be able to issue sudo commands without trouble.
4.6 And finally...
We are almost done!! We just need to make sure that the new operating system knows how to bootstrap itself at boot time. That's done with the commands:
pacman -S grub
grub-install /dev/sda
grub-mkconfig -o /boot/grub/grub.cfg
That installs a boot loader called 'grub', makes it take note of the /dev/sda device that was initialised way back in Section 4.2 and creates a boot configuration which enables the new operating system to boot correctly in future.
At this point, the only thing left to do is to ensure the new PC's network connection comes up properly on subsequent reboots. Issue this command:
systemctl enable NetworkManager.service
And with that done, you can quit the chroot environment we entered earlier and ask for your new PC to reboot:
exit
reboot
You should end up at a command-line login prompt, at which point you can log in as yourself (in my case, as 'hjr').
5.0 Installing Giocoso Pro
Now that you have a working Arch server, it's time to install Giocoso Pro onto it. This basically means downloading a script from this website which (a) installs the MariaDB relational database program; and (b) creates and configures a database suitable to act as a shared Giocoso database. The process, once launched, should be mostly automated: the occasional prompt to supply your password at various points may arise, but otherwise it should be fairly painless.
So, first obtain the Giocoso Pro installation script by typing the command:
wget https://software.bbritten.com/pro
You then run that script, once it's been downloaded, with the command:
bash pro
The script will produce a lot of output, similar to this:
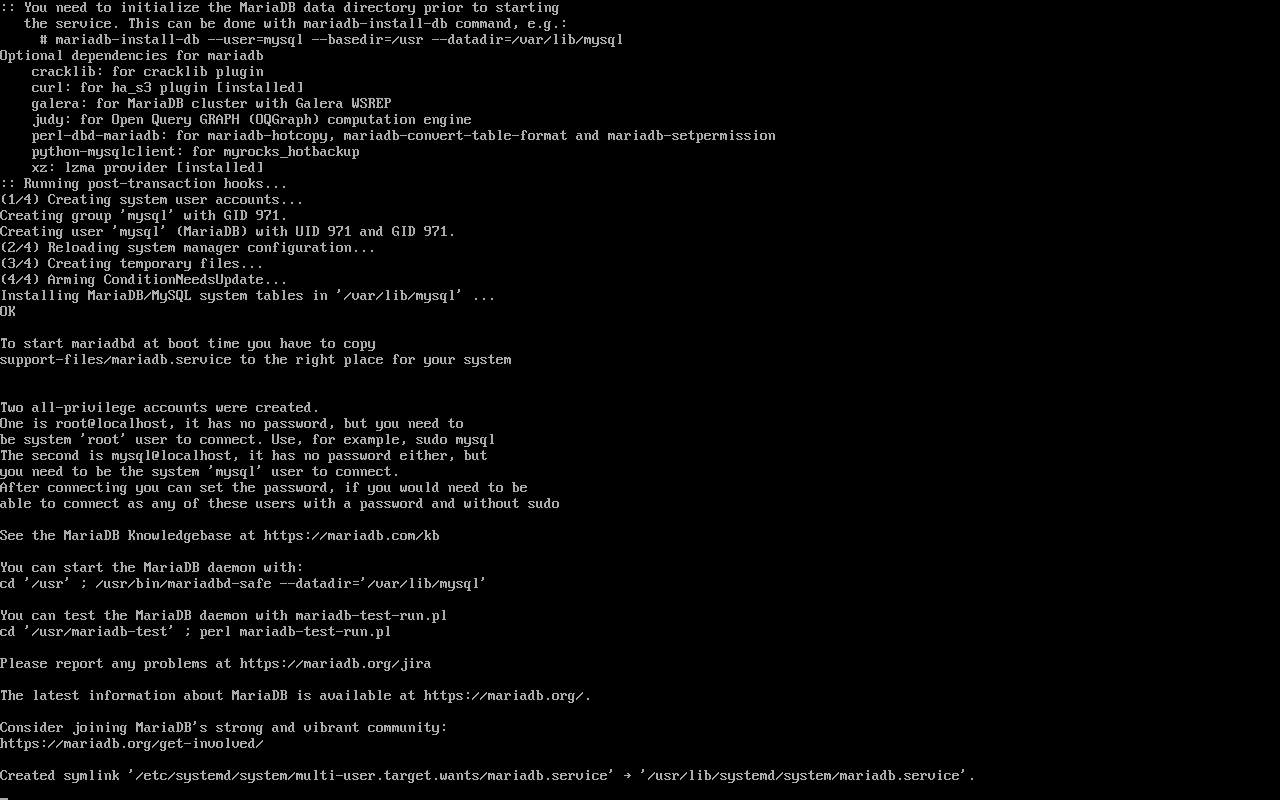
Most of the output can be safely ignored: the key thing to watch out for is that you should see reference to 'mariadb': that's the clue that MariaDB is being installed and configured for you. Once MariaDB is running and configured appropriately, all that is needed is a reboot of the entire server to ensure that MariaDB really does come back up and running automatically afterwards, so type:
reboot
When your PC comes back, log in as yourself and type:
sudo mariadb
…followed by:
show databases;
If MariaDB really is running correctly, you should see this sort of thing:
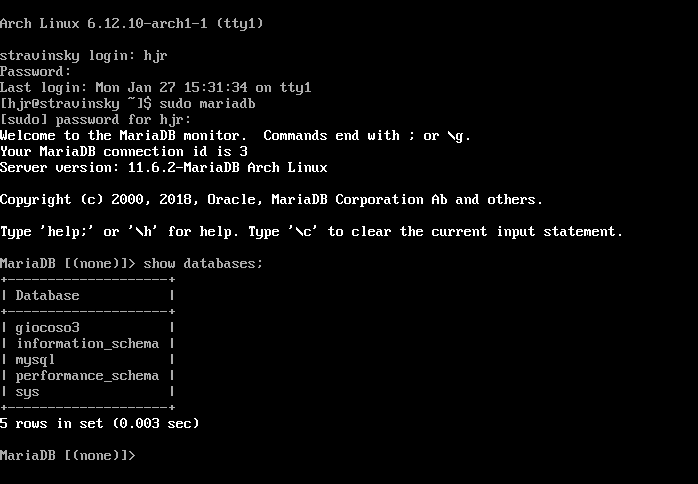
Notice in the list of databases that there is one called 'giocoso3': that's the proof you need that your Giocoso Pro server is ready to accept connections from client devices. You can then just type exit to get back to a standard command prompt.
6.0 Final Checks from Clients
One final check is probably worth performing: can your client devices actually see and connect to the new Pro server? The way to test that is to switch to using one of those client devices, onto which you've previously installed the MariaDB client software. This command should be typed in a terminal session launched on one such device:
mariadb -u giocoso3 -pgiocoso3 -h 192.168.137.188 -D giocoso3 --skip-ssl
…which means “a user called 'giocoso3' and with a password of 'giocoso3' (notice there's no space between the -p and the password!) wishes to connect to the MariaDB Server running on host 192.168.137.188 and connect to the database called 'giocoso3'”. The response should be something like this:
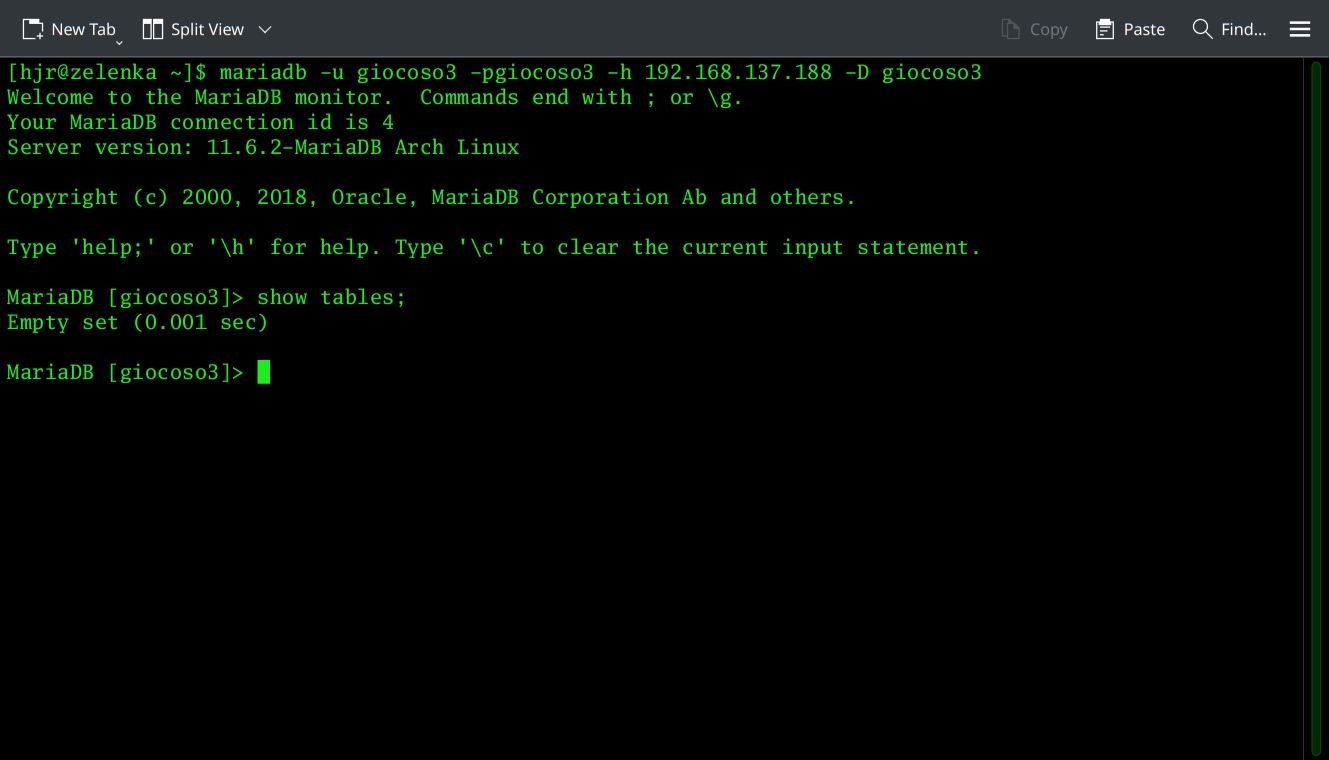
You'll notice that I threw in a 'show tables;' command there -the result was 'empty set', because no tables actually exist within this database as yet, but the fact that the command produce a response of any sort at all indicates that remote connections to the server are working as intended. To create appropriate tables is the job of the Giocoso Pro initialisation process, which is launched from within Giocoso itself… and which is resolutely outside the scope of this particular article! For now, it's sufficient to know that you've got a working Pro server that is able to be used by clients successfully.
7.0 Conclusion
Building an Arch server is not particularly hard, but it is fiddly! There are quite a lot of commands to type, all of which are important, all of which demand being typed in correctly
Once built, however, turning the barebones server into a Giocoso Pro server is a simple matter of downloading the appropriate script and launching it. After that, a simple couple of checks performed both on the server itself and on the client devices that hope to make use of it will hopefully demonstrate that you're in business for running Giocoso in shared database mode.
| Back to Software Home | Back to Giocoso Documentation Home | Back to Pro Menu |