Installing Giocoso on Windows 11
1.0 Introduction
By way of introduction to the topic of installing Giocoso on Windows 11, I have to make several disclaimers:
- I'm using real, physical hardware
- The physical hardware is a Lenovo L460 laptop, with an i5-6200U CPU and 16GB of RAM, manufactured in about November 2016
- That laptop does not meet Microsoft's official, supported hardware requirements for Windows 11
- My Windows 11 installation is thus unofficial and unsupported by the operating system manufacturer
Accordingly, what I go on to describe in this article might not be representative of what will happen on properly-supported hardware. I should also mention that I'm writing using Windows 11 25H2, which is the latest version of that operating system at the time of writing, in December 2025.
The basic principle of getting Giocoso working on Windows 11 is to install the Windows Subsystem for Linux (WSL) onto your Windows system, then install a Linux distro of your choice, and finally install Giocoso into that distro. It is, in other words, a cheat! Giocoso is, essentially, a Bash script that orchestrates a number of Linux programs and utilities to play music: it doesn't really run on Windows at all… but thanks to WSL, Windows can run Linux, and if Linux is running, Giocoso can run within that.
In what follows, I'll show you how I installed the Windows Subsystem for Linux on my Windows laptop; how I then installed a distro; and how I then made that distro run Giocoso. I'll finish up by showing you how I went on to install more distros on the same laptop and was able to run Giocoso under all of them, mostly with total success.
2.0 Installing the Windows Subsystem for Linux (WSL)
Microsoft actually invented two versions of the Windows Subsystem for Linux, so technically the one we're about to install is properly known as WSL2: it's the second version and is needed because only it allows direct access to graphical and audio hardware from within the virtualised Linux workspaces it creates. I will generally refer to it as merely “WSL” however, as almost no-one is going to be using the first version of it these days.
In order to be able to install WSL2, your computer needs to using a 64-bit CPU (which is practically a given these days, I think). You also need to make sure that your computer's BIOS or UEFI settings are configured to enable the virtualisation features of your CPU: that's not a given and you may need to hunt around for the right setting to switch that on.
Assuming those minimal prerequisites are met, however, then installing WSL consists of opening a command prompt with Administrator rights and issuing the command:
wsl --install
Windows will respond by downloading some software, installing it and then prompting you to reboot:
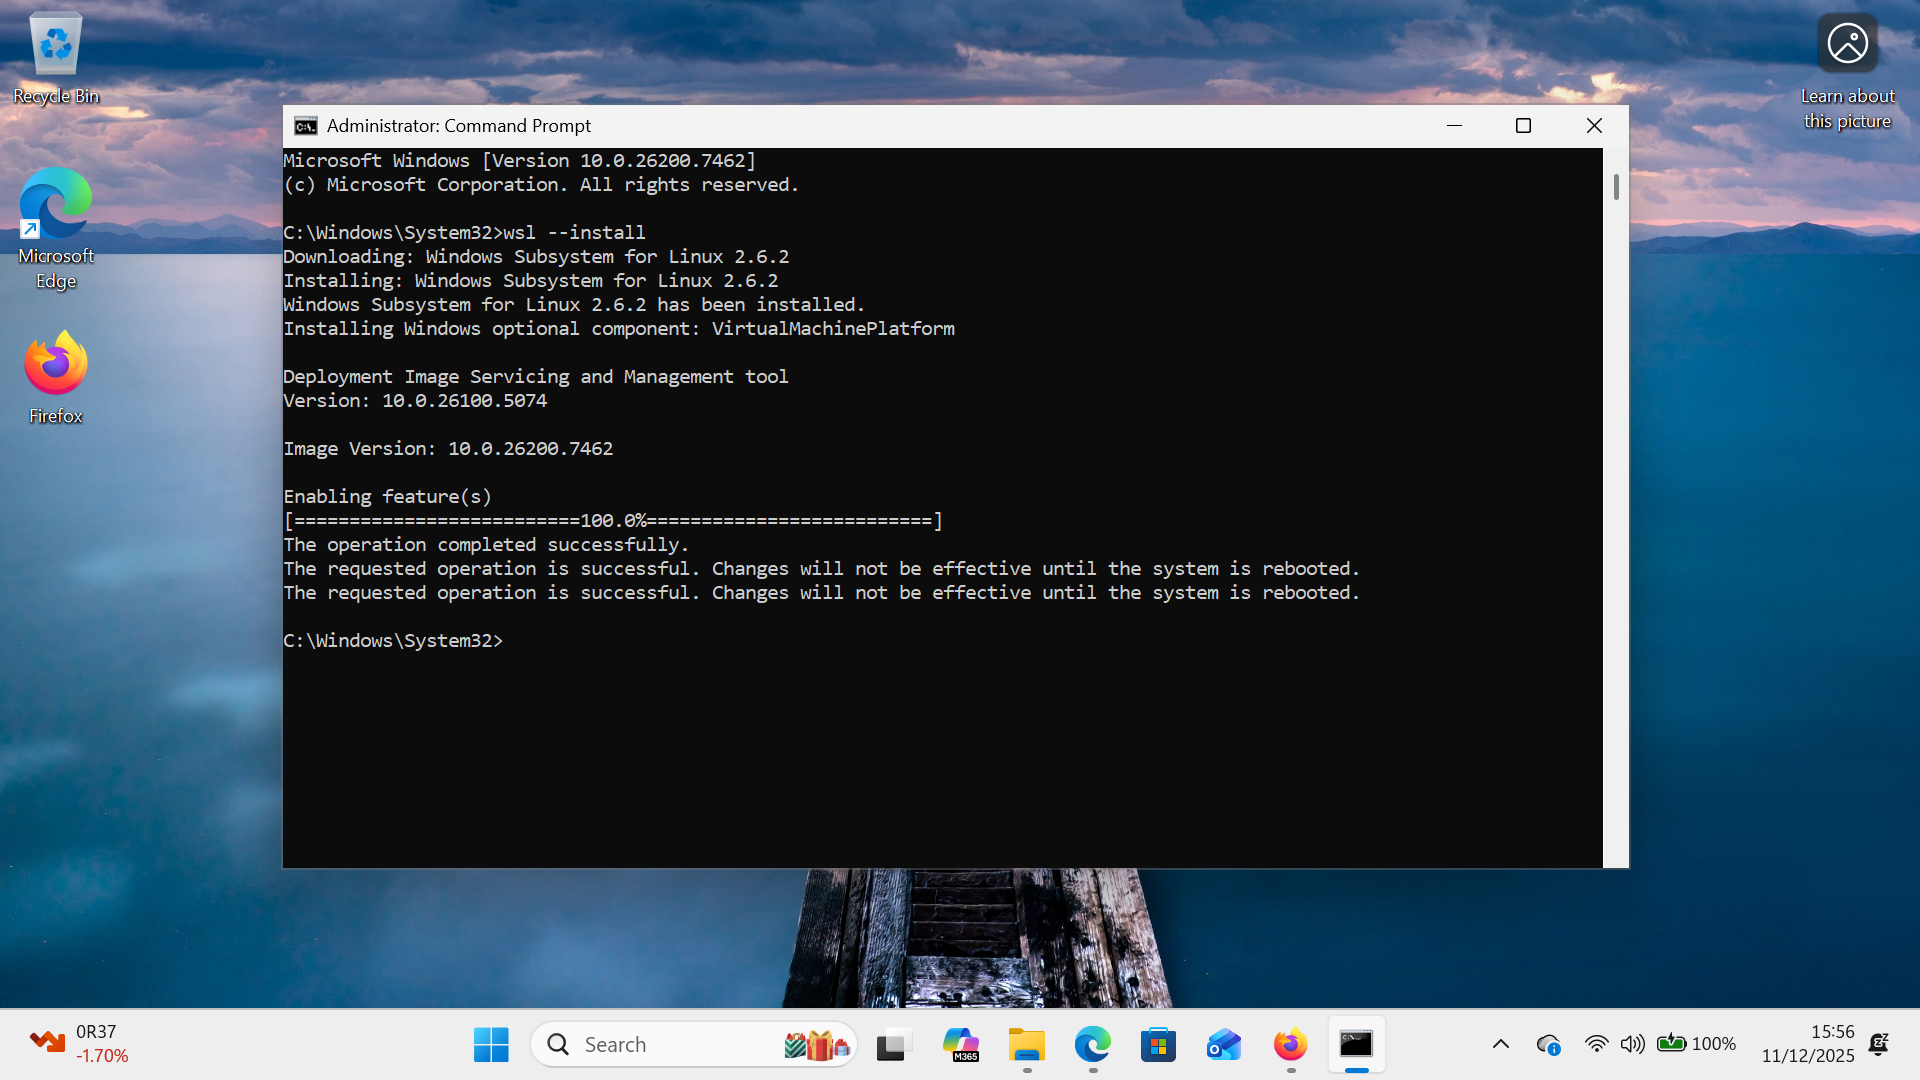
When you see this message, do as it says and reboot your PC to make the new feature available and functional. Once your PC has rebooted, nothing will apparently have happened and nothing terribly Linux-y will be available to you to use! That's because you haven't installed a distro yet… so that's the next thing to do.
3.0 Installing a Linux Distro
Open another command prompt with Administrator rights and type the command:
wsl --install ubuntu
It doesn't have to be 'ubuntu' here: you can install 'debian' or 'fedora' or several other distros if you prefer. But I'm running with Ubuntu for now and we'll see how to install these other distros later on.
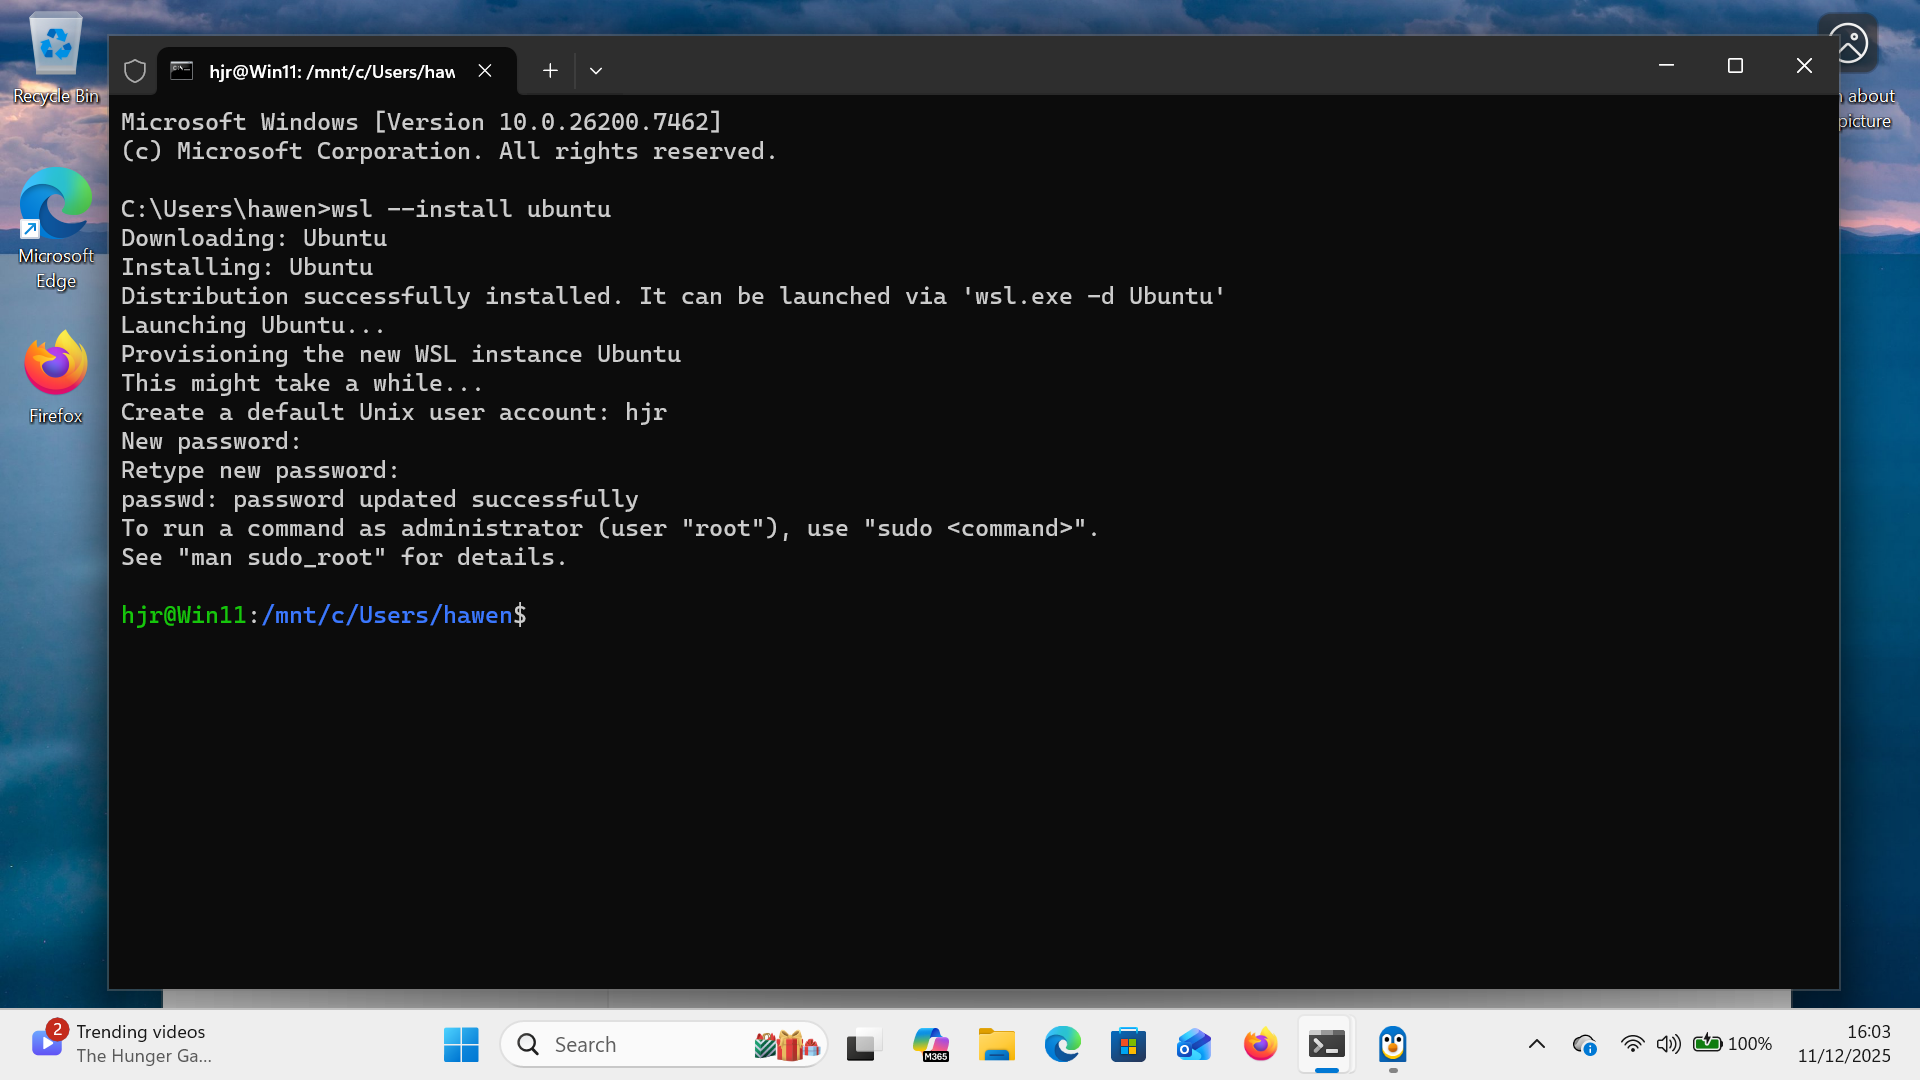
As you can see, Windows pulls down various software packages, installs them and then 'provisions' them for you. At the end of that process, you are prompted to supply a new username and password combo: this will be the Linux user, which is not the same as the Windows user at all. If you choose to type in, when prompted, the same username as you use to log onto Windows 11 in the first place, that's perfectly fine… but you don't have to do that. Similarly, your Linux password does not have to match your Windows one… but they can do so if it makes it easier for you.
As soon as you've supplied a new user/password combo, you are unceremoniously dumped at the command prompt of your new Ubuntu environment, as you can see in the above screenshot. A rather important point to note here is that you are dumped at a Linux command prompt (the slashes slant forward!) but in a Windows folder location. In my case, you'll note that I'm in /mnt/c/Users/hawen: that “/mnt/c” prefix part of the path is how the Linux environment 'sees' my Windows C: drive. If you have music files stored in C:\Users\hawen\Music, for example, then the Linux environment will be able to see them in /mnt/c/Users/hawen/Music, too.
As soon as you have a functioning Ubuntu system, you must update it, by issuing the commands:
sudo apt update && sudo apt upgrade
That will trigger a lot of in-terminal activity:

As you can see, in my case there were over 100 updates to apply, totalling around 150MB of software download. Let that happen, responding 'y' when prompted: Giocoso will not install on a Linux environment that hasn't been fully updated.
Once your distro has been fully updated, close the terminal window, which is kind of equivalent to rebooting the Linux environment and having the updates applied. You've just built yourself a working Linux environment inside a Windows PC (which to this day still impresses me as a significant technical achievement on the part of Microsoft).
4.0 Installing Giocoso
If you click your Windows 'Start' button now, you should see an icon in the 'Recommended' section of the start menu for launching an Ubuntu environment directly. Click that and Windows' new 'Terminal' application will be launched, dumping you straight into an Ubuntu terminal session, in your Linux user's new $HOME folder. You can check this by typing the commands:
pwd
uname -a
cat /etc/os-release
…just in case there's any doubt in your mind that you are actually sitting inside a Linux virtual environment at this point. Another way you can get into your Ubuntu environment is to open the Terminal application from the Windows start menu yourself, then click on the little down-chevron you see along the top bar of the display:
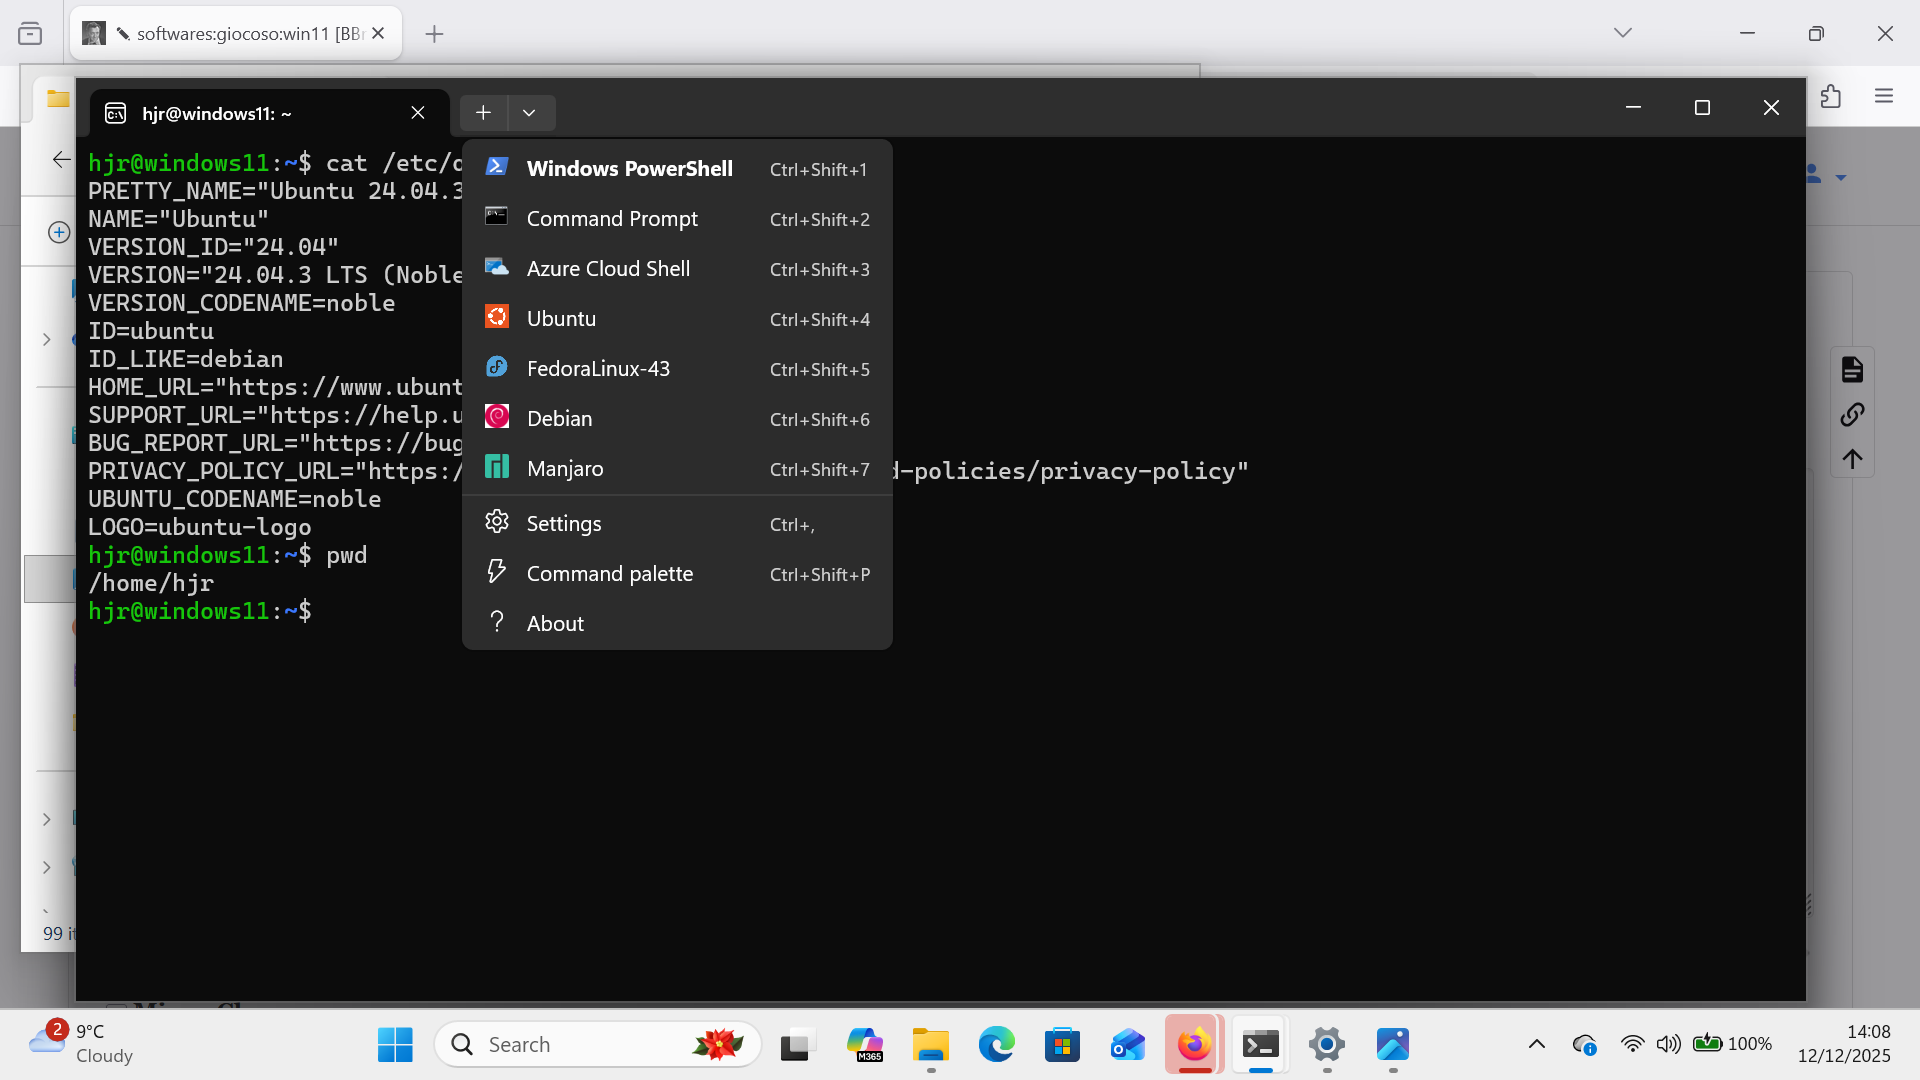
As you can see, that displays options as to which sort of terminal session you want opened, and Ubuntu is listed there, with its familiar roundel icon. Click that and a new terminal tab will open, in Ubuntu's trademarked purple hue, giving you a strong visual clue that you are indeed using Ubuntu at this point.
However you launch your Ubuntu session, type the following command into the terminal prompt:
wget software.bbritten.com/gioinst
You'll see a flurry of screen activity as the Giocoso installer script is downloaded:
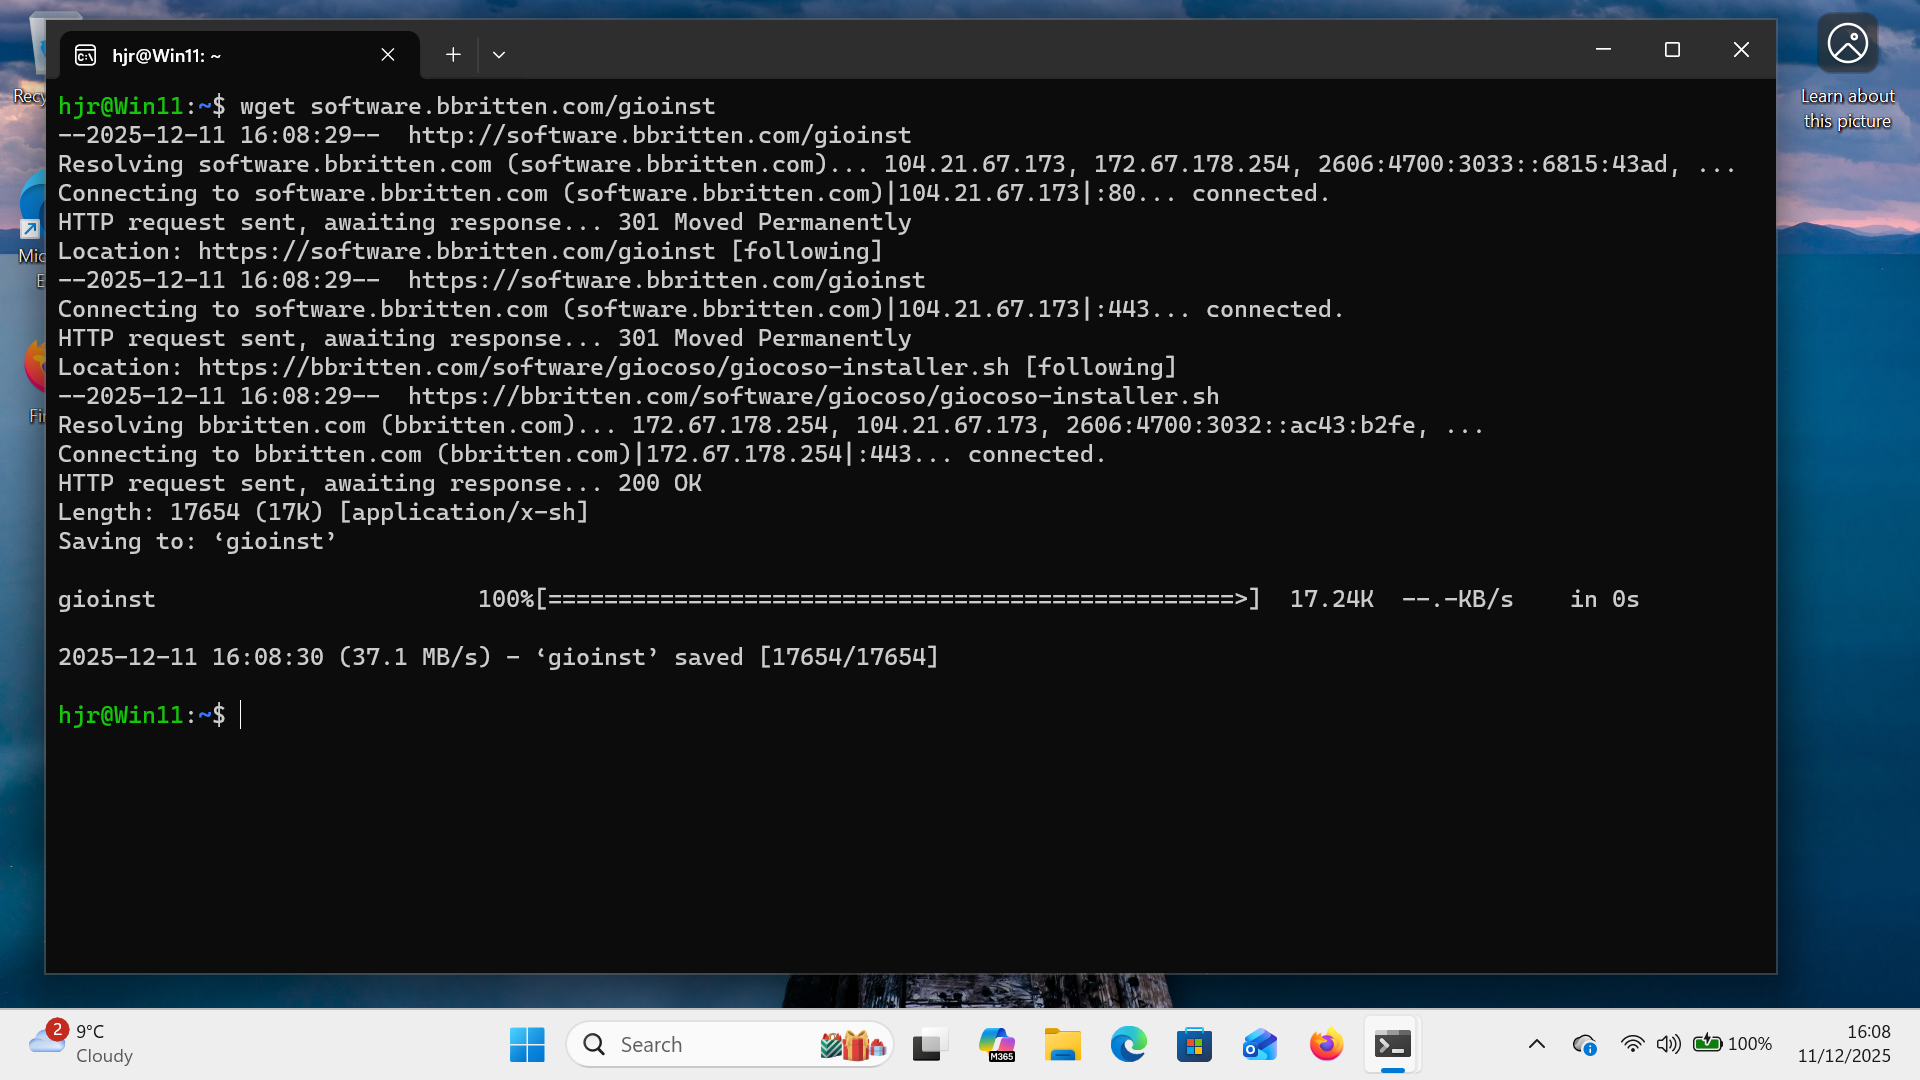
The script is tiny, so it takes hardly any time to download. Once it has, type the command:
bash gioinst
…and this will happen:
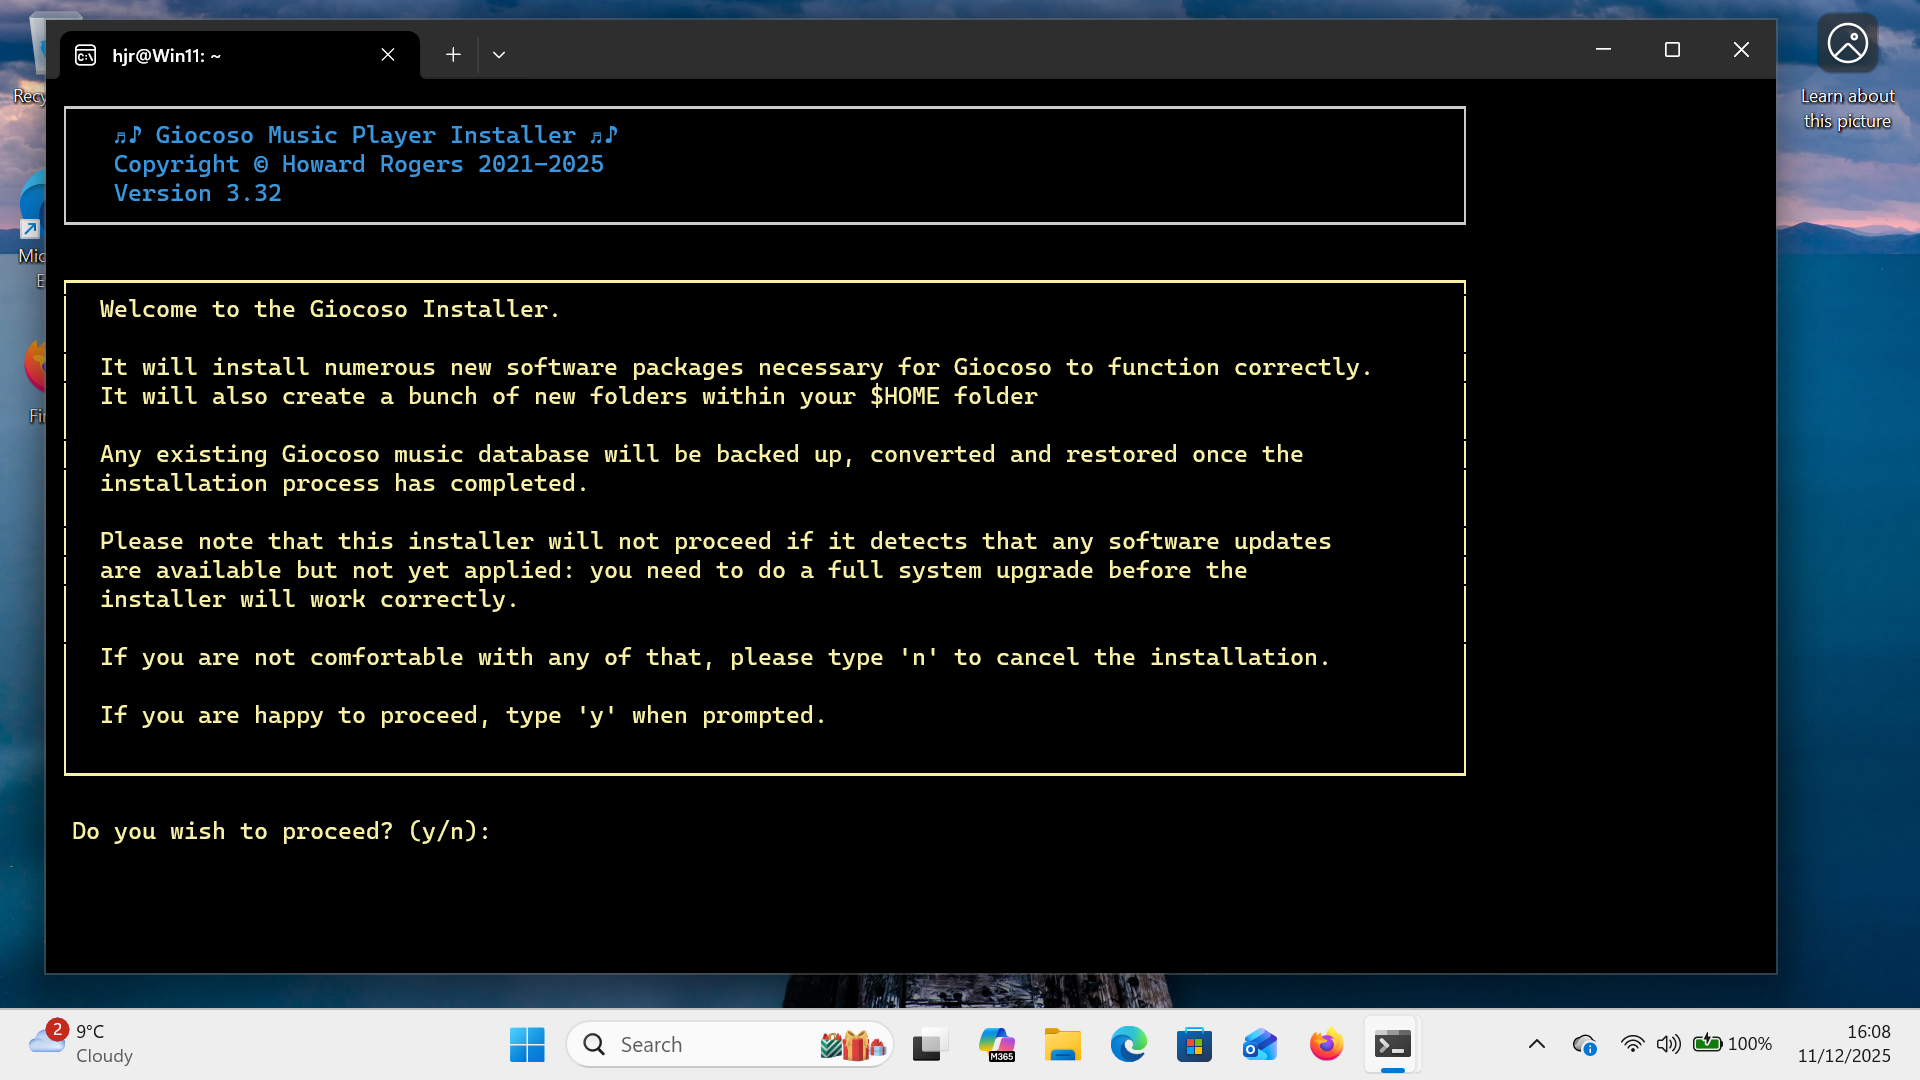
The screen-full of text is there to warn you that installing Giocoso will trigger the installation of a bundle of software that Giocoso relies on. You can tap 'n' to back out of the installation without it having altered your system at all… but if you tap 'y' to proceed, this immediately happens:
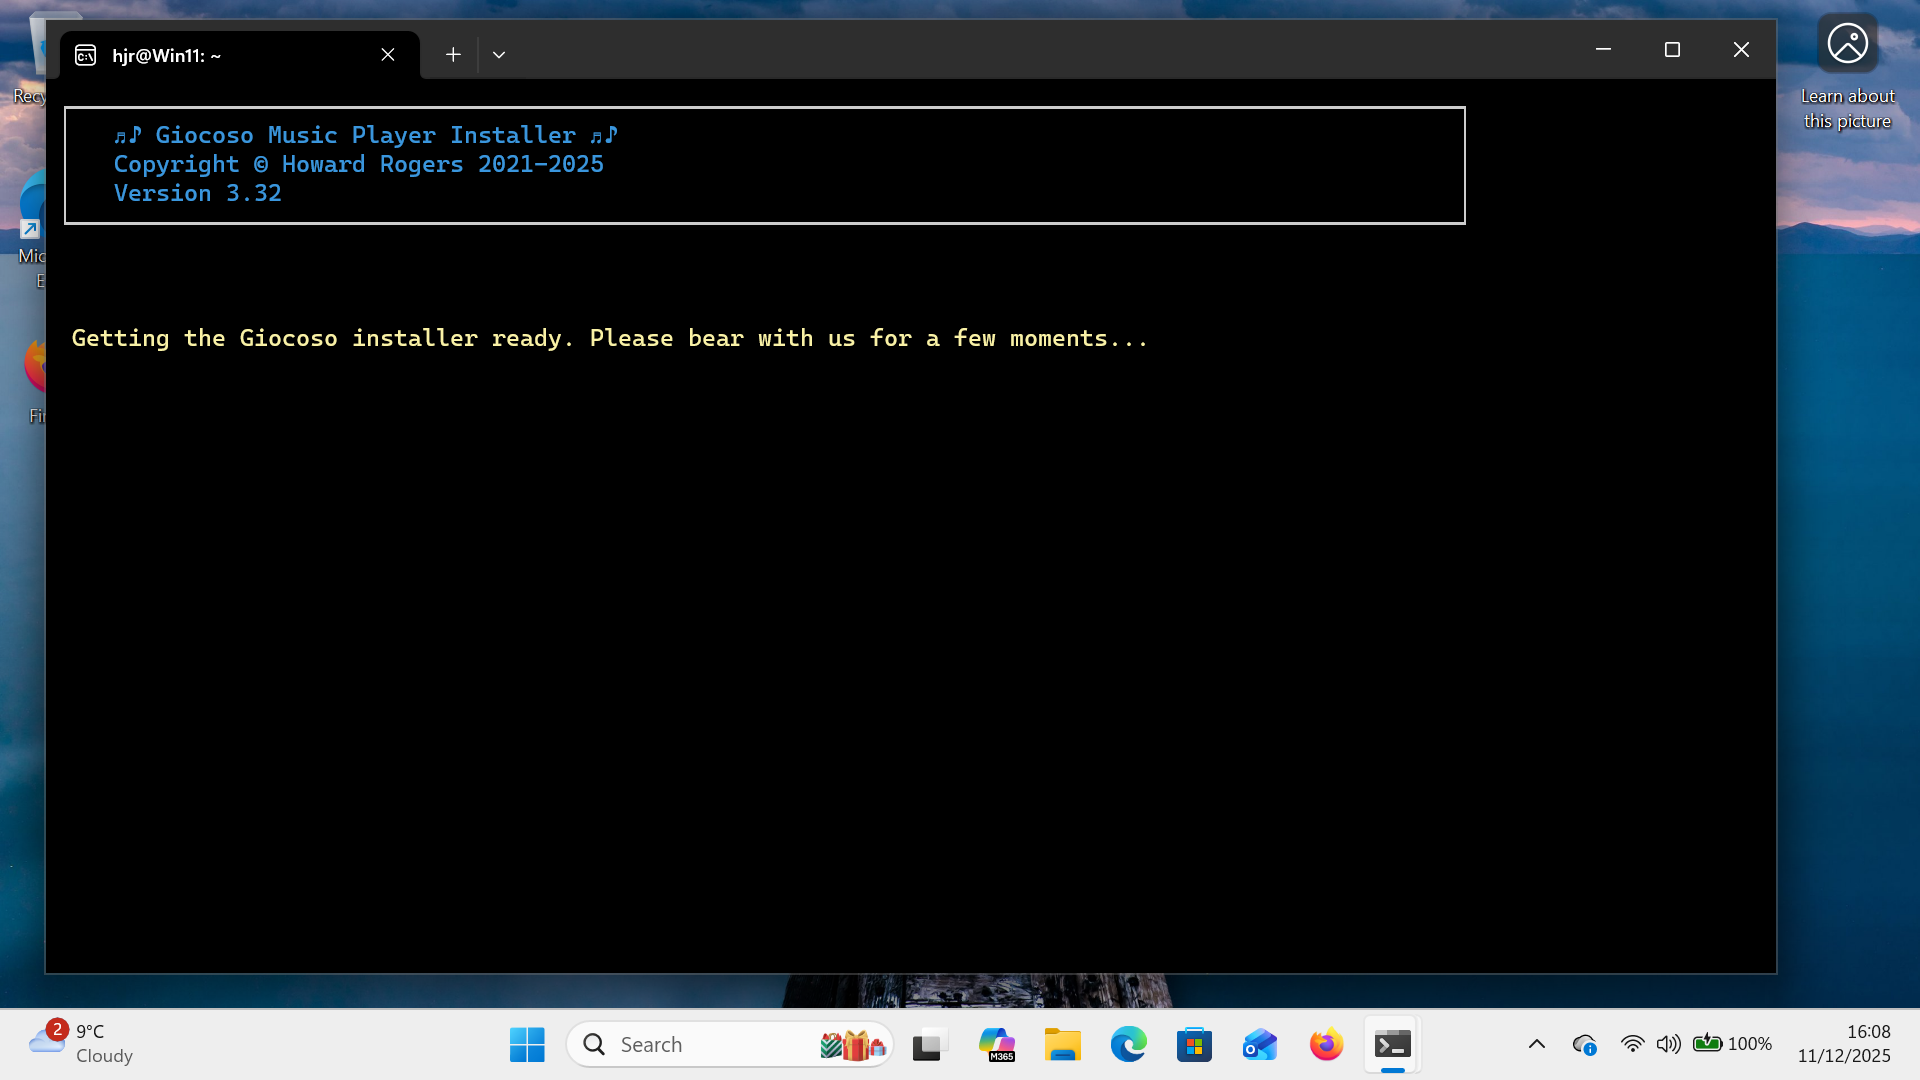
That's just a little bit of preliminary checking and configuring taking place, after which the screen will change to display this:
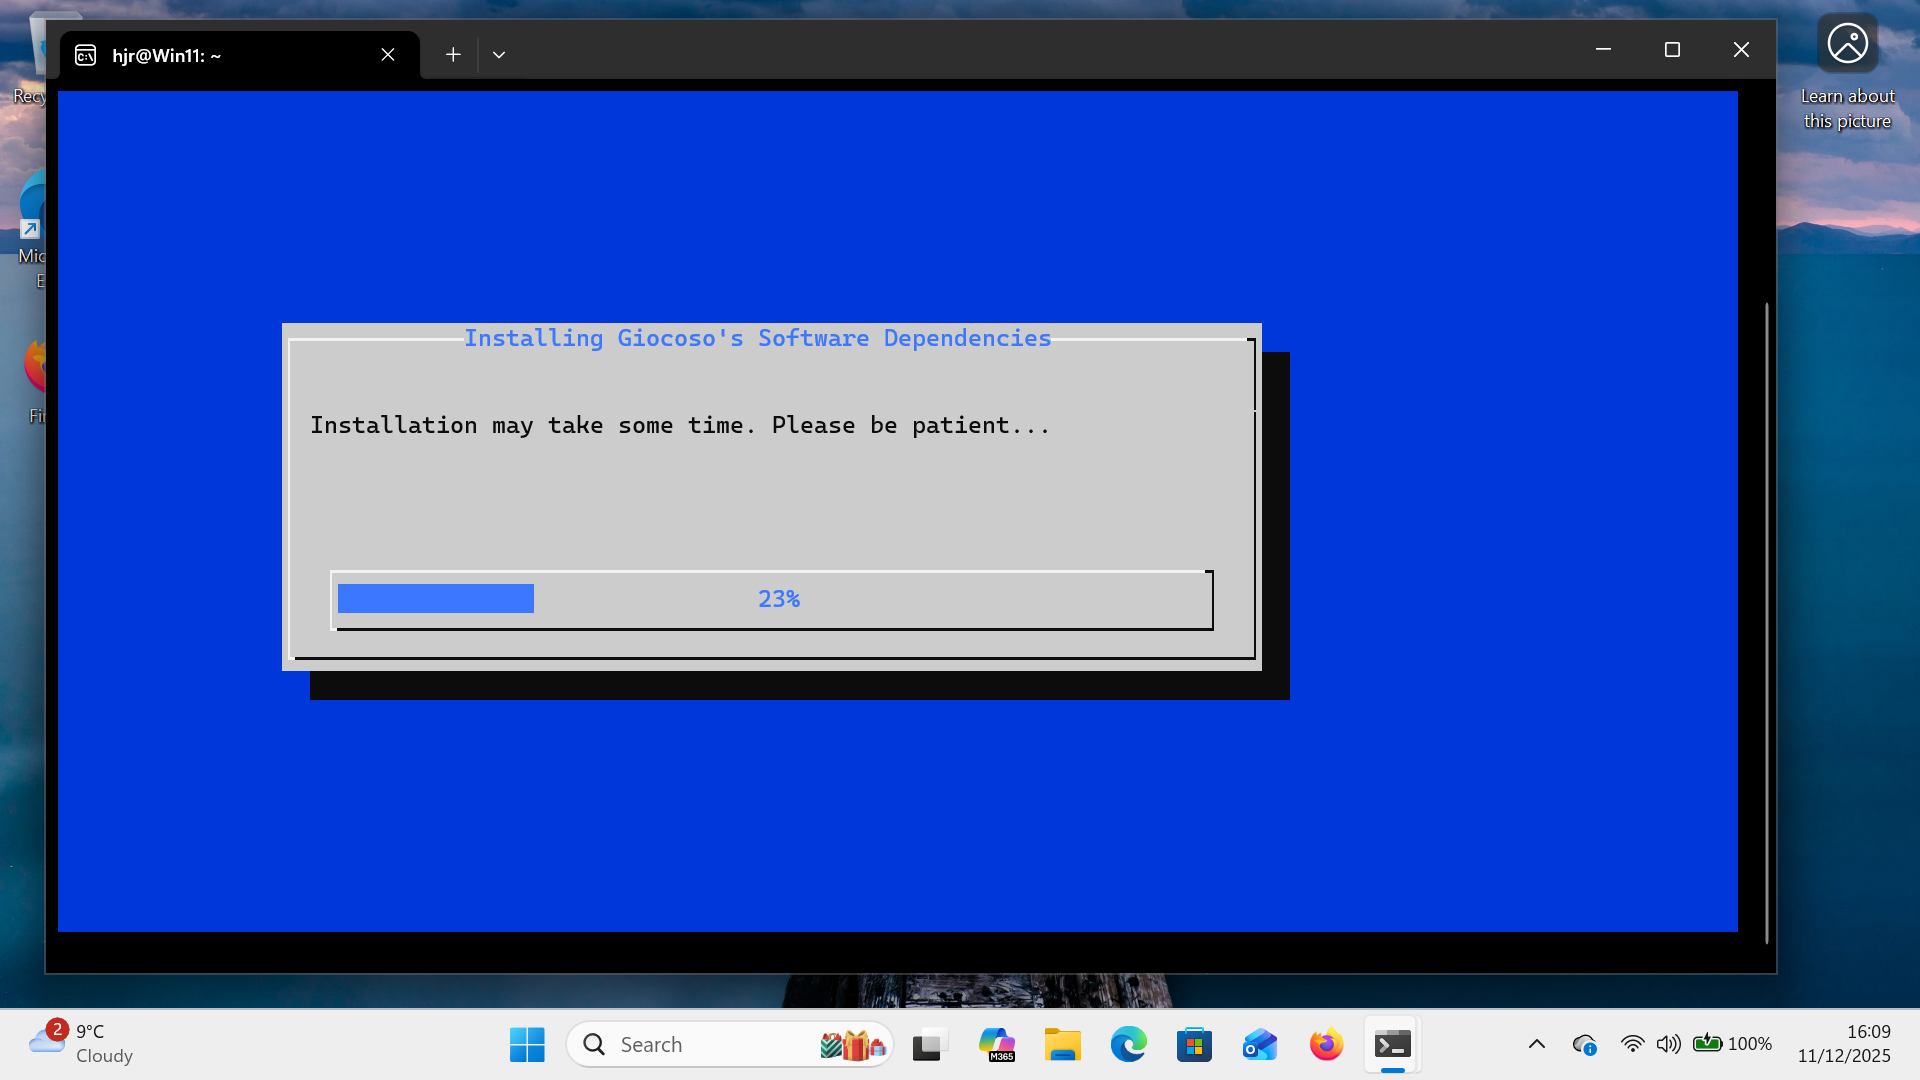
Here, a progress bar will indicate the installer's gradual installation of all the software packages Giocoso needs to work properly. There aren't that many of them and so it shouldn't take more than a couple of minutes for the installer to display this message:
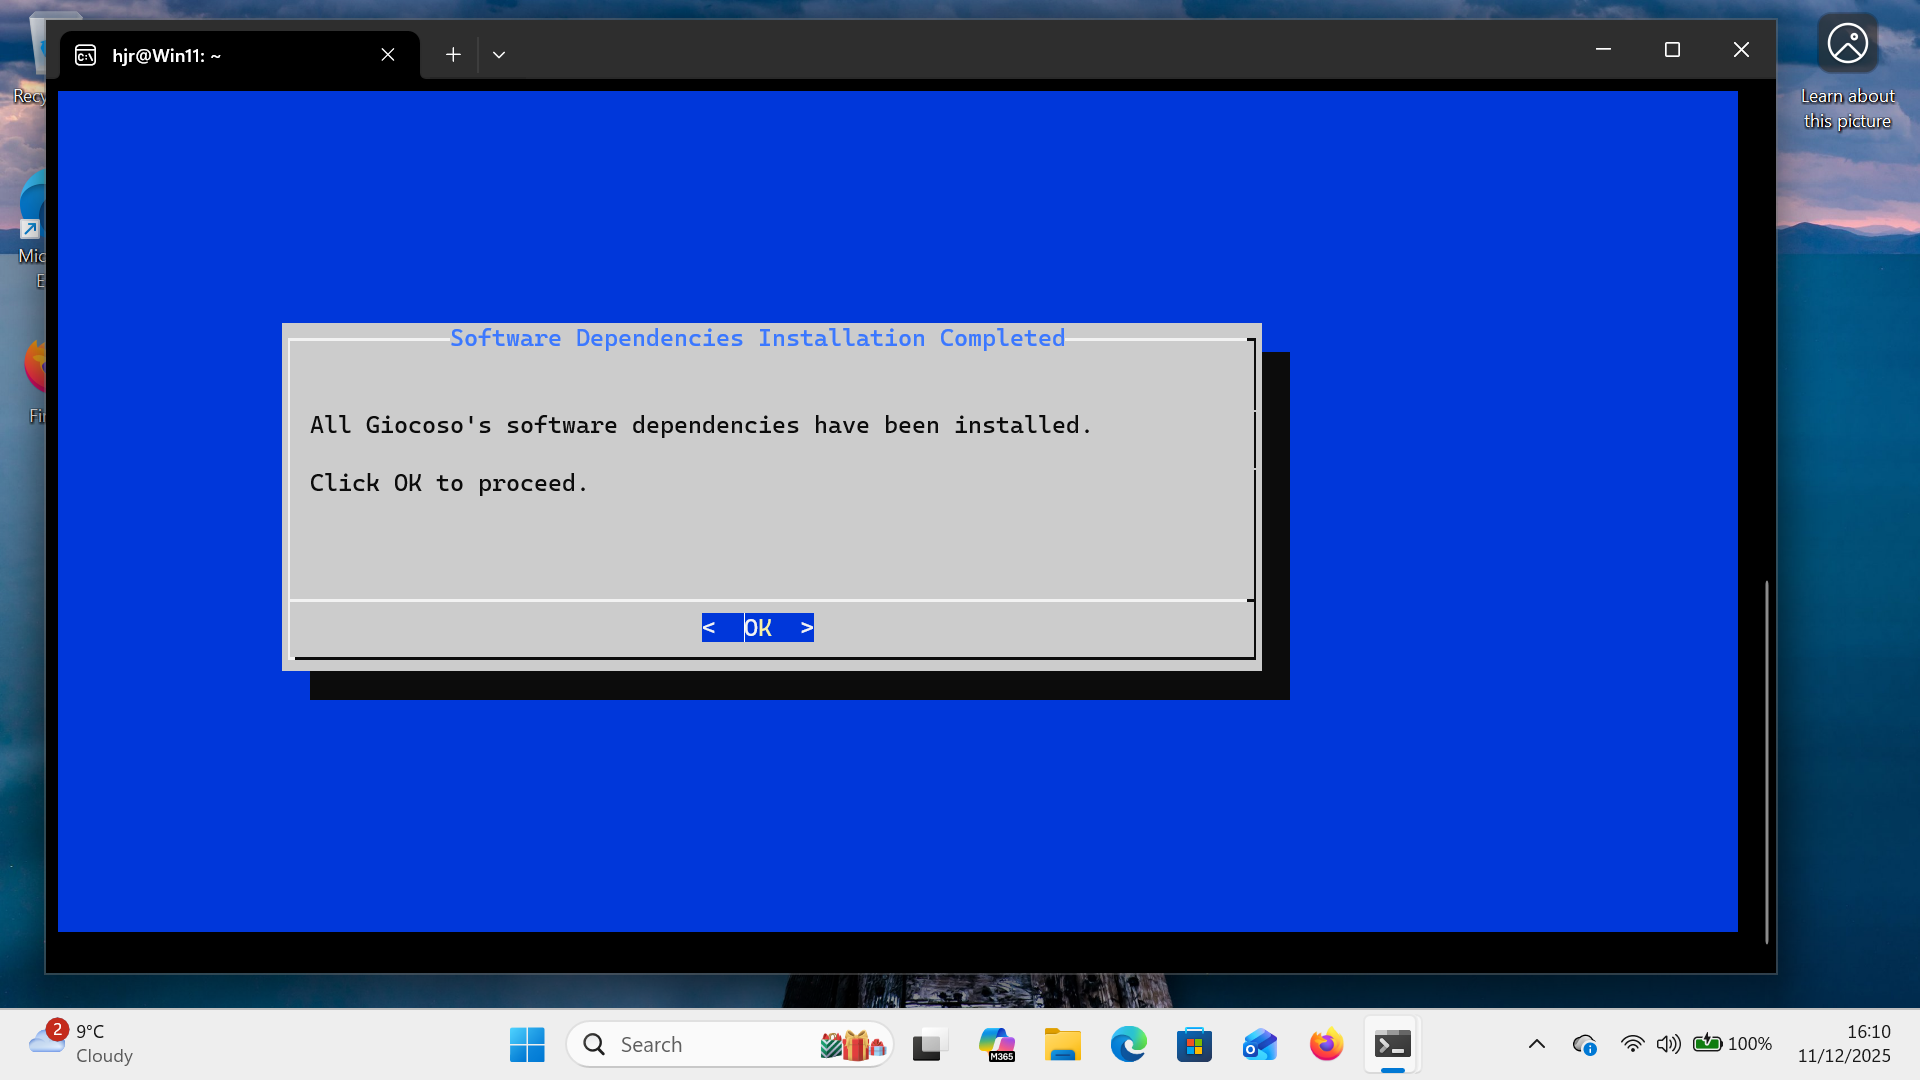
Clicking OK at this point (or just pressing [Enter]) will move the installer onto its second phase, where it begins to pull down the Giocoso software components themselves:

Once that's been done, you'll see this confirmation message:
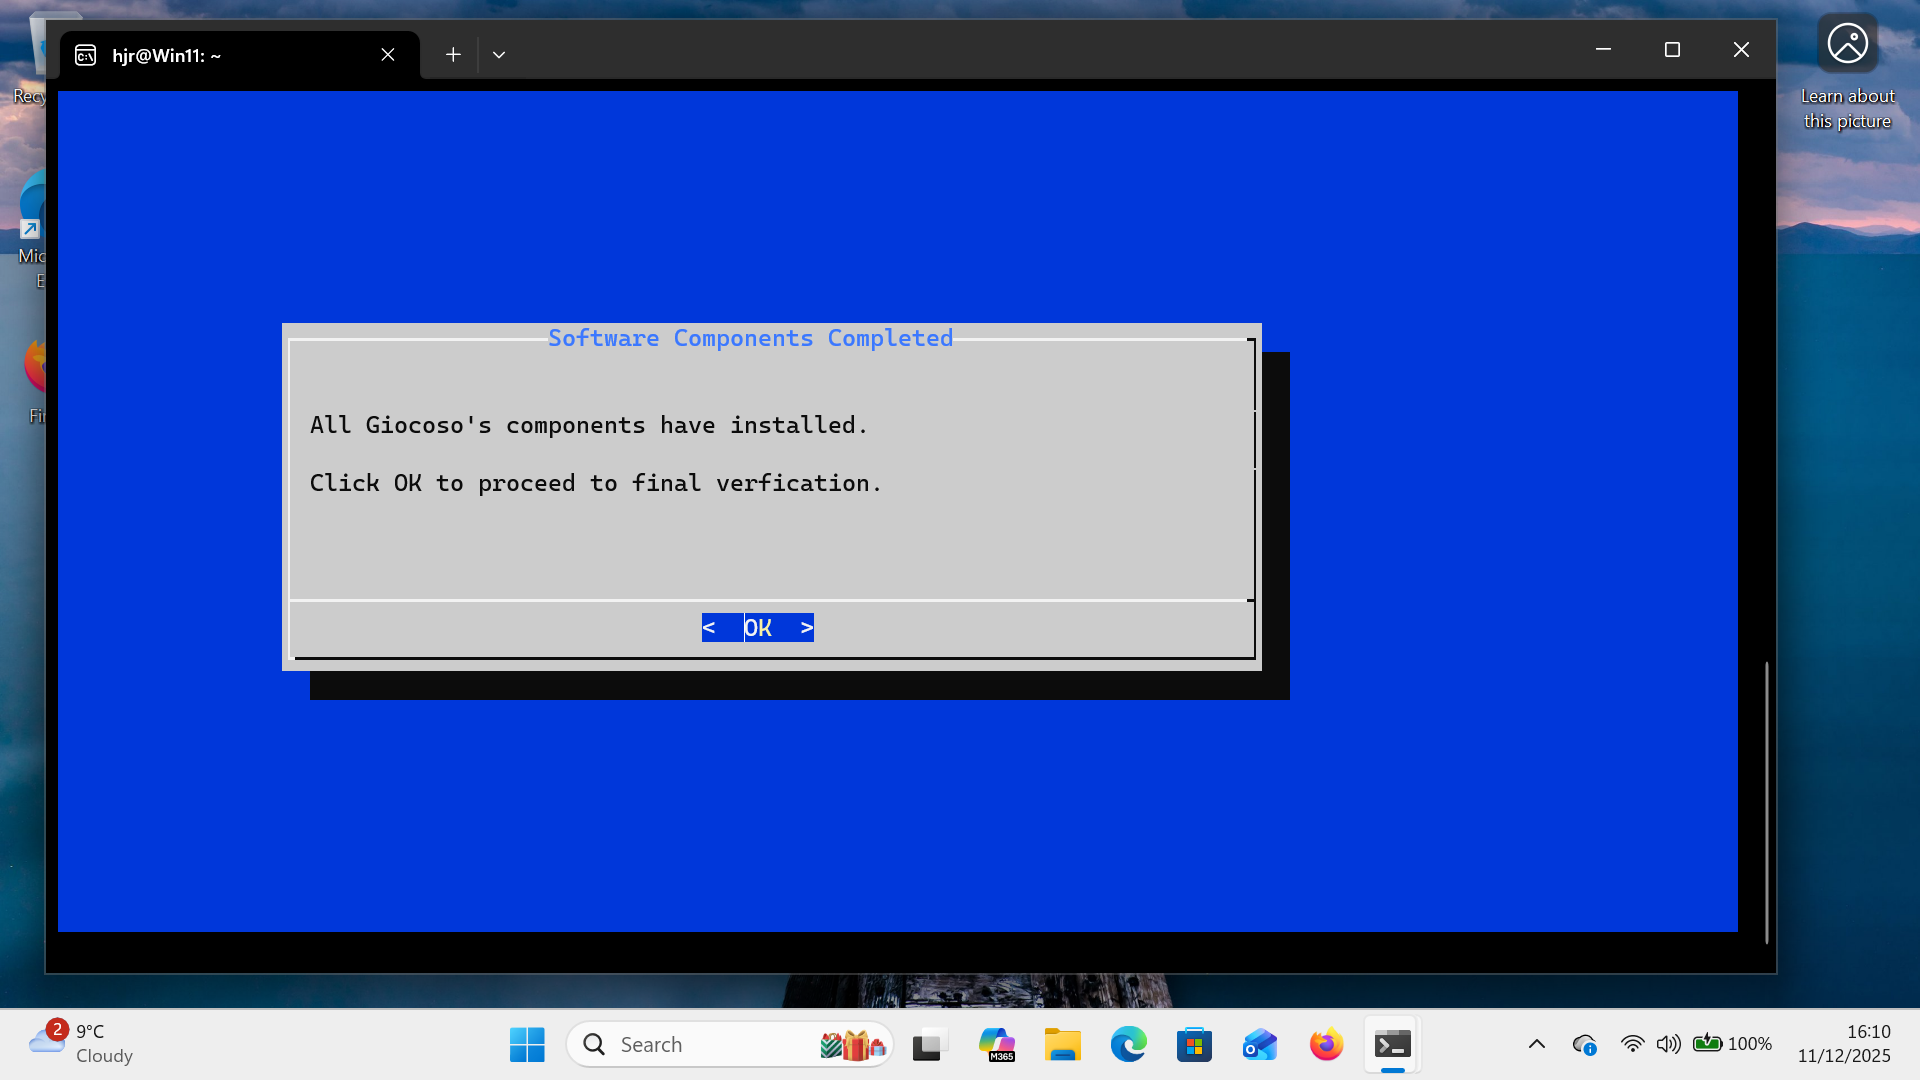
Click OK (or press [Enter]) at this point and the installer will verify that all the Giocoso components came down successfully by computing and comparing the hash values for the files:
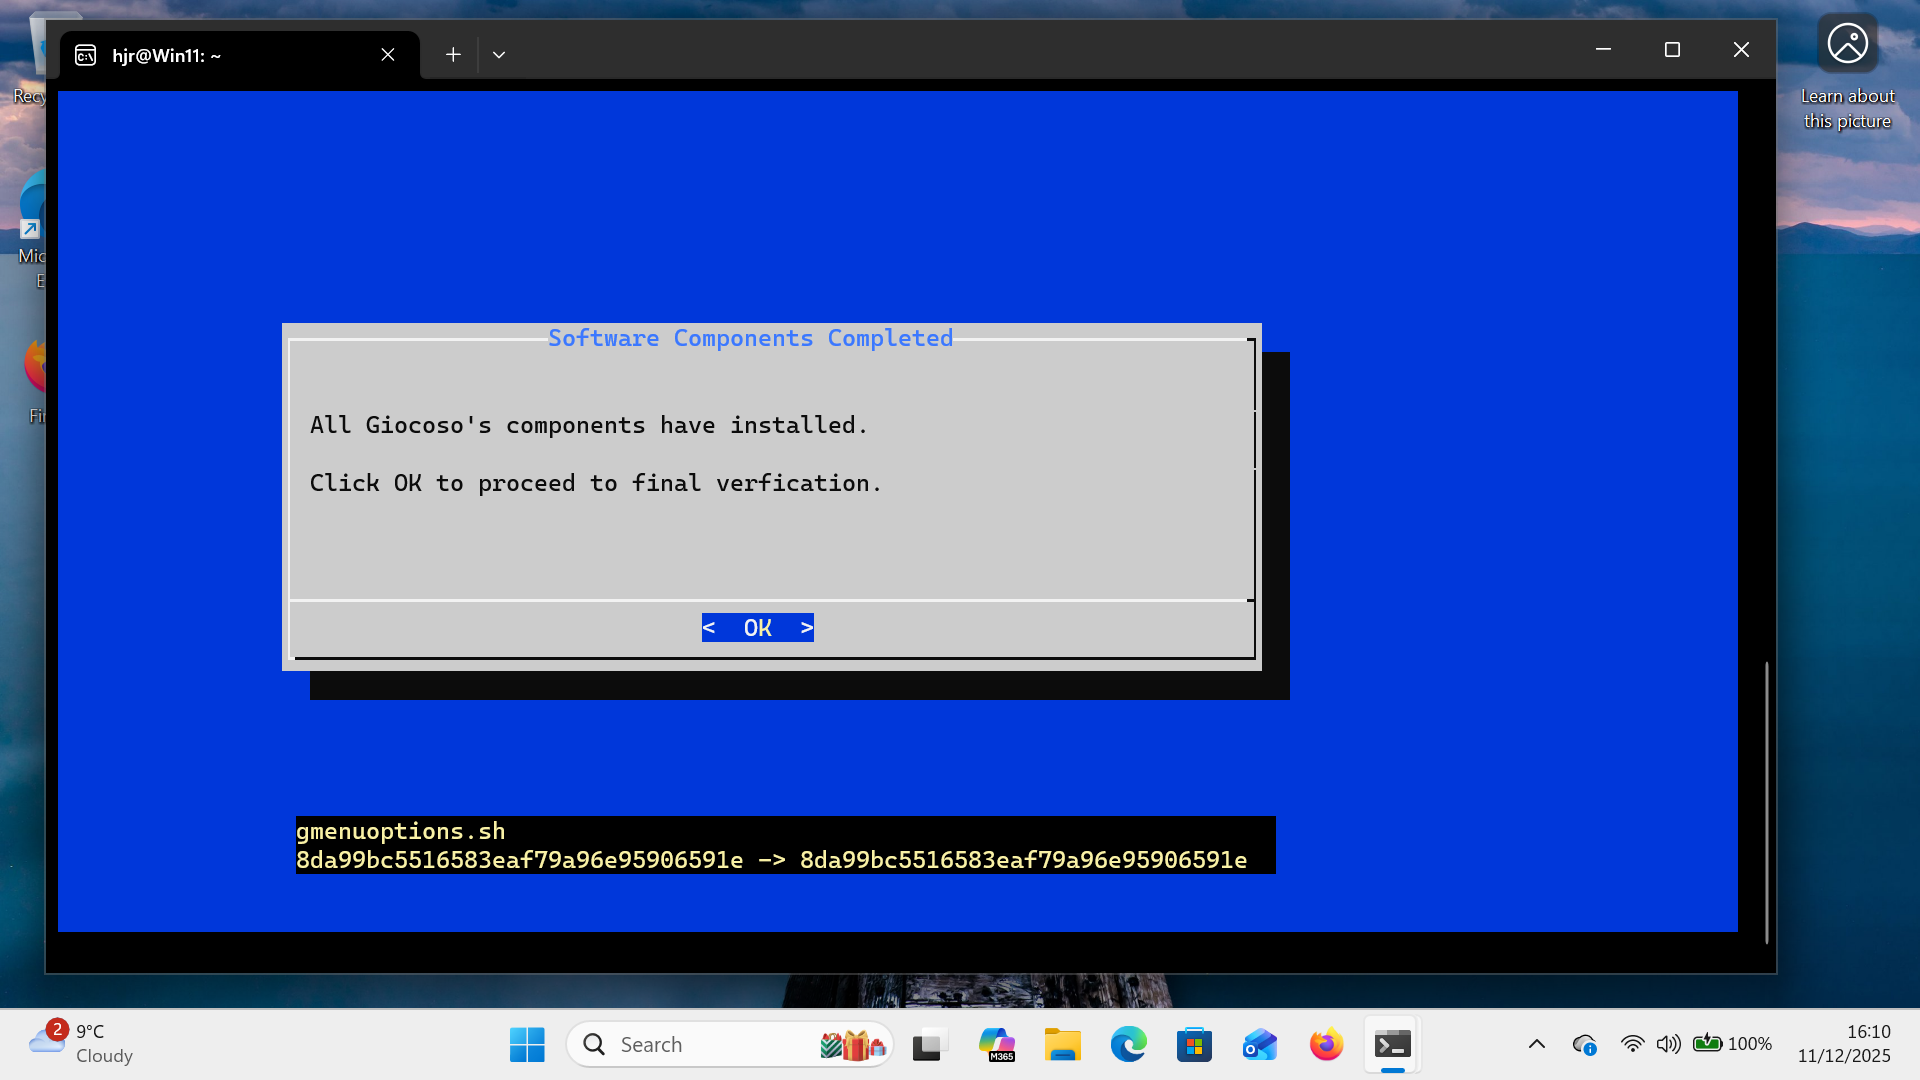
That bunch of gobbledygook is just Giocoso's way of checking that the local file installed on your PC actually matches the one stored on this website's servers, precisely and completely. If they don't, it will be because there was some sort of glitch in the download process -and, accordingly, the installer will attempt to fetch the relevant files one more time. If everything matches, however, then we know the local installation is a good one and you'll thus see this message by way of conclusion:

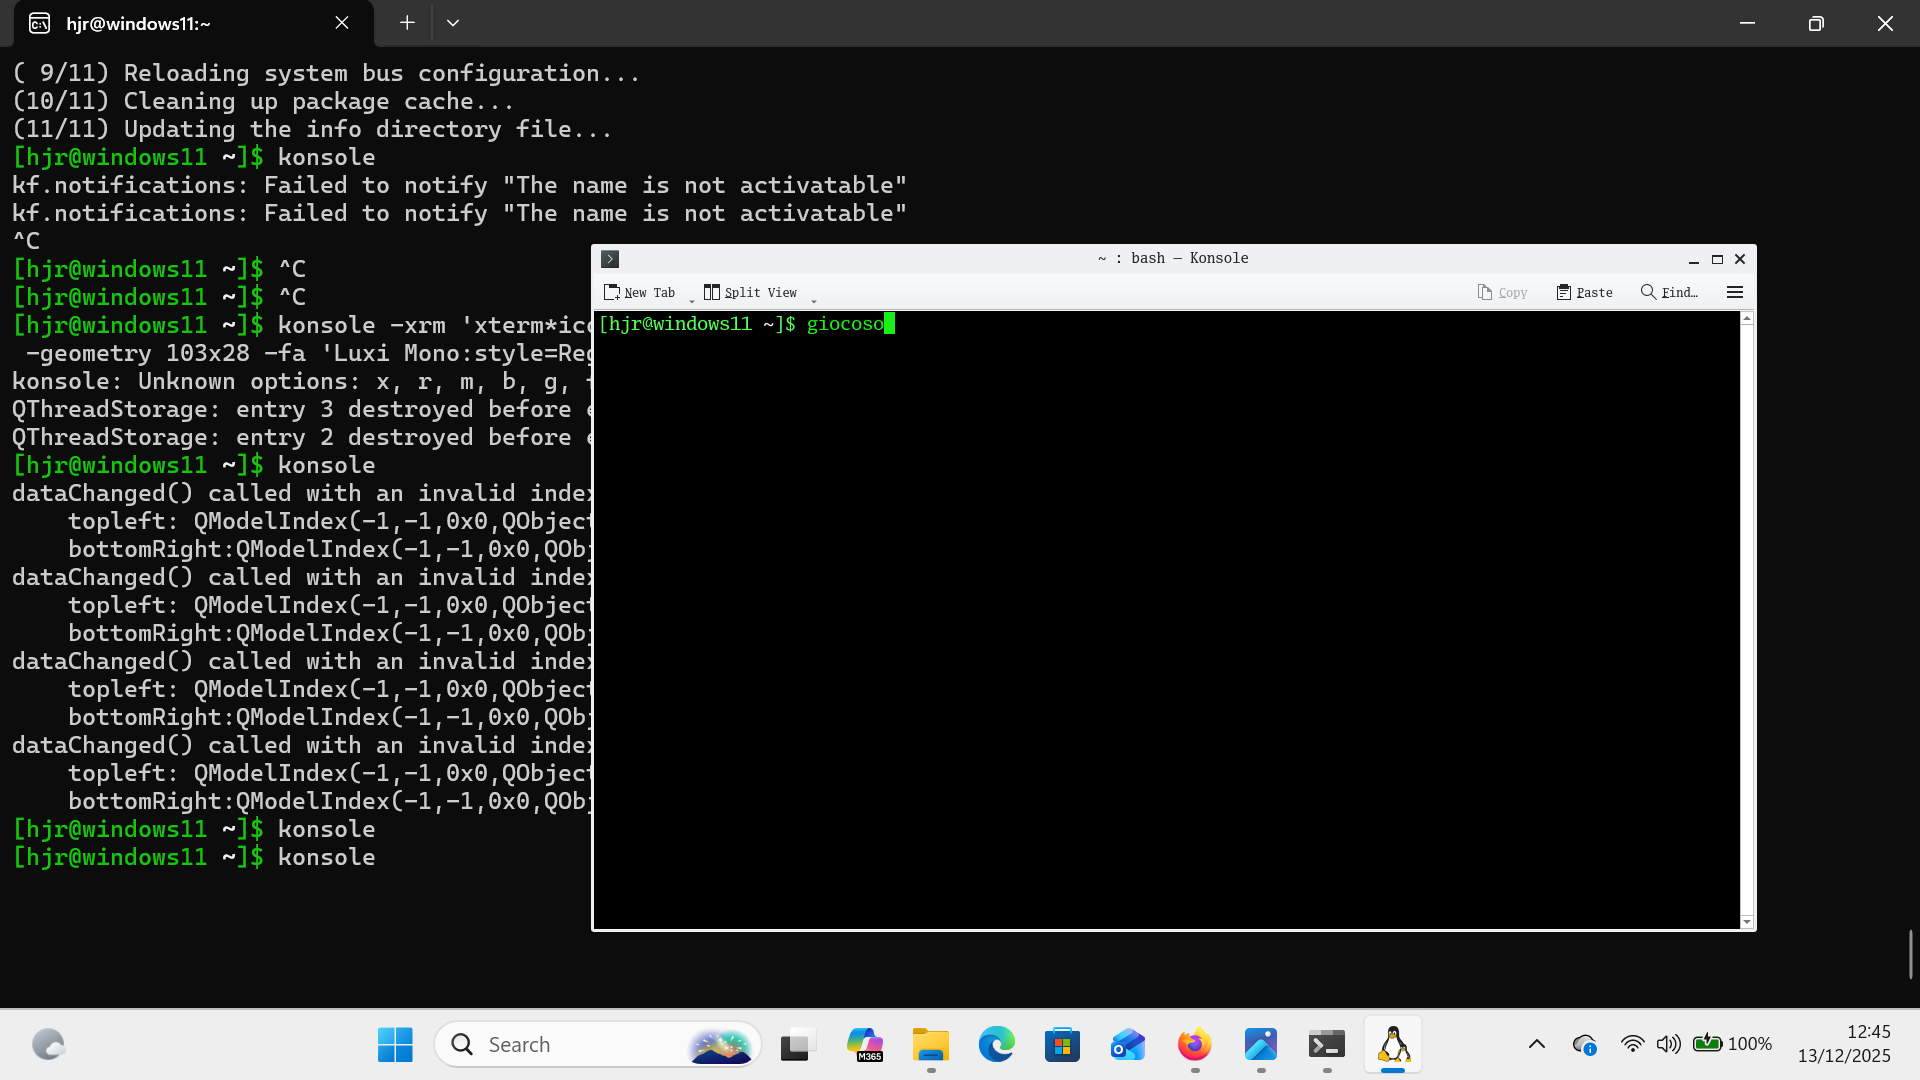
That's the message that tells you that Giocoso has indeed been successfully installed. You can do what the message suggests and close your terminal… or you can run Giocoso immediately, by typing the command:
giocoso
…which will trigger this display:
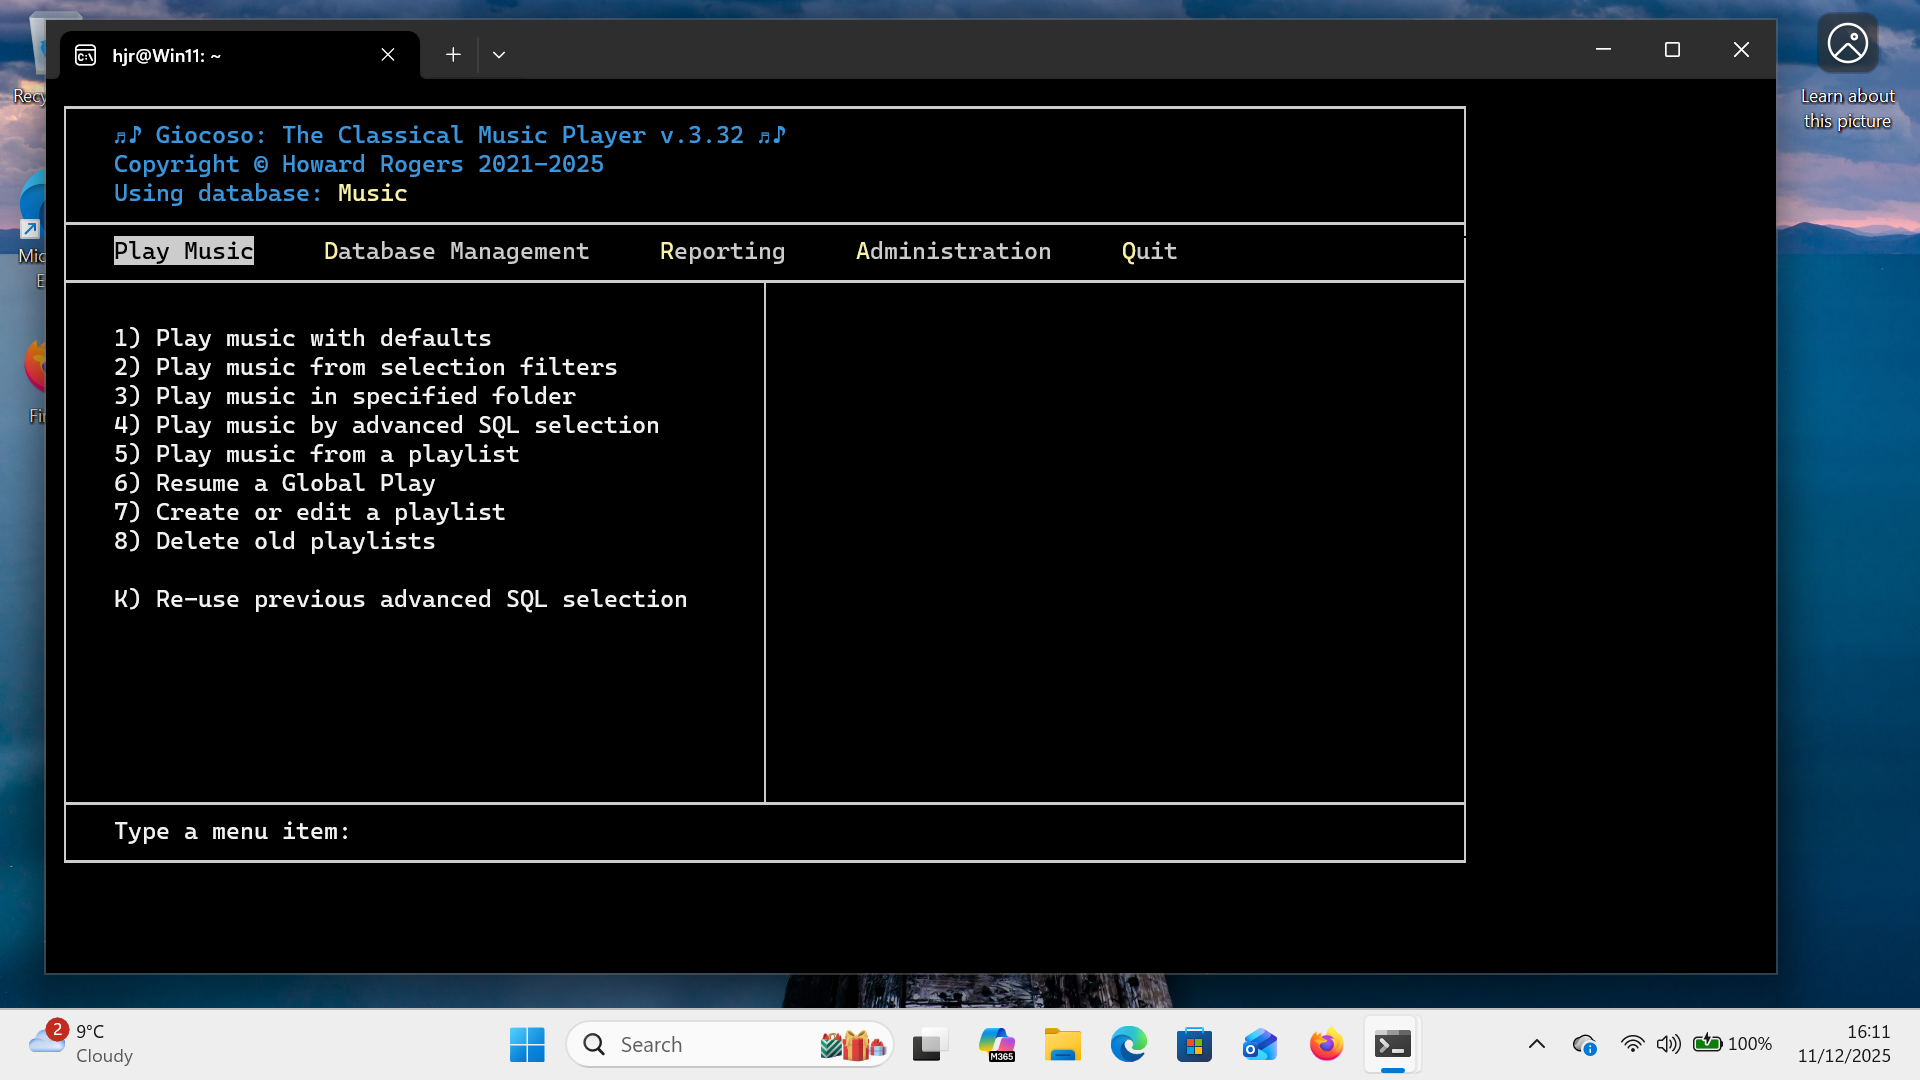
It's a bit bare-bones and you may have to manually fiddle with the size of the terminal window to get everything to display nicely, but Giocoso is, at least, running. Your next steps are to create a new music database; discover a bunch of music files to play; and start playing some music! Taking those steps one at a time therefore…
If you tap 'D' to get to the Database Management menu and then '1' to Create a music database, you'll first be prompted for a name for the new database:
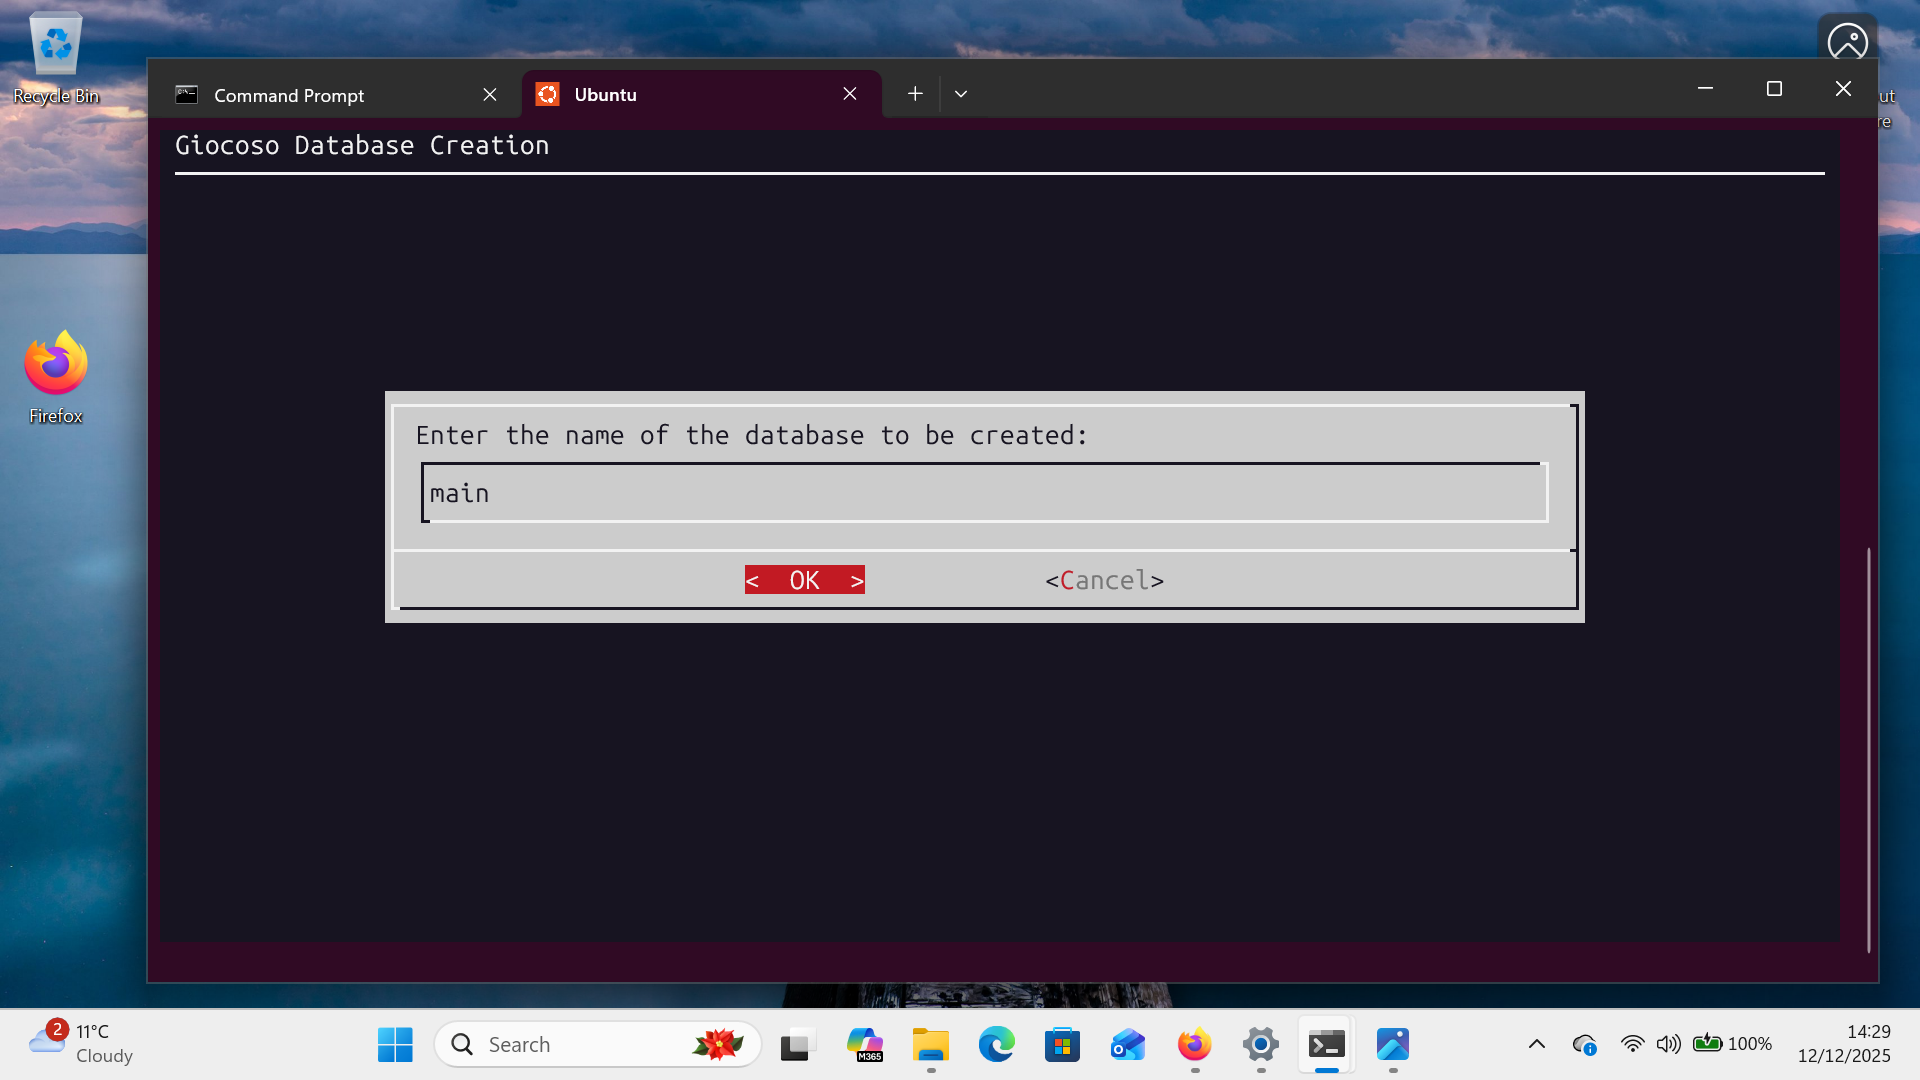
You can supply any name at this point, but I suggest you keep it to a single, short word, as in the screenshot example. Once you submit a name, you'll immediately be prompted to specify where music files can be found on disk:
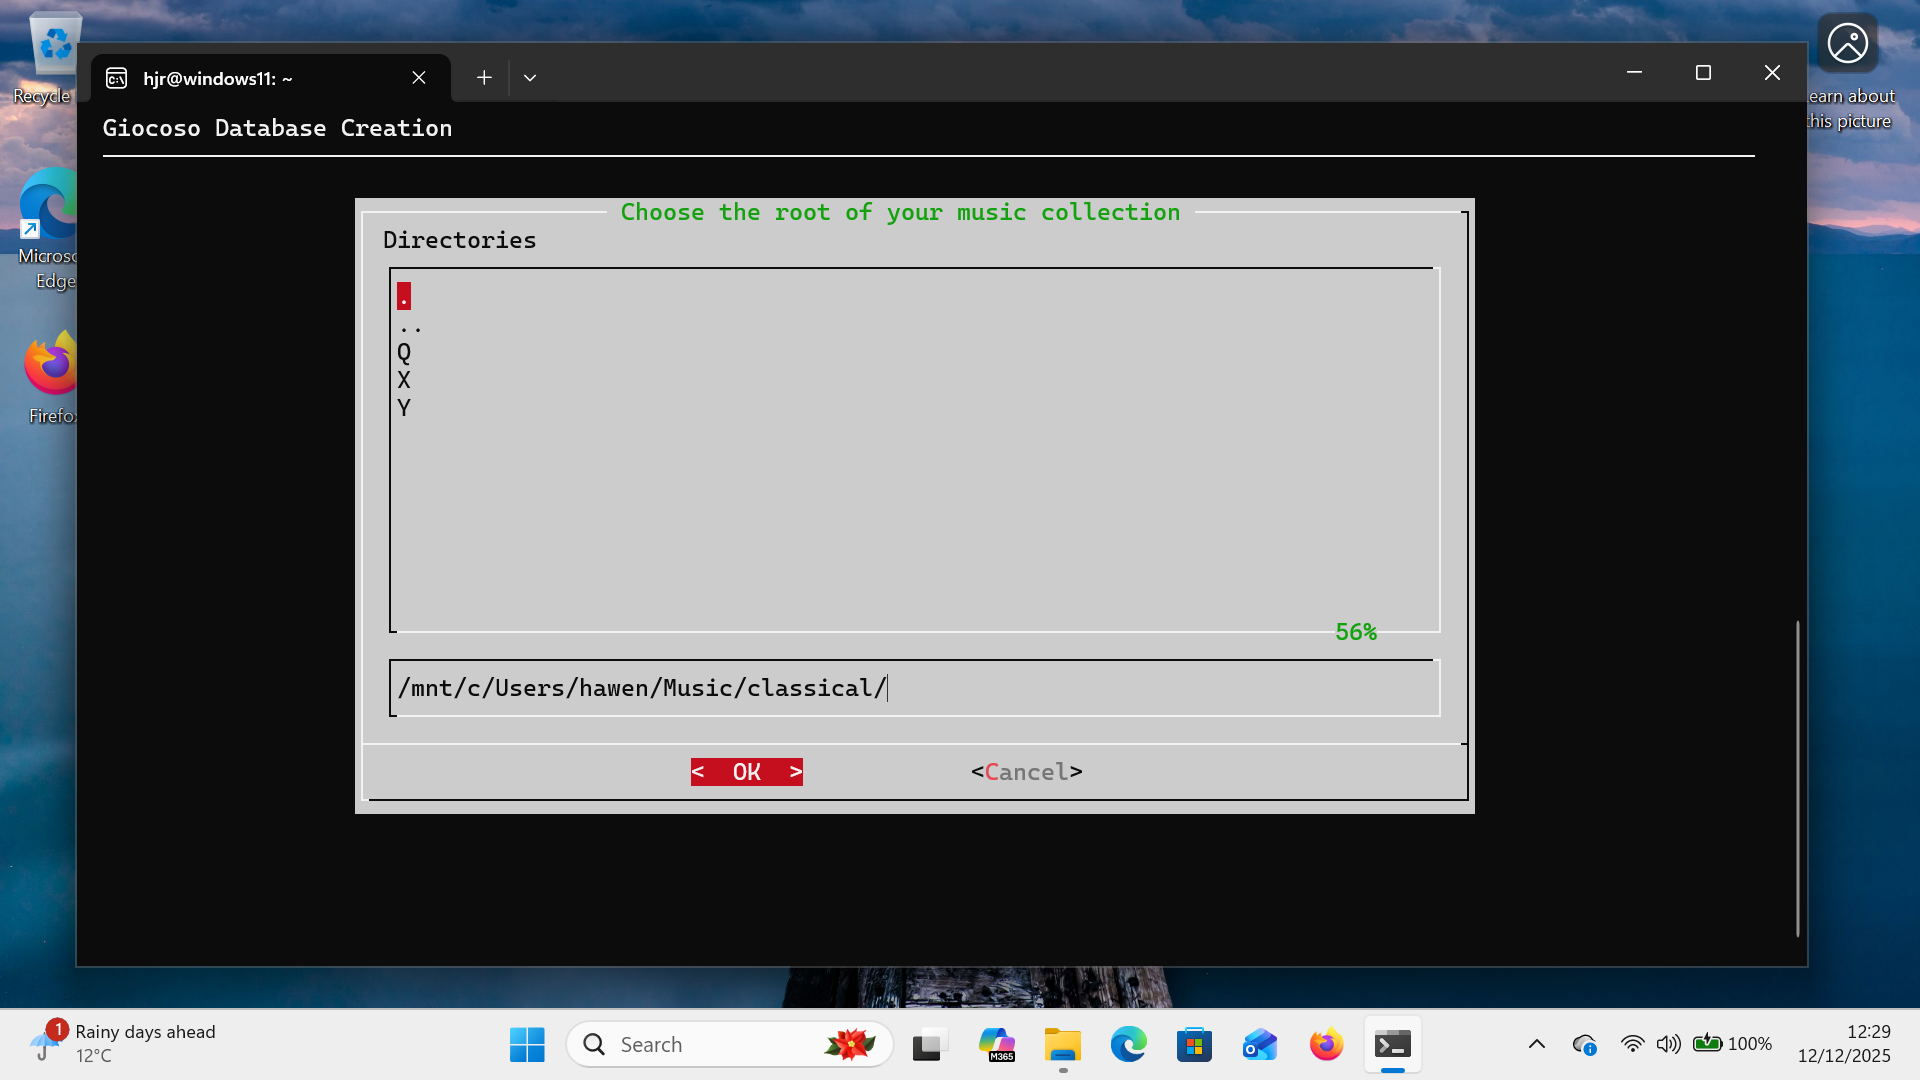
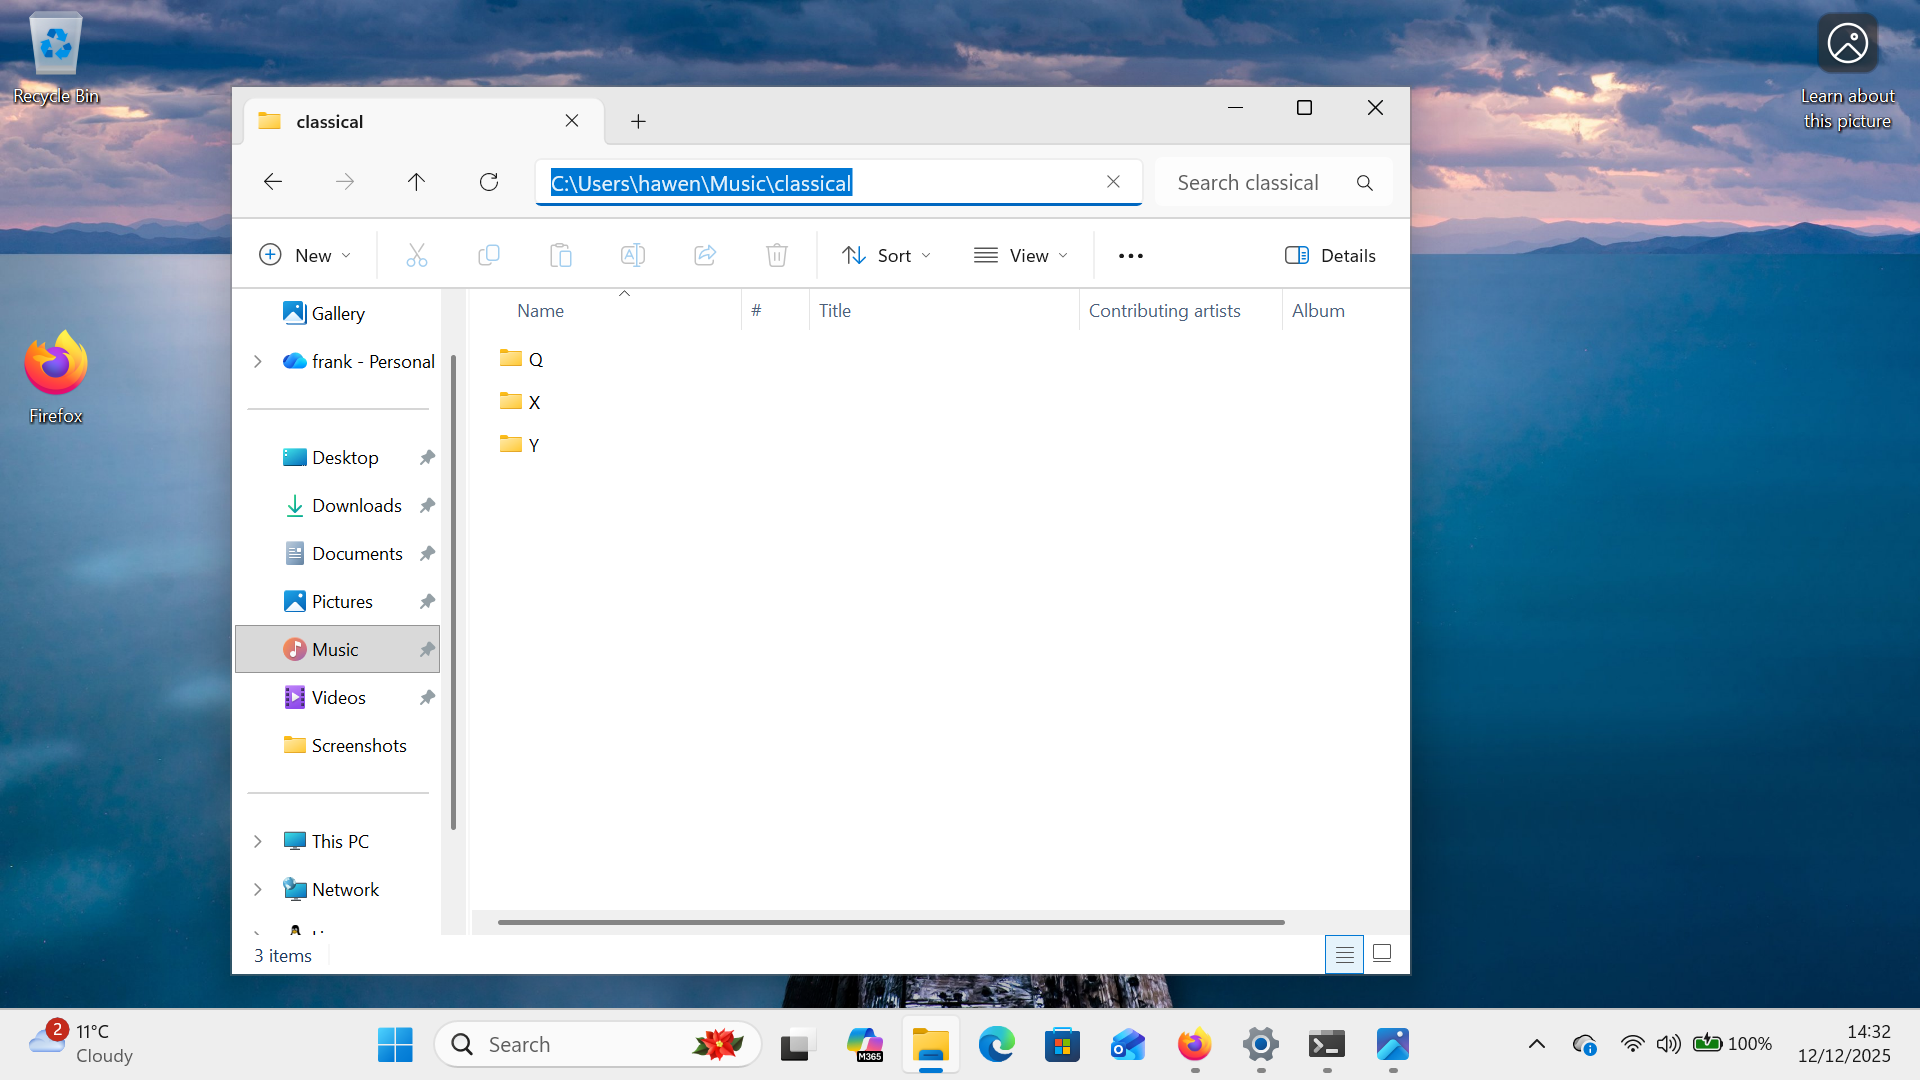
Your job is to navigate your way to wherever your music files are located. Mine happen to be stored in the Windows user's Music folder:
…inside a sub-folder called 'classical' and within additional sub-folders named after the initial letter of each composer's first name. You'll recall from Section 3 above, however, that the Linux environment sees the C: drive at '/mnt/c', so my Windows path needs to be converted to /mnt/c/Users/hawen/Music/classical. I could just type that into the horizontal panel of the Giocoso folder selection screen or I could use the upper panel to navigate to that location: either method works equally well, so long as Giocoso ends up 'inside' the folder, looking at the initial-letter sub-folders, as you see in the above screenshot.
Click [OK] or press [Enter] when the correct path has been supplied and you'll see Giocoso do this:
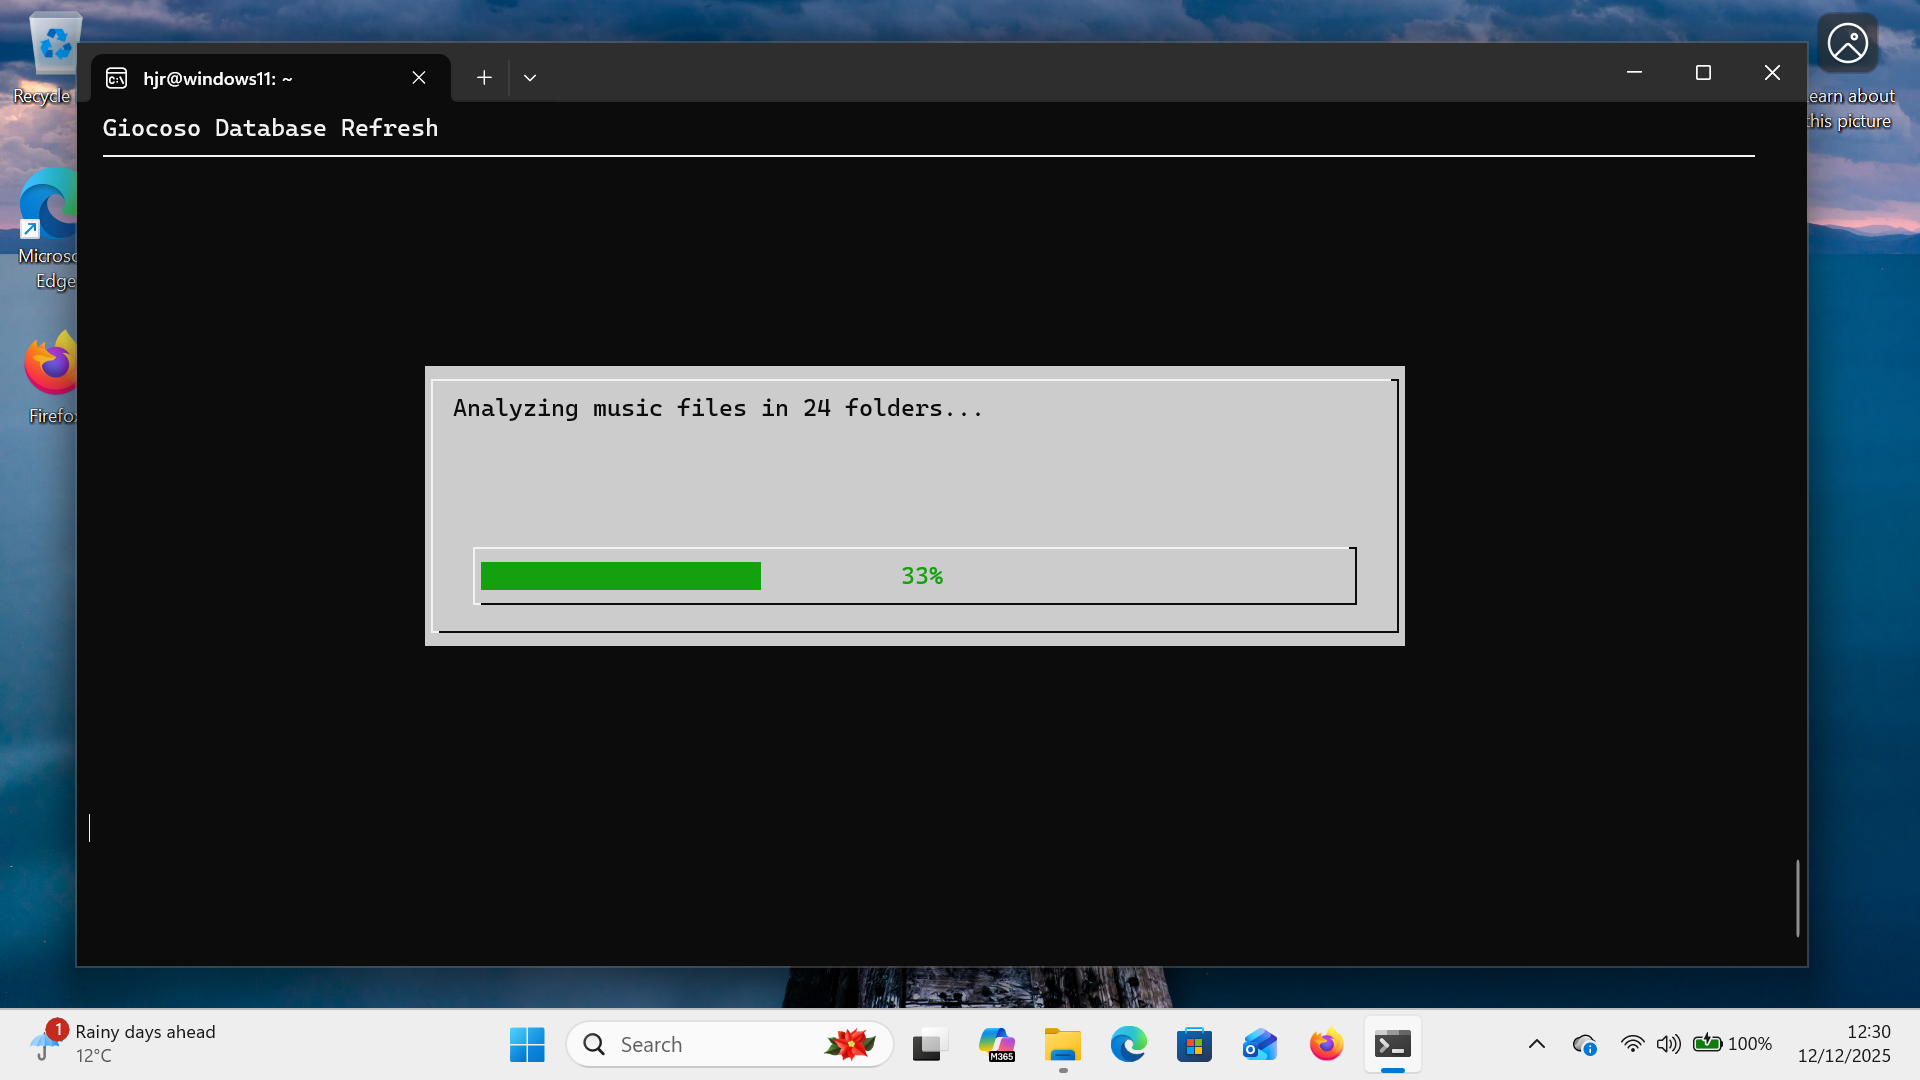
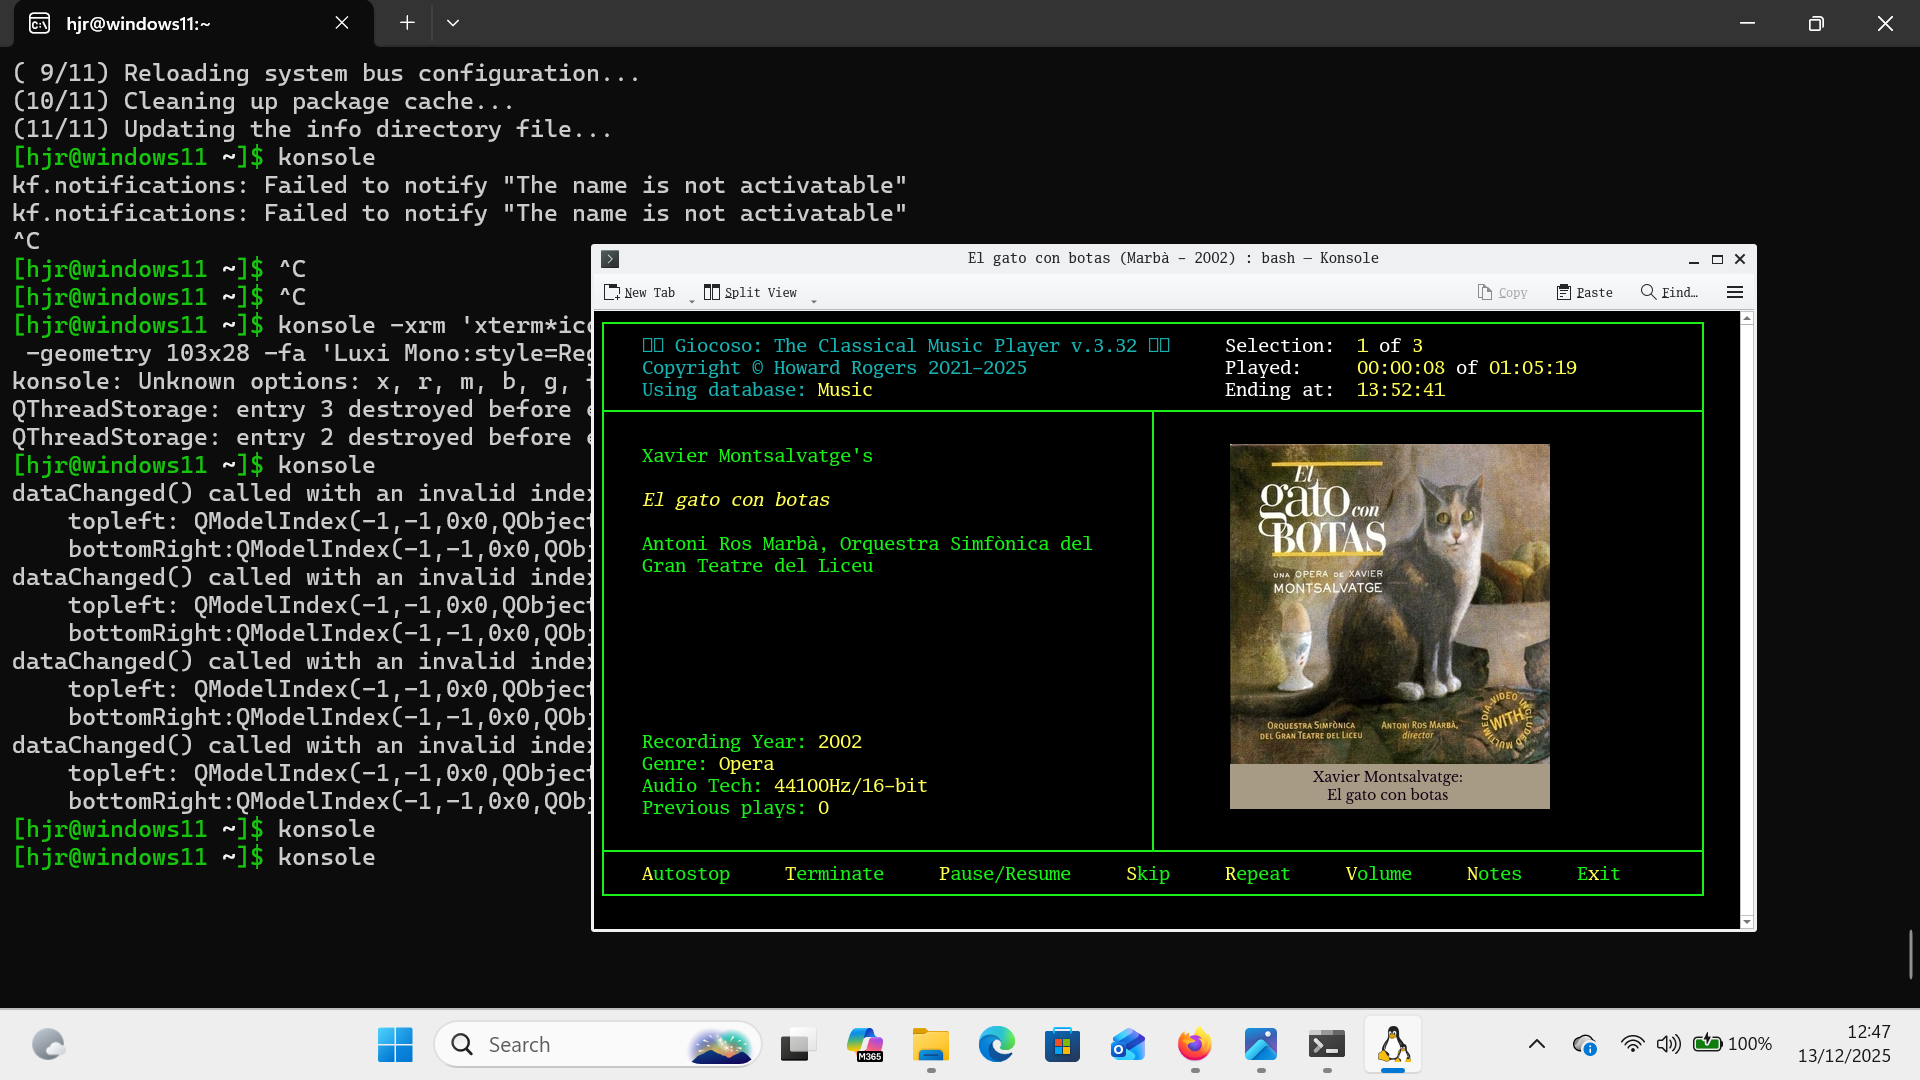
That's Giocoso discovering FLAC files within the path supplied and, for each one, reading the internal metadata contents and populating its database with those details. Once that process completes (which can take many hours if your music collection consists of tens of thousands of FLACs), you can at last play music: just press 'P' to get to the 'Play Music' menu and then tap '1' to select the 'Play music with defaults' option: Giocoso will randomly select something to play from the database of music you just created and the result should look like this:

You'll note that Ubuntu-in-Windows has zero difficulty displaying the album art for a FLAC …and you'll have to take my word for it that my laptop's speakers were full of music, sounding great, as intended! Giocoso on Windows (via Ubuntu) thus works perfectly.
5.0 Other Supported Distros
If you'd prefer not to use Ubuntu, you have various other distros that can run under Windows without difficulty and which are officially supported by Microsoft. You just open a command prompt with administrator privileges and issue commands such as:
wsl --install fedora
wsl --install debian
or
wsl --install archlinux
As described earlier, each of these commands will trigger the download and installation of the necessary Linux environment files. You'll be prompted to create a new Linux user/password combo, as described above for the Ubuntu environment. You should then perform a full system update, using your distro's standard package management features. For Fedora, that would be:
sudo dnf update
…whereas for Debian, it's the slightly more convoluted:
sudo apt update && sudo apt upgrade
You then just obtain the Giocoso installer script… but this is where things can get a bit interesting!
On Fedora, for example, you'll issue the command:
wget software.bbritten.com/gioinst
…without any drama at all, but when you try and run that script with the command bash gioinst this will happen:
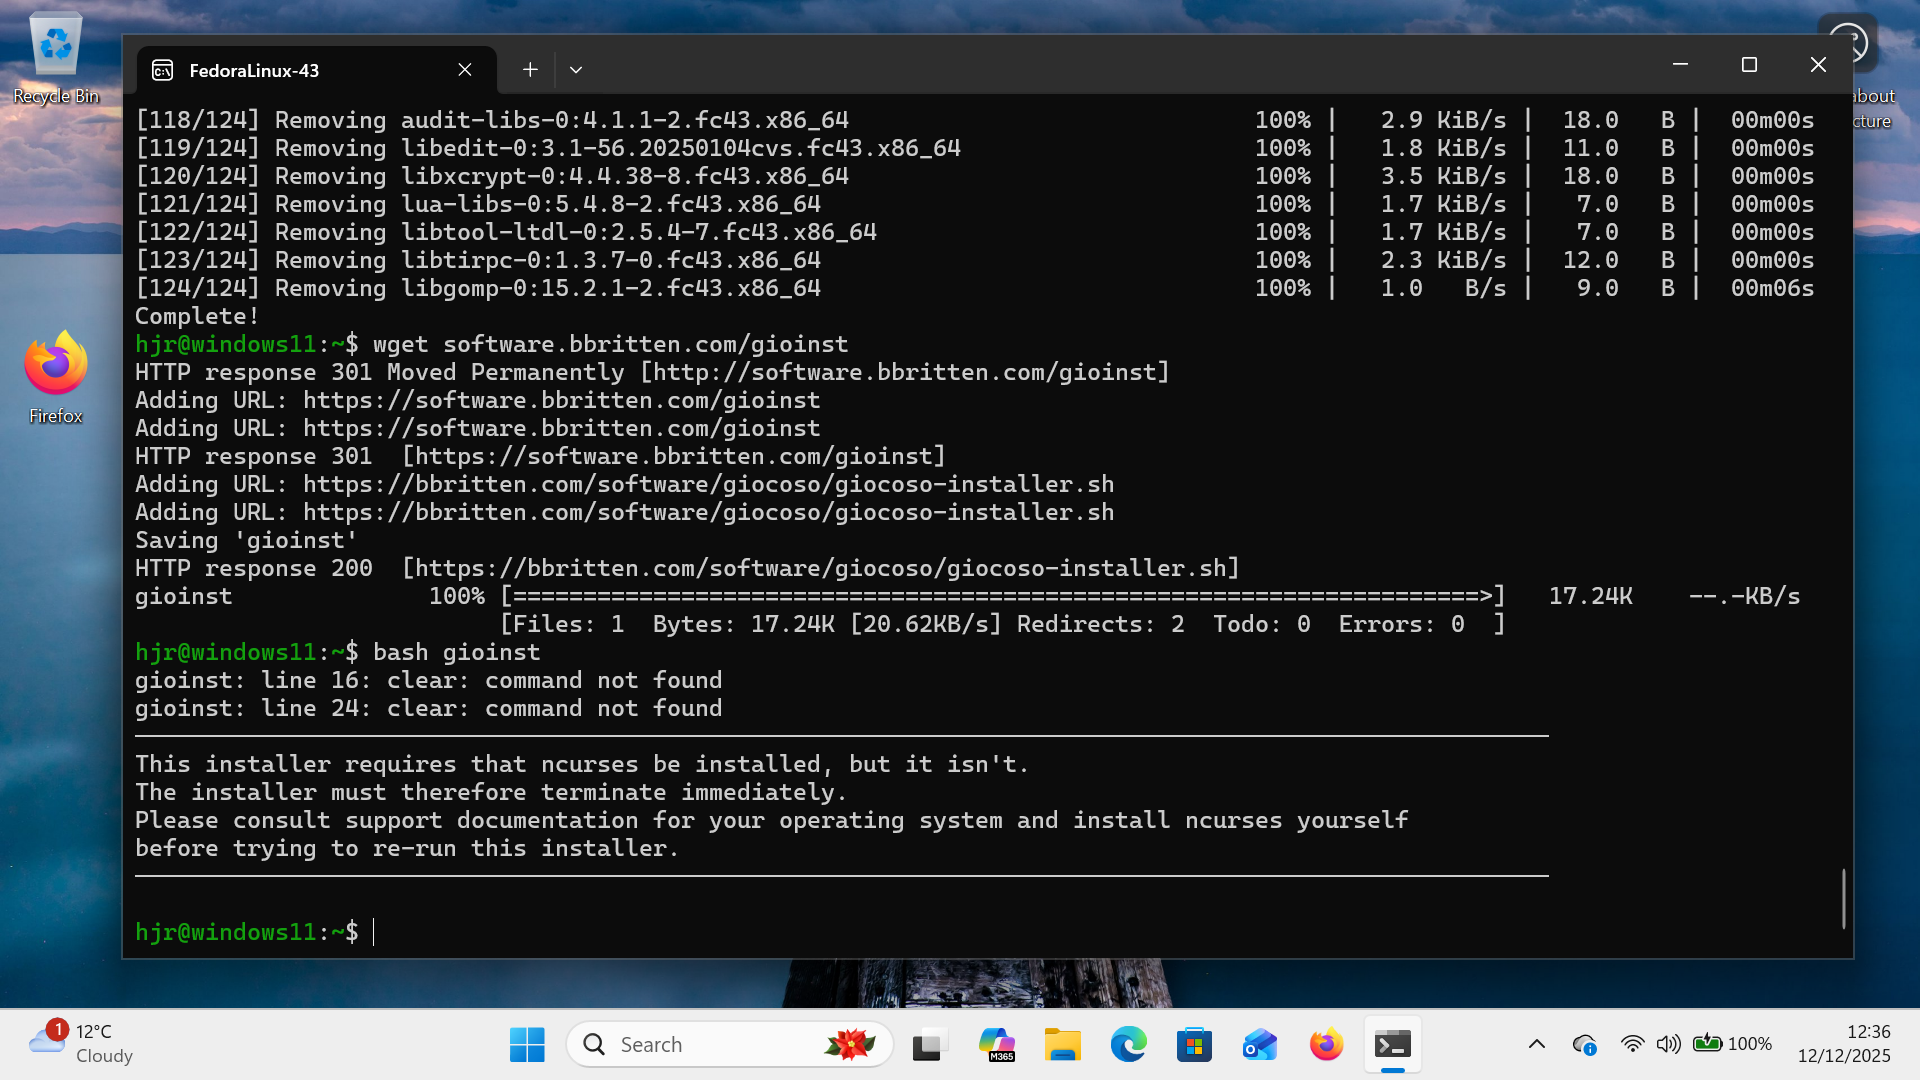
That's the Giocoso installer noticing that ncurses is not a standard part of the Fedora-on-Windows installation. Without it, the installer cannot proceed. You'll therefore need to install it manually:
sudo dnf install ncurses
…and then try the bash gioinst command once more: this time, the installer will function entirely as documented above. You can then launch Giocoso, create a music database, point it to your FLAC files, and start playing music as previously described: music playback and display of album artwork both work perfectly.
Using Debian poses a different set of issues, however:
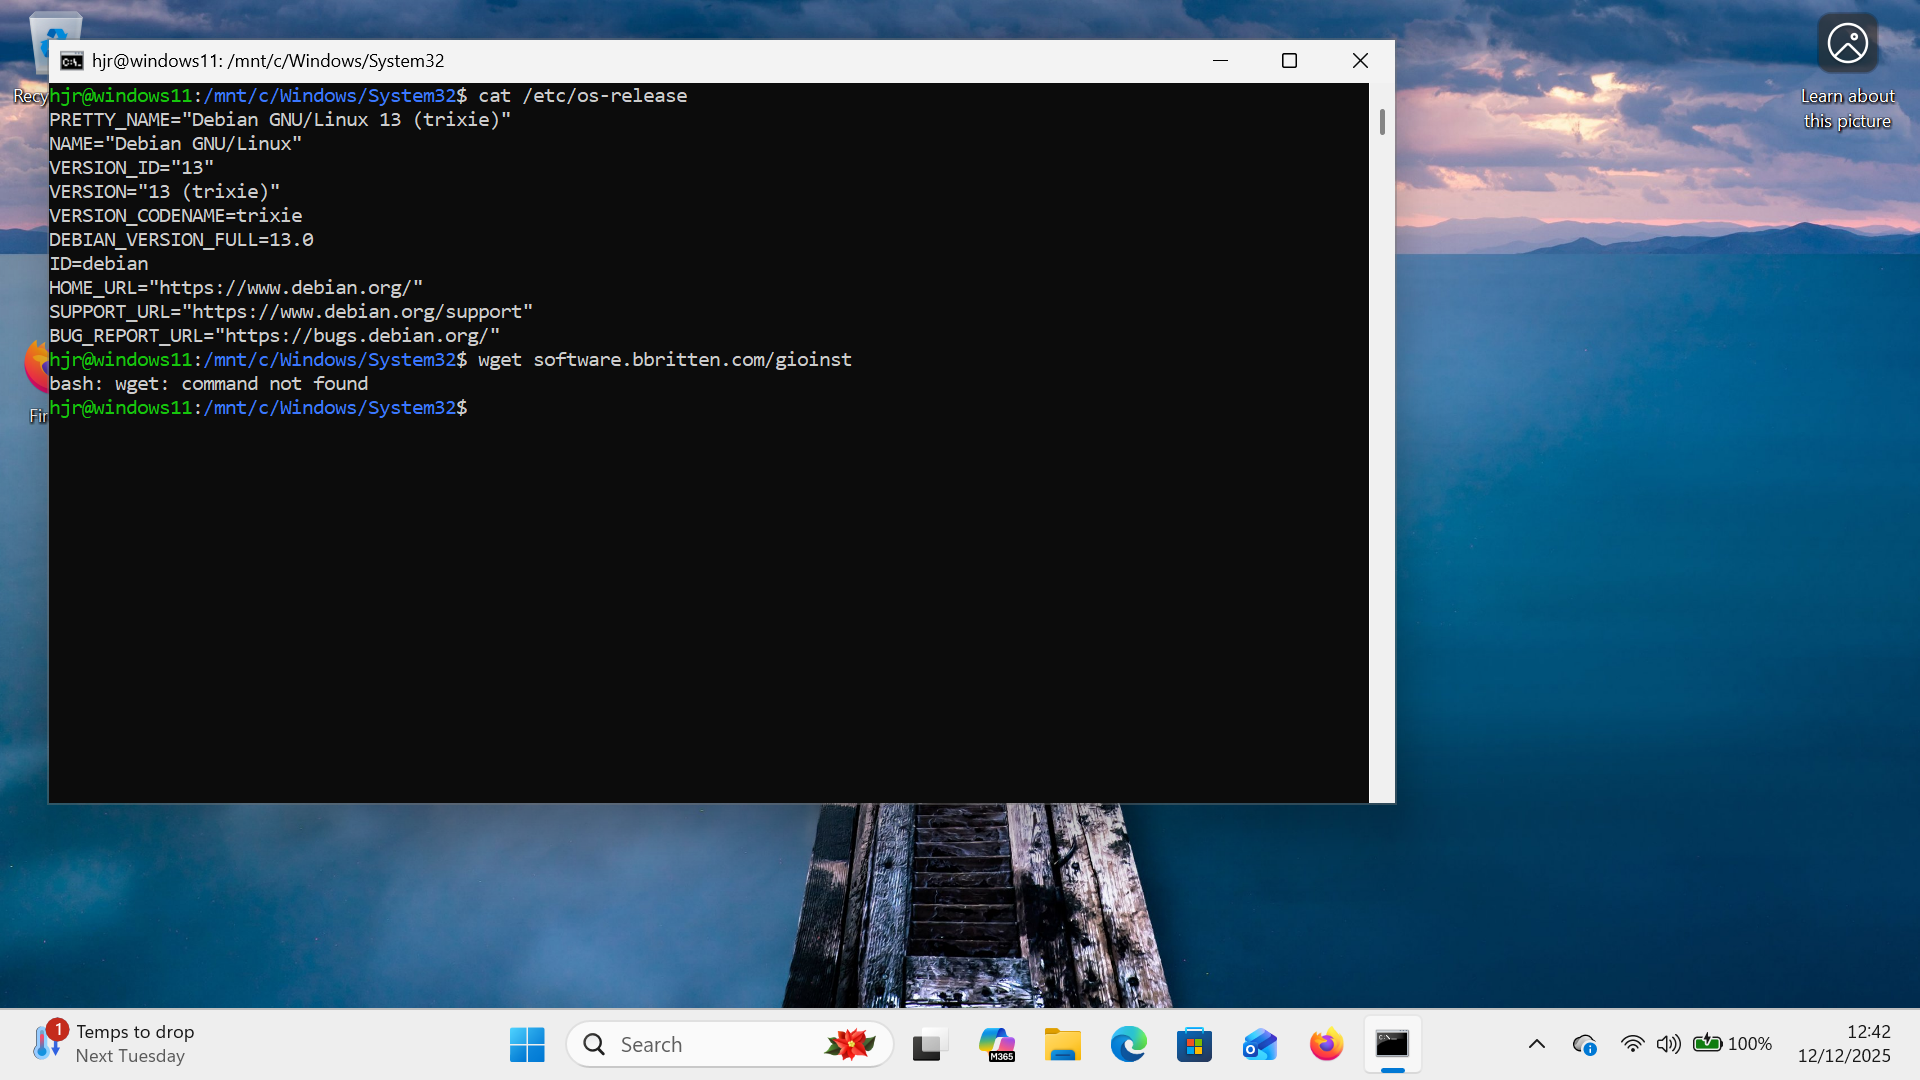
Here you'll see me in my shiny new and updated Debian environment trying to download the Giocoso installer script with a wget command: unfortunately, wget is not a standard part of the Debian installation, so the attempt to download fails. It's therefore necessary to manually download the utility with the command:
sudo apt install wget
Once that's installed, the bash gioinst command will work perfectly: music sounds correctly and album art will be displayed correctly.
The Arch distro is rather different than anything discussed hitherto! It's extremely minimal, to the point that there isn't even a prompt to create a non-root user. You probably should create such a user, but that's outside of scope for this article. For my purposes, the point is that you install and run Giocoso as root… but even that is not straightforward. For a start, you need to manually update, then install wget and sudo before you can successfully run the Giocoso installer: pacman -Syu updates; pacman -S wget sudo installs the necessary prerequisites. After that, wget software.bbritten.com/gioinst and bash gioinst will work correctly. Unfortunately, after you've created a database and discovered FLAC music files, though they will play correctly, album art will not display correctly, unless you configure Giocoso to use a pop-out window to do so. I'll discuss a possible workaround for this below, when I discuss using non-Microsoft-supported distros.
Apart from the need to install either ncurses or wget manually before the Giocoso installer can be launched successfully, therefore, there's little difference between running Giocoso running on Windows via Ubuntu, Debian or Fedora. The choice of distro to host the Giocoso installation is therefore largely immaterial. Arch is suit generis however… and I can't honestly recommend trying to run Giocoso on that distro within Windows.
6.0 Non-Supported Distros
I'll conclude this description of getting Giocoso running under Windows by mentioning that although there aren't many distros that are officially supported by Microsoft for running in a WSL2 environment, WSL2 can actually run pretty much any Linux distro, with varying degrees of awkwardness. Sometimes, distros provide specially-packaged versions of their distro to make life fairly easy (think: Devuan or Manjaro). For other distros, you'd have to construct your own converted distro 'bundle' and import it to the WSL environment: I won't document that approach here, but you essentially have to extract the root file system from the standard ISO and turn it into a tarball, which can then be imported into WSL. There are guides on how to do this elsewhere on the Internet.
For now, I'll document how I got Manjaro to run under Windows, and sort-of got Giocoso running on that!
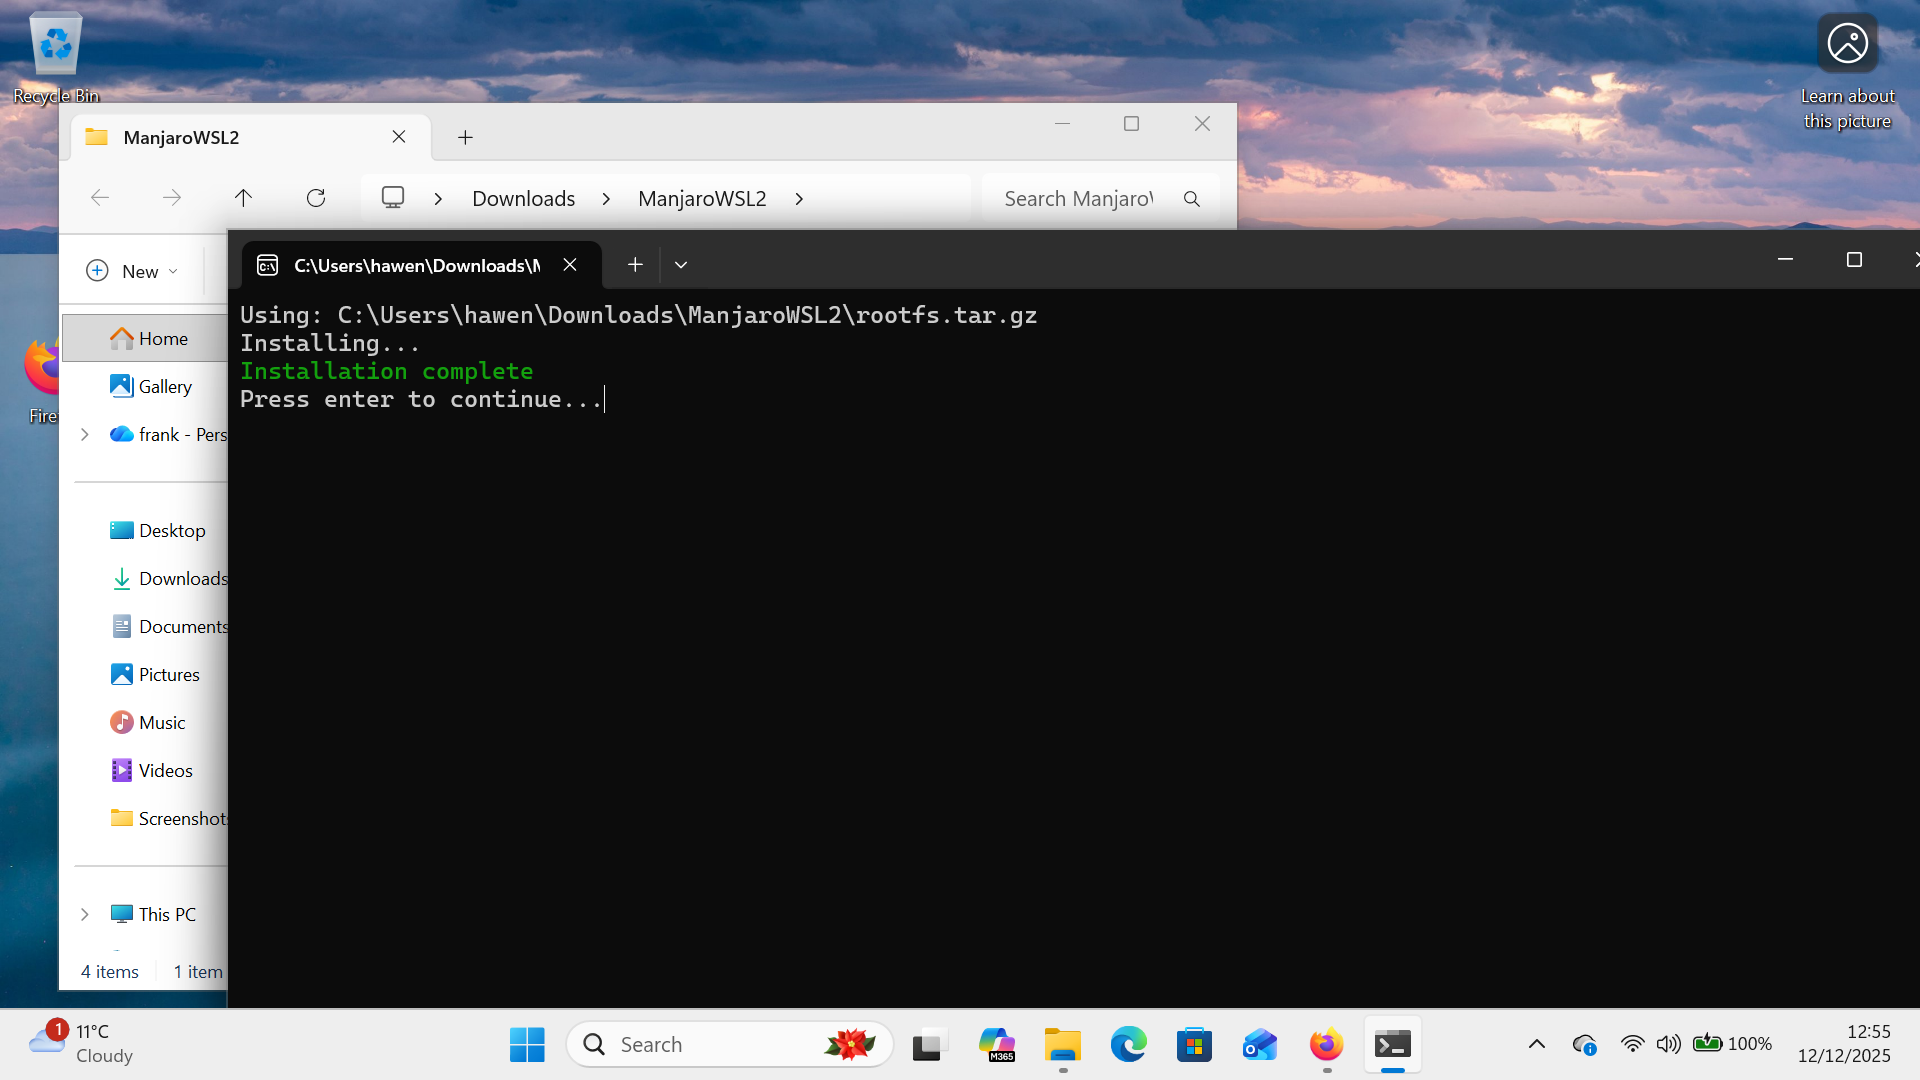
First, obtain your Manjaro-on-WSL software: I've already pointed you to the website I used for that: at the time of writing, the latest release was called “ManjaroWSL2-20251201” and within that section of the site I downloaded the ManjaroWSL2.zip file for that release. Once downloaded, I right-clicked the file and selected the 'Extract All…' menu option. That creates a “ManjaroWSL2” folder, within which you'll find an item called, simply, “Manjaro”. It should be labelled as an 'Application' in one of the columns visible in Windows File Manager. Double-click that item and this happens:

Windows begins to import the new distro and install it 'within' the WSL environment. The process is relatively quick and ends like so:
Press [Enter] at this point and the terminal window will close. If you were to look at your Windows Start menu at this point, you'd probably see something like this:
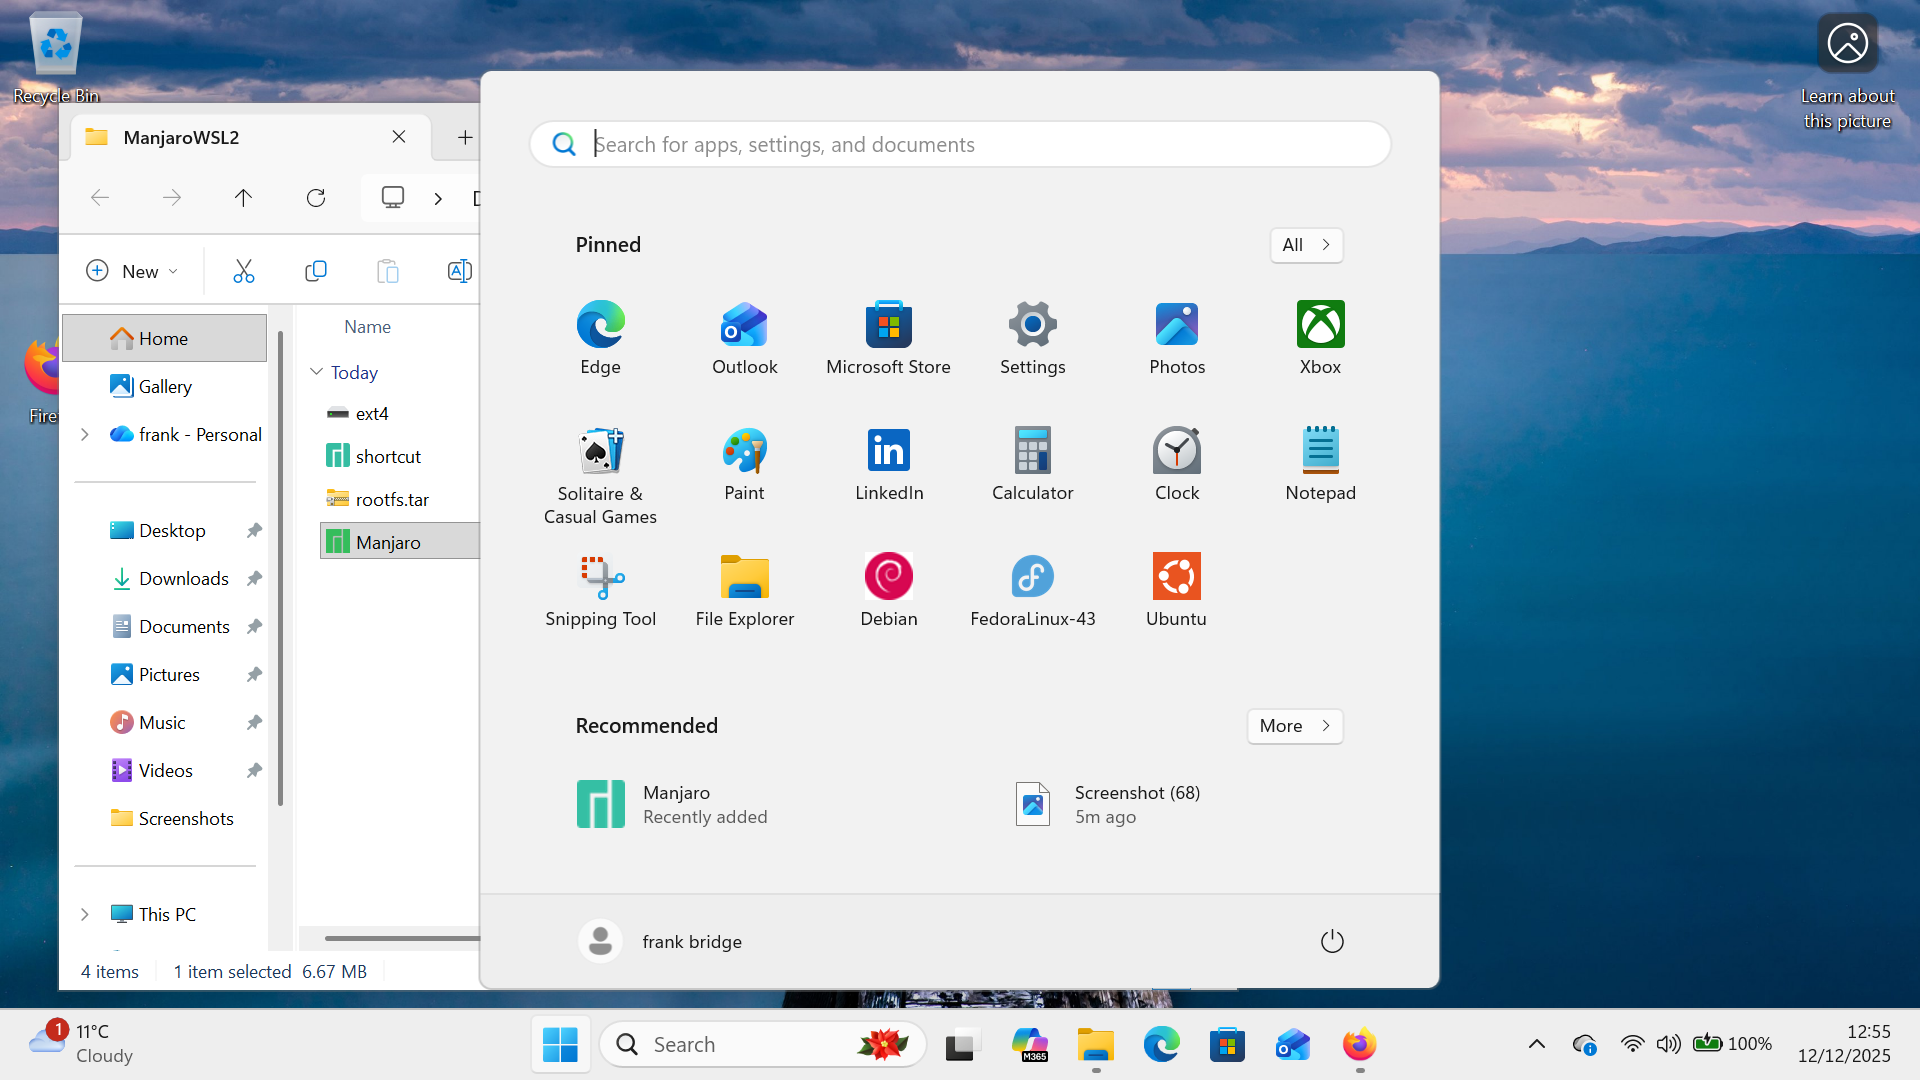
The existence of a Manjaro icon in the 'Recommended' section of the menu here tells you that Manjaro has indeed been installed. It's not quite ready for use, though: click that icon to launch it and you'll see this:
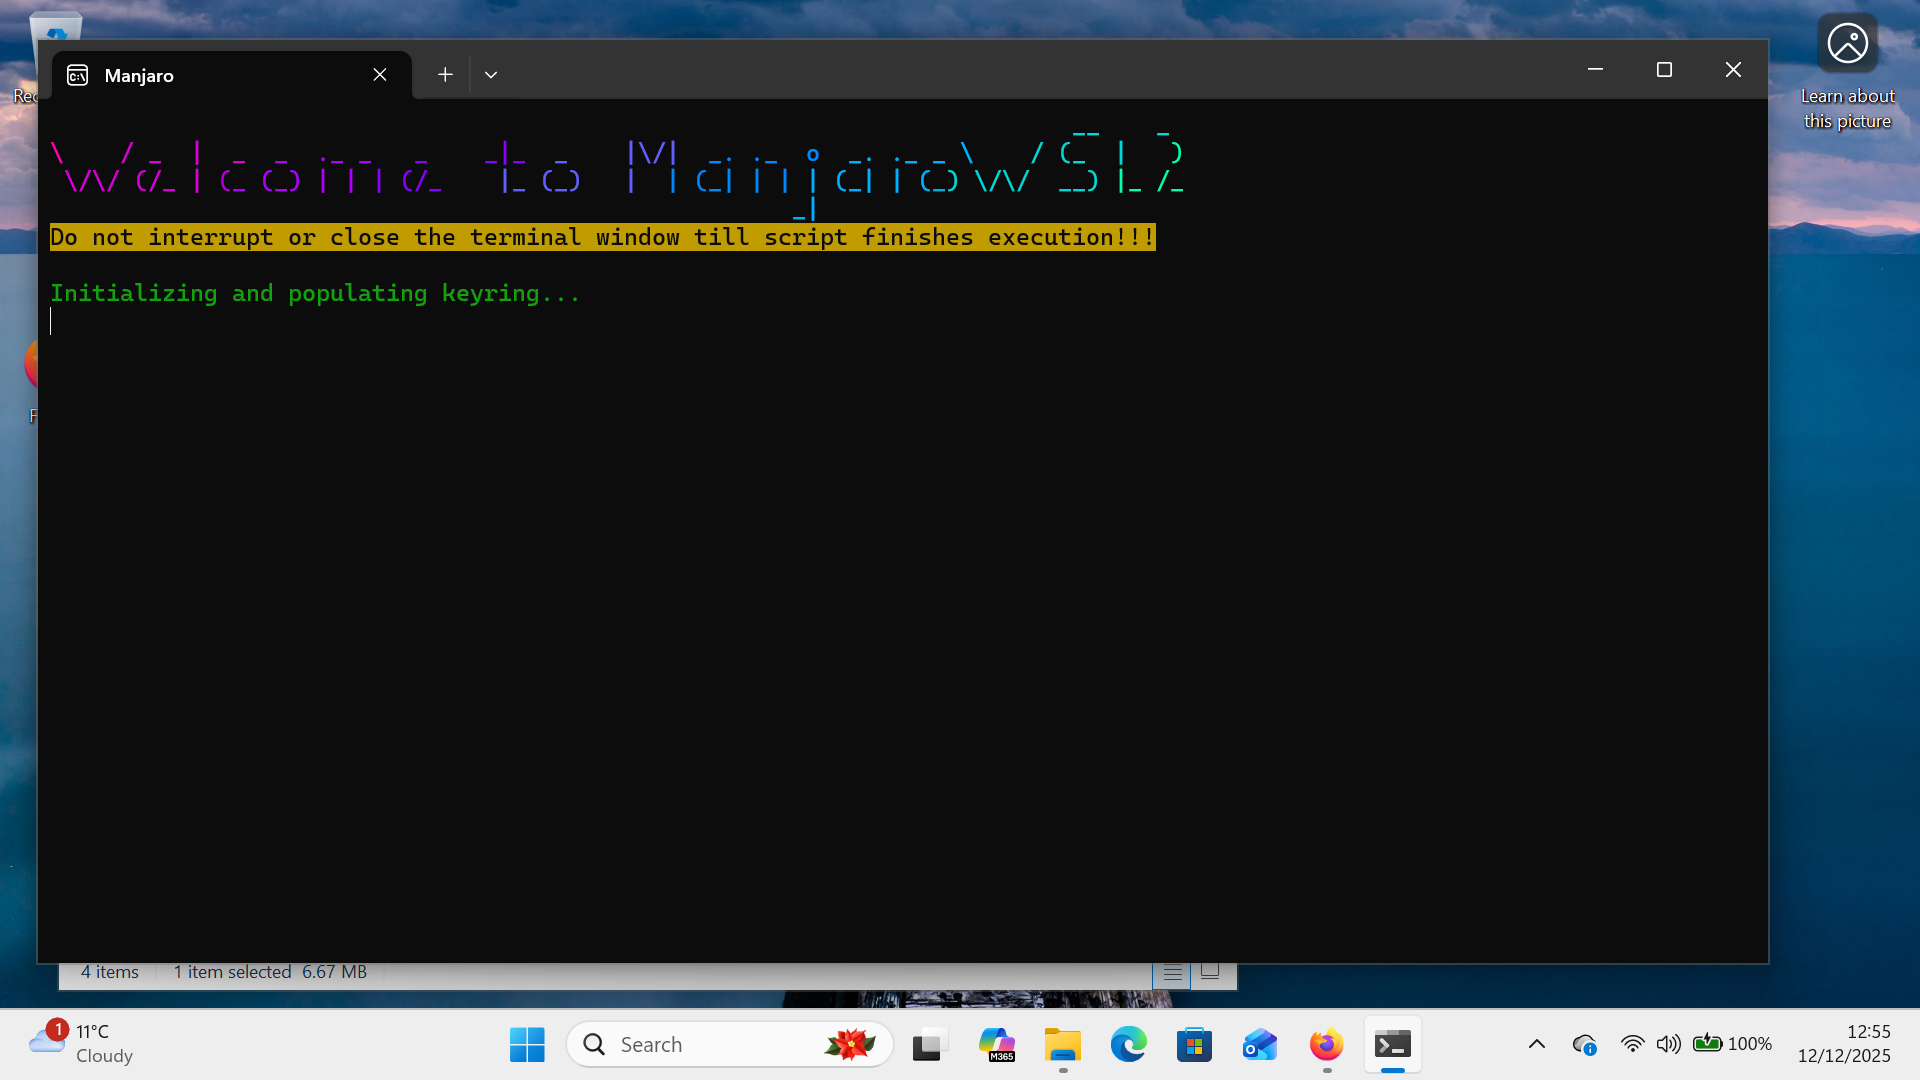
That's the new Manjaro getting itself provisioned properly. Part of that process is this prompt:
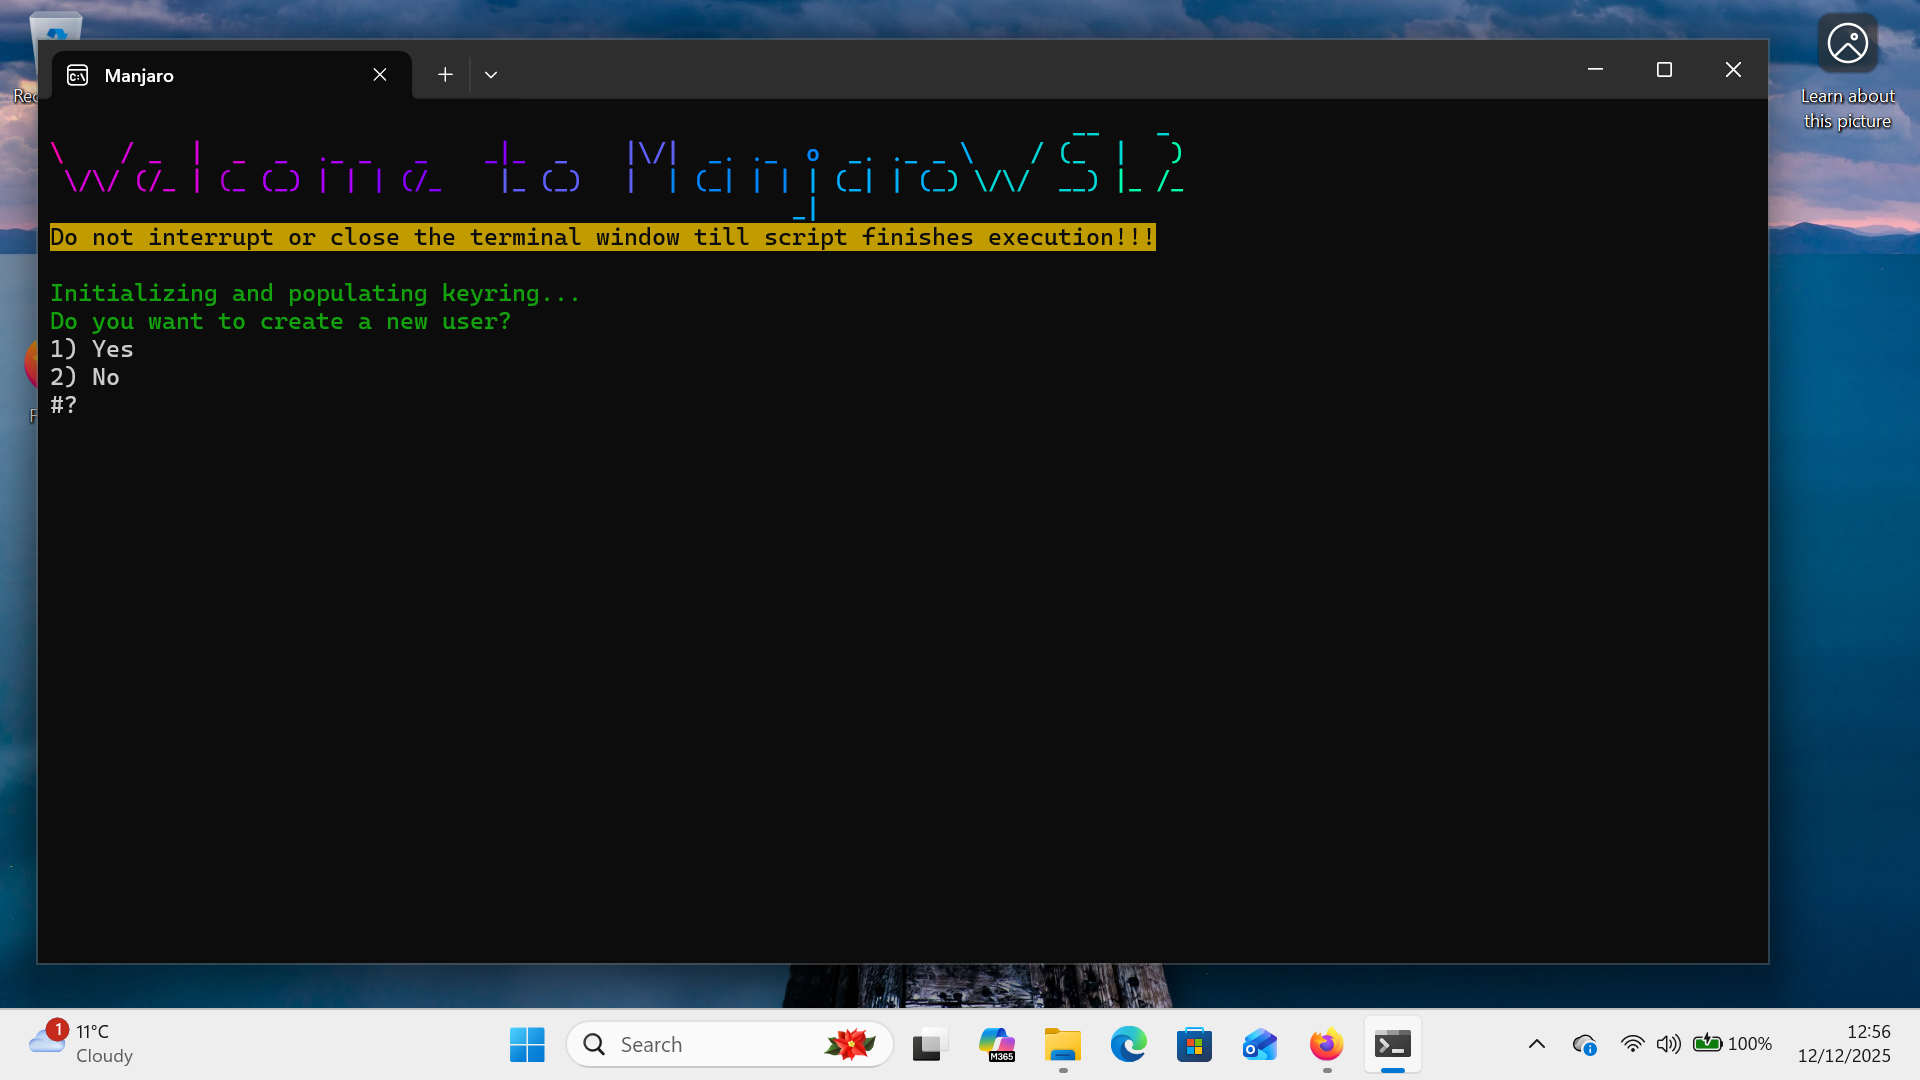
You don't have to create a non-root user, but it's strongly recommended to do so. Follow the prompts and supply a new password for the new user when asked; eventually this will happen:
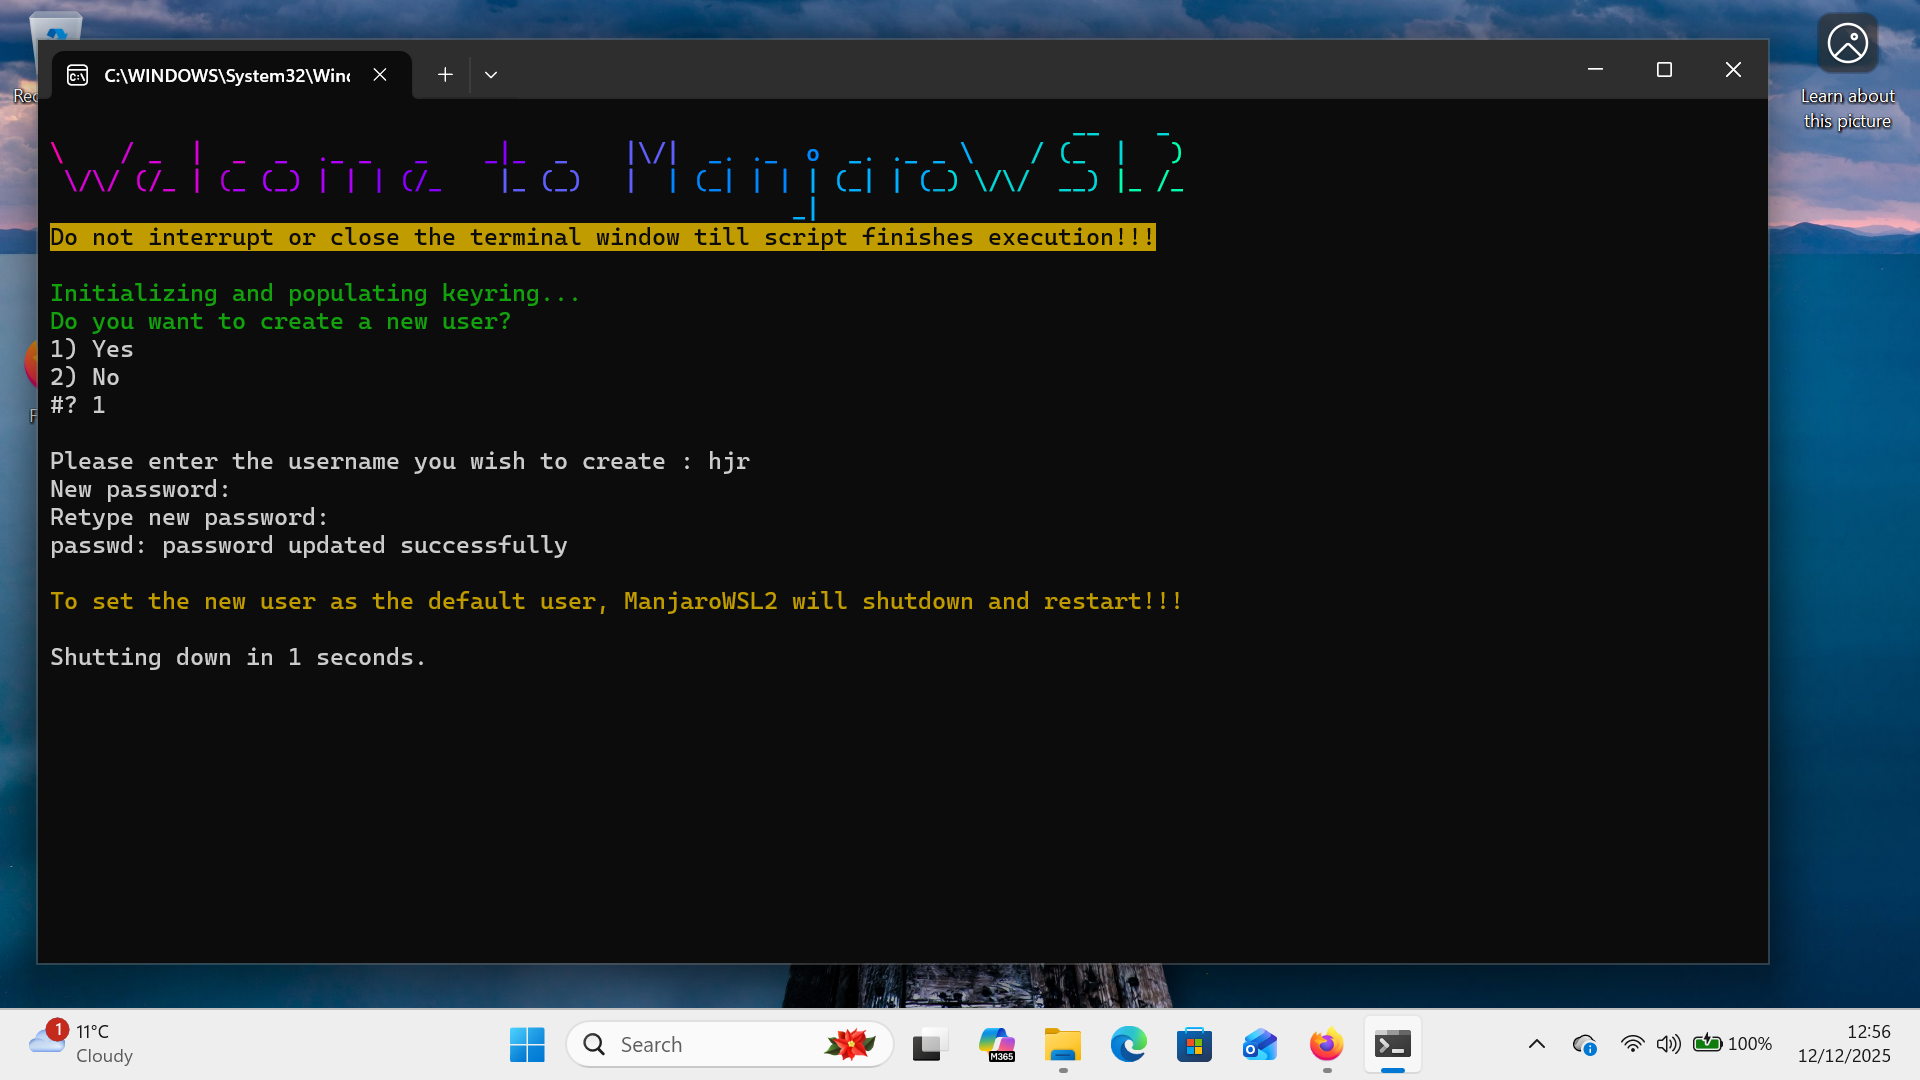
The distro will reboot itself and when it comes back, you'll be able to log in as the new user. You can now do a standard Giocoso install: start by bringing your Manjaro distro fully up to date with the command:
sudo pacman -Syu
Once that's done, obtain the Giocoso installer:
wget software.bbritten.com/gioinst
…and then launch it by typing:
bash gioinst
The standard Giocoso install process will then run its course without incident. Giocoso itself can then be launched with the simple command. giocoso. You then use Giocoso in an entirely standard fashion: create a music database, discover music files, go to the Play Music menu and start playing:
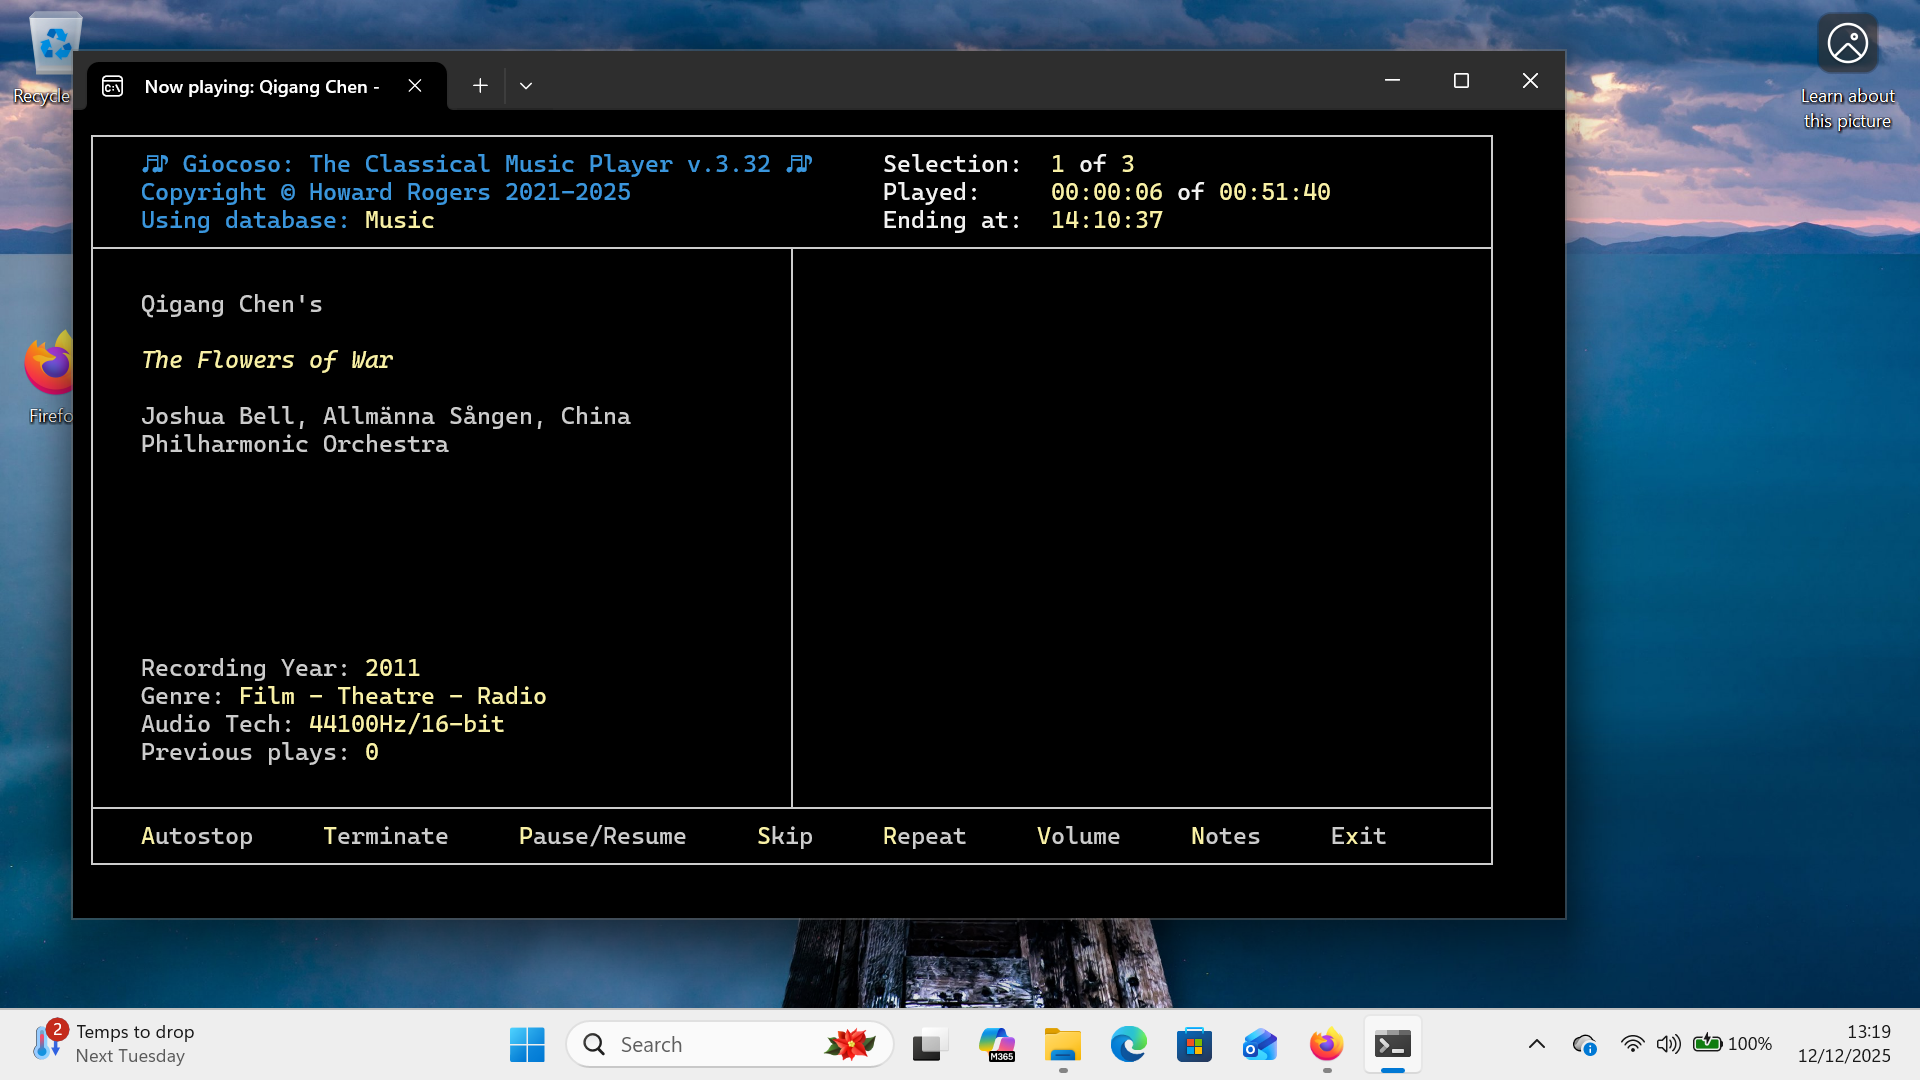
It is at this point that you'll discover that 'non-standard' distros have non-standard quirks! In this case, you can tell that music is playing fine: the counter in the top right of the Giocoso screen is saying we're six seconds into playing a 51 minute recording, for example. But you'll notice that there's no album art: that's because Manjaro-on-WSL's default terminal is not configured to display 'sixel graphics', Giocoso's default mechanism for displaying graphics within a terminal.
Various workarounds for this problem are available. First, you could use the Administration menu, Option 2 to tell Giocoso (on the last page of options) to 'Display album art in its own window':
You can also adjust the 'Size of album art when displayed' parameter to make that standalone album art window bigger or smaller, as needed. If you insist on seeing album art within the Giocoso terminal window, however, you're going to have to jump through some hoops. First, install the Konsole terminal emulator:
sudo pacman -S konsole
You can then launch konsole from within the main Manjaro terminal:

You'll note that the window is tiny and really not much use for anything. To fix that, click the 'hamburger menu' (three horizontal lines) at the top right of the konsole window. Select settings → Configure Konsole…. On the General options, uncheck the option to 'Remember window size'. Switch to the 'Profiles' option. Click New, then create a new profile that sets the initial terminal size to 103 columns and 28 rows. Click Appearance, and select 'Green on Black'. Click on the [Choose] button to alter the font: select Luxi Mono at 14pt. Click OK. On the list of profiles, select the profile you just created and click the 'Set as Default' button. Click [OK] once more. Now you can close the existing konsole session and start a new one. The new konsole window should open looking much more usable:
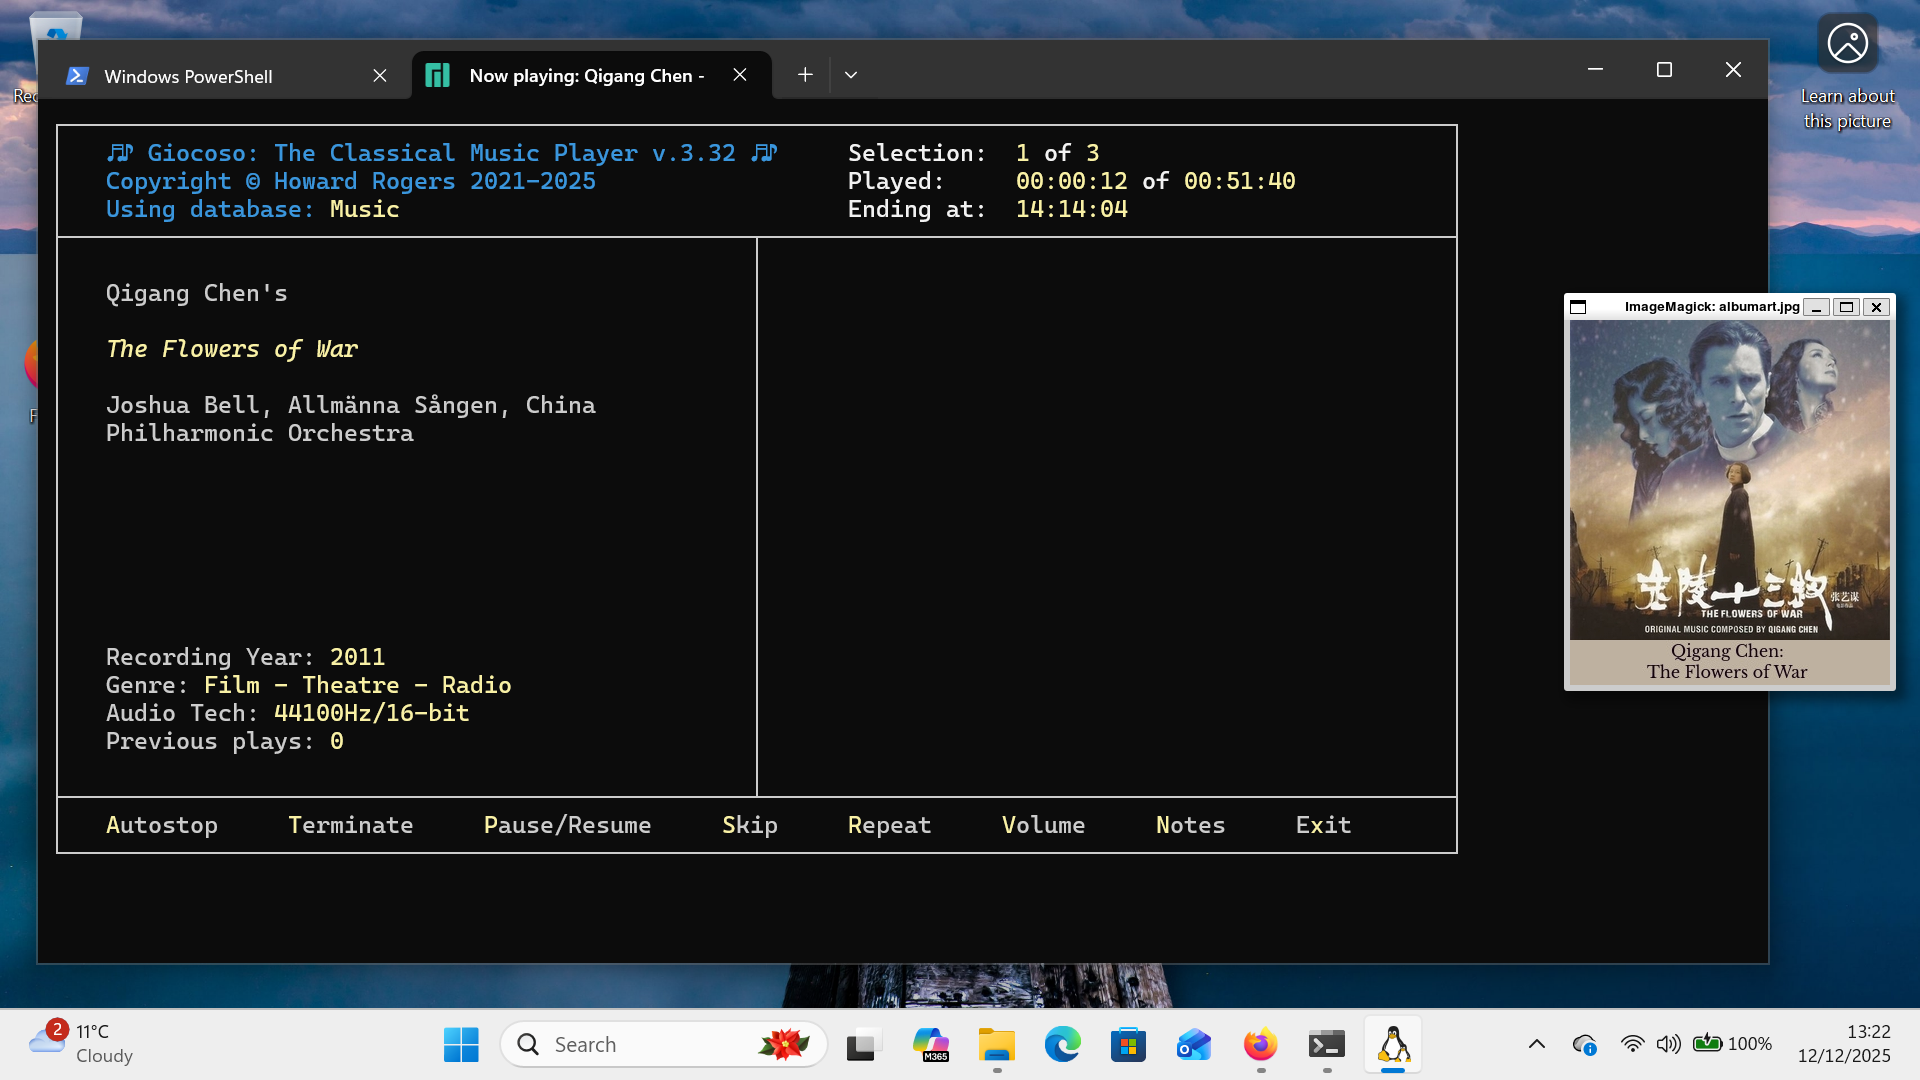
Launch Giocoso from within that konsole window and you should see Giocoso looking perfectly normal… but it still won't be able to display album art properly just yet. For that, visit the Administration menu, Option 2 and switch on the option to 'Use Kitty Graphics for in-terminal display'. Kitty is an alternative in-terminal graphics protocol …and konsole understands how to use it. When you start playing recordings, the result should be acceptable:
As you can see, everything is finally behaving normally… though having to use a terminal to launch a terminal to launch a program is not exactly ideal. To fix that inconvenience, you might consider editing your $HOME/.bashrc to contain the line:
alias giocoso="konsole -e giocoso3.sh"
Save that file and then get its modified contents applied by typing:
. ./.bashrc
(That's dot-space-dot-slash-dot-bashrc). You can now just type the command “giocoso” and konsole will be launched for you, with Giocoso already running within it. It's a slight improvement on doing it all manually, I think!
The short version of this section is, therefore, that of course you can run unsupported distros under WSL, which means you can run Giocoso on them, too. However, you are likely to run into visual presentation issues when Giocoso runs that don't arise in the more 'standard' distros. With a little bit of effort, they can be worked around, so that Giocoso still runs well on Windows… but expect to encounter problems that require workarounds! My personal recommendation is that, given you simply want Giocoso to work well on Windows, stick to a mainstream distro as discussed above in Sections 3, 4 and 5.
7.0 Conclusion
Summing this all up, therefore: Giocoso doesn't really run on Windows at all: it always runs on Linux. However, the Windows Subsystem for Linux allows you to run Linux on Windows in a practically invisible manner… and that means Giocoso can run, effectively, on Windows after all. WSL installation is straightforward, installing one of the supported distros is easy, and Giocoso installation is mostly straightforward in all cases. Non-mainstream distros are also a possibility but I wouldn't personally recommend them.
| Back to Software Home | Back to Giocoso Documentation Home |